Tag Archives: fountain pen repair

How Do I Re-Sac a Vintage Pen

You can’t make an omelette without breaking a few eggs, the old saying goes, and it is true for learning how to fix vintage pens. Today, we are going to learn how to restore a lever-filling fountain pen…or re-sac it, as they say. But first, you are going to have to get used to the concept that you’re going to destroy a few pens along the way—even if you’re careful.

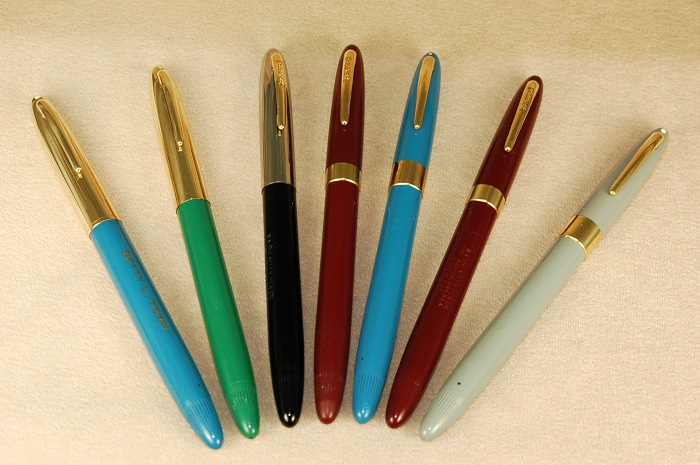
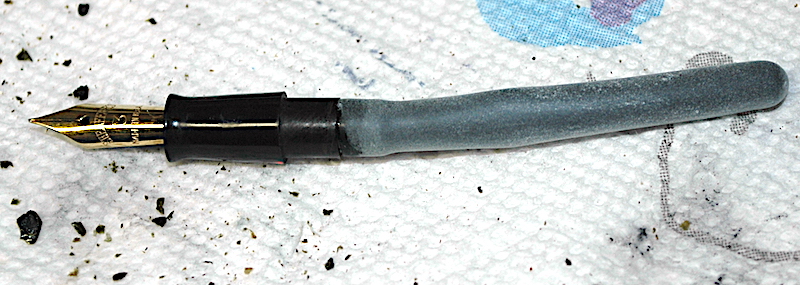
Find a few good, cheap vintage pens to practice restoring before experimenting with more expensive models. This deformed Sheaffer Balance 350 is a great starter pen.

When you are starting out, don’t begin with an unrestored version of your grail pen. Find some broken-down cheap pens such as Wearevers, Esterbrooks or even this banana’d Sheaffer 350 Balance. The longer you are on the hunt, the more you will find vintage pens that turn into the shape of bananas. The deformation happens when the pen is left in the sun or near a heater for too long, which warps the plastic/celluloid.

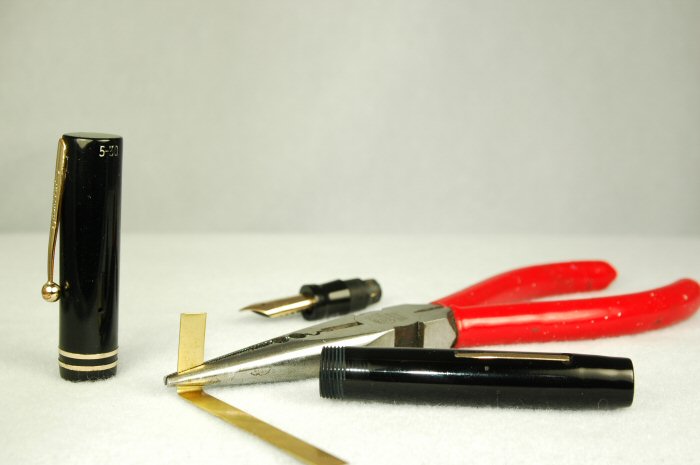
In addition to a good practice pen, you will need some ink sacs, a pair of spark-plug/section pliers, a long dental pick, sac shellac or rubber cement, scissors that can cut through rubber ink sacs, a jar or cup, clean water, polish, a cloth rag, paper towels, a hairdryer, a razor blade and, if at all possible, an ultra-sonic cleaner. You can get most of these items pretty cheaply. One trick of the professionals is to buy a pair of rubber coated spark-plug pliers, instead of formal “section pliers” that you can find on many pen restoration sites. Why? Spark-plug pliers can be had for less than $10 at most auto parts stores. Section pliers are almost always the same, exact pliers but marked up to $20 or $30. In the early days of pen restoration as a hobby in the 1970s and ’80s, a lot of guys used regular pliers and cut off two one-inch sections of hose to cover the teeth of their normal pliers. That’s how I was first taught.

Attempting to keep this simple, I’m going to break this down into what I hope are very simple steps to make this as fun and easy an experience as possible.

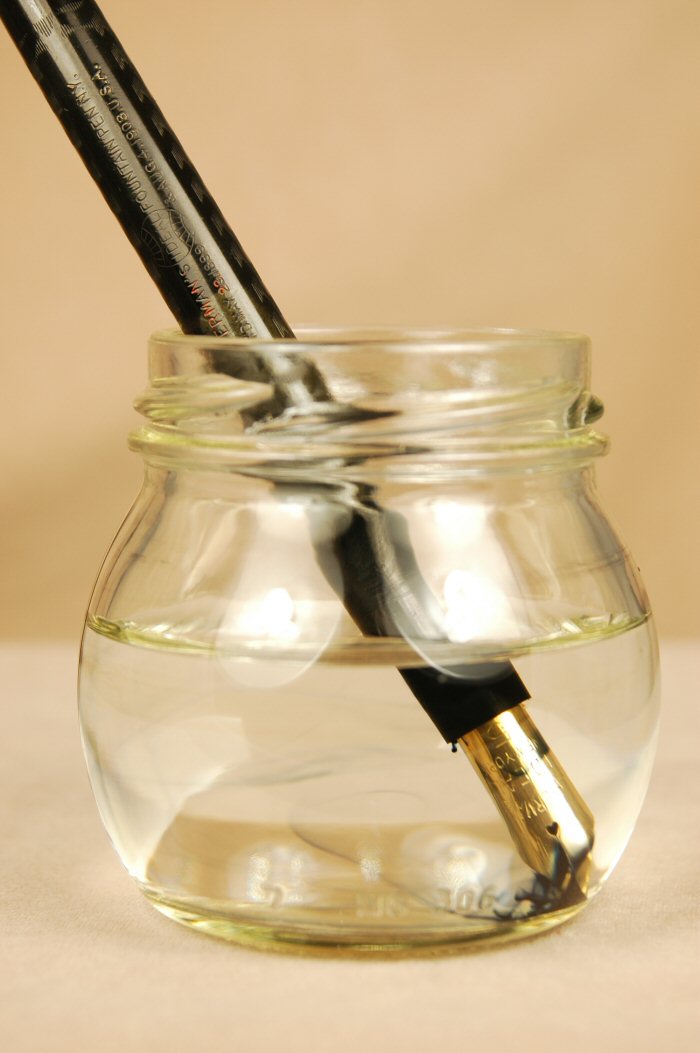
  1. I like small mustard or baby food jars to use for filling with just enough water to get the pen wet from the tip of the nib to just over the threads of the barrel.

    Fill a cup with just enough room-temperature water that you can stick your pen in and go just a little bit over the section and past the cap threads. (Sections are the writing grip into which the nib and feed are inserted in one end.) Let it soak for at least an hour. (Never use hot water.) This leaches out a lot of the dried old ink in the nib and inkfeed, while also potentially softening any glue or shellac used to hold the section tightly into the barrel. Many of the old factory repair manuals encouraged repairmen to use a dab of sac shellac to hold the sometimes loose pressure-fit sections into the barrel. WARNING: Water is necessary, but it also isn’t your friend. Black hard rubbers turn chocolatey brown in water fairly quickly. (An hour might be too long for some rubbers.) Some celluloids get more brittle or discolored when in water too long. Be sure to dry off the pen as soon as you remove it from the water.

2. Use the hairdryer to warm up the space where the section and barrel meet. DO NOT melt the plastic or set the celluloid on fire. All you need is a little warm to the touch. Until you get comfortable, keep the heat to barely noticeable to the touch. Grip the section, and only the section, with your rubber coated pliers. Very gently and slowly begin to twist counter clockwise as you hold the barrel in your other hand. It is common to hear some very scary cracking sounds. Usually, that sound is the petrified rubber ink sac in the pen breaking apart as you open. Sometimes it is the pen barrel breaking. Experience will teach you the difference. If you feel the section coming loose,

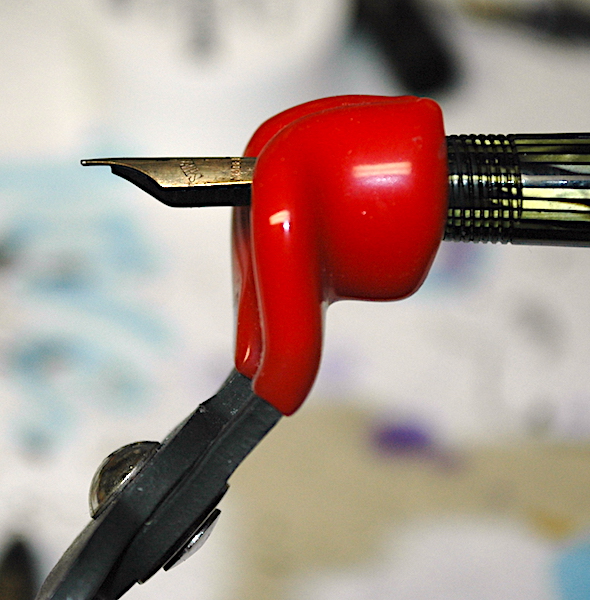
Grip only the section with rubber coated pliers, such as these spark-plug pliers. Don’t grip too tightly, just enough not to let go.

keep twisting slowly and gently. If you do not feel it turning or you feel it actively resisting, stop twisting. Some sections—especially Parker Duofolds and Vacumatics—were threaded into the pen barrels, which is why we usually start with a twist. Most pens of all brands were straight pressure-fit sections. HOWEVER, some brands—especially Wahl-Eversharp, although they were extremely inconsistent—used little pins in the barrel or section to hold the section firmly in place. You CANNOT twist those sections without destroying the barrel or section. If a section resists twisting, hit it with a little more heat and very gently start trying to wiggle it in teeny, tiny side-to-side motions while pulling straight out.

This is the most dangerous part of the entire restoration job. This is where probably 80% of all pens break, if they are going to break. ALSO, celluloid is insanely flammable. DO NOT get it hot. If it catches fire, it burns like a magnesium flare. It is an extremely hot burning flame that burns extremely quickly. Early on, I accidentally set a Vacumatic on fire. It scared the hell out of me, and it was a miracle I didn’t burn down my house. Even after getting it under running water it didn’t go out right away. I had to drop it in the steel sink and flood it to put the fire out. In about 10 seconds, it burned away the majority of the barrel. Be careful with the heat.

Use a razor to scrape the old sac pieces off the section nipple.

3. Once the section is free, scoop out the old sac guts from inside the barrel with the dental pick. Sometimes those guts stick pretty good to the inside of the barrel. A flashlight or gun light can help you see in to make sure you got it all. Do not put water in the barrel to clean out the sac or old ink. This will likely ruin and rust-out the pressure-bar assembly.

4. Use the razor to scrape the remnants of the old ink sac from the nipple of the section. Be careful not to cut yourself or split open the nipple.

5. Fill your ultra-sonic cleaner with clean, room-temperature water. Sometimes a drop or two of ammonia will help badly clogged pens. Put enough water in to completely submerge the cap and section assembly. Before you turn it on, let the cap soak for a minute or so. This allows the water to penetrate the inner cap, where a lot of old ink is usually trapped. After the cap and section have had a minute to soak, turn on the ultra-sonic cleaner for no more than 2 minutes.

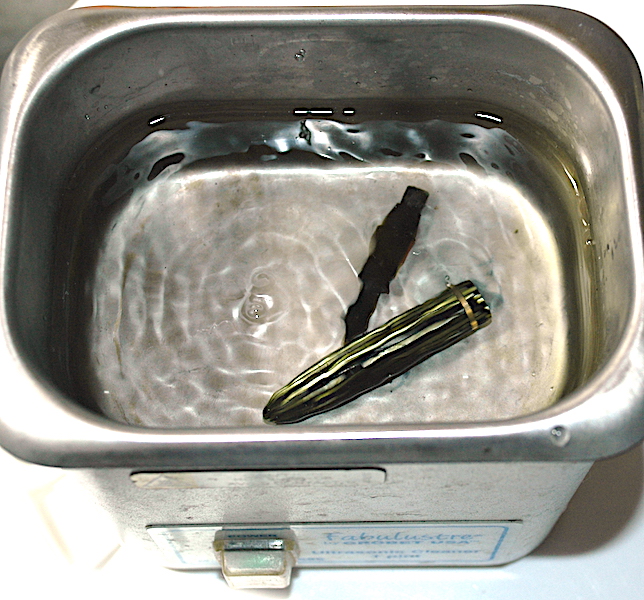
If feasible, an ultra-sonic cleaner is the easiest way to remove old ink.

You might not see a lot of “action” with your eyes, but the vibrations are practically violent to the parts that are submerged. It can shake free most of the old ink in two minutes or less. If a cap lip is cracked, I’ve seen some caps crumble in the ultra sonic cleaner. That’s how powerful it is.

NEVER stick your fingers in the ultra-sonic cleaner when it is turned on. It can damage your fingers and their joints. Also, don’t leave your parts in for much longer than two minutes because the cleaner will get hot and potentially damage or discolor your parts.

Turn off the ultra-sonic cleaner, collect your parts and drain the old dirty water. Then rinse the parts under the faucet with room temperature water for a few seconds. Shake the parts dry, and then dry them with a paper towel on the outside. Q-tips are perfect for drying and removing the remaining ink from inside the cap.

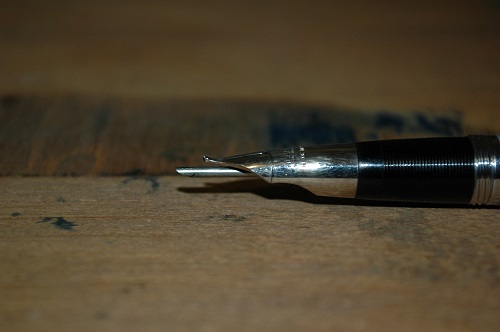
6. I like to polish the pen next, especially the nib. It allows me to see any major flaws I might need to work on, such as replacing the nib while the section is exposed. I use a pin-head dollop of MAAS metal polish on a Q-tip to get the nib shining like new. I use the clean side of the Q-tip to wipe off the remaining polish. Then I dip the nib in water and dry it with a clean rag to get off the remaining, invisible polish remnants. I repeat the process with a pea-size drop of MAAS metal polish on the rag and polish up the rest of the pen, rubbing it down several times with the clean parts of the rag…avoiding water.

Every repairman I know seems to have a different process for polishing a pen. The method above is adequate for most pens. Yet, if you’re a detail-oriented person, there are myriad methods of multiple polishes or wet sanding that do a much more factory-fresh looking job. Yet, those methods take up to an hour and are worthy of their own article.

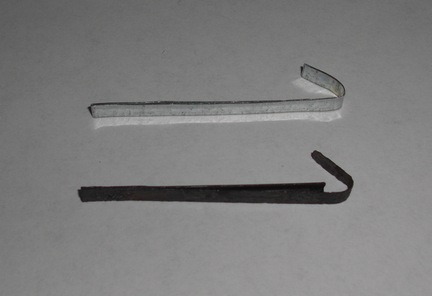
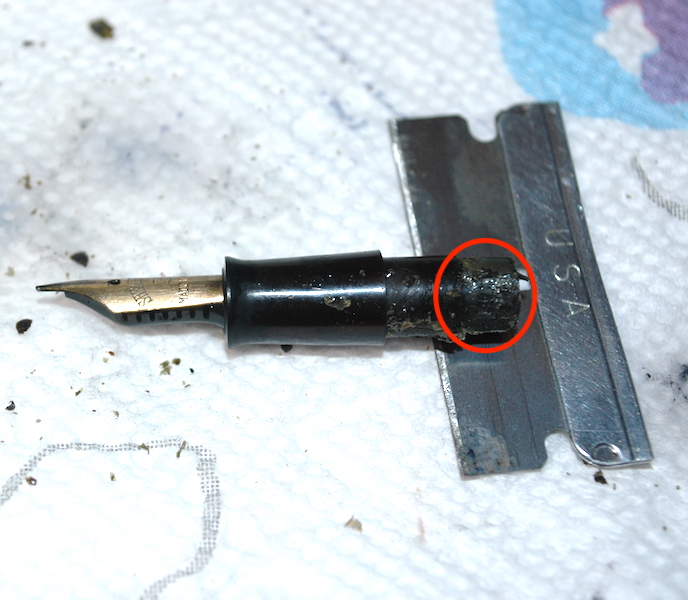
This photo illustrates how to eyeball the spot you need to trim the ink sac.

7. Sizing an ink sac. How detail oriented are you? You can easily research what size sacs went into what pens. You can measure the nipple with a fine ruler using increments of 1/64th of an inch, the way old pen repair manuals did to find the right aperture width of the ink sac. Or, you can eyeball it.

The real trick to eyeballing it isn’t fitting the sac to the nipple but finding the right sac to fit inside the barrel. You do not want the edges of the sac to snug against the inside of the barrel. It is best if the sac can easily slide in and out of the barrel, preferably with a little space all around the sac. If one is to carry a pen in their shirt pocket, the goal is not to transfer body heat through the barrel to the sac and ink, which might effect the interior pressure of the ink in the pen and have it leak a bit on you with a full pen.

Regardless of how you choose the sac size, you will likely need to trim the ink sac before installing it. Most ink sacs are longer than the pen barrels. My rule of thumb is quite literally a rule of thumb. I stick the sac in the barrel as far as it will go. I then pinch the end of the barrel at the threads, with my thumb having just enough reach to go past the threads. Pinching awkwardly down on the sac, right where it exits the barrel, I remove the sac. Gaging where my thumb tip is, I trim the sac at the tip of my thumb. Usually, this allows just enough room for the section and nipple inside the pen so that the sac can be as long as it needs to be. You can double check the length by putting the section and sac next to the empty barrel, as they would fit inside it.

Use Talc to powder and preserve your new ink sac before final re-assembly.

8. Most modern pen restorers use orange shellac to affix the sac to the nipple. Before most of us learned how to make or knew where to find orange shellac for sale, rubber cement was the go-to adhesive. Orange shellac is nearly perfect, as it can harden and still be water soluble. Rubber cement forms a good seal at first but can be more easily effected by heat and aging. Yet, it better fills-in tiny hairline cracks in the nipple, hopefully extending the functional life of the pen. (NEVER use super glues of any kind. The rubber ink sacs will give out long before the super glue ever does and you can ruin the pen by forever getting the section stuck in the barrel…or sticking other wrong parts together.)

On this pen, we painted only the nipple with a thin layer of shellac. Then we slipped the sac over it. After that, we dusted the sac with pure talcum powder, which helps to extend the life of the sac.

9. Fitting the section back into the barrel is the second most dangerous part of the restoration process. Sometimes the barrel opening shrinks while the section is out and cracks open if you put the section back in too quickly or roughly. If the section feels like it is having difficulty going back in, maybe warm up the barrel end a little and gently wiggle the section back into place. Although it doesn’t really matter, I like twist the section into place where the top of the nib is even with the lever on the pen.

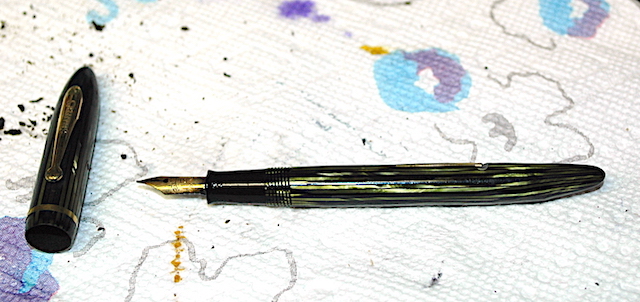
Congrats! Your pen is fully restored, looking beautiful and ready to write.

If the section is too loose, you can tighten it up with a tiny cut out of a piece of onion-skin paper. Or, like the old repair manuals, you can use a small drop or two of shellac on the section. Just wipe off the excess shellac and keep it out of the threads.

10. Let the shellac dry. As the shellac is water soluble, I wait about 24 hours before I test the pen with water or ink. Once the shellac is dry and the pen tests well, you’re all done. Congrats!

It took longer to read this article than it likely will take you to restore a pen—at least once you get used to the process. Fixing and writing with vintage pens is my favorite part of the hobby. If you like seeing how things work and getting your hands dirty, you’ll love pen repair. The only thing that improves it for me might be repairing pens while listening to a Cubs game on the radio and nursing a cold beer.

Always feel free to write in with questions. And always remember to go slowly and take your time. It isn’t a race. Enjoy the zen of pen repair, and best of luck to your future projects!

Slaying the Snorkel Siren

If you have been following these Drippy Musings for some time now, you know that the Sheaffer Snorkel fountain pen has been the bane of my existence for the past decade. I love these pens in all of their complicated filling mechanism glory, but I could never tame those very filling systems.

Here are the magnificent seven! In other words, they are my first graduating class of Sheaffer Snorkel repair pens. Included are two Sheaffer Crests, a Sheaffer Sovereign, two Sheaffer Saratogas and two Sheaffer Statesmen.

Here are the magnificent seven! In other words, they are my first graduating class of Sheaffer Snorkel repairs. Included are two Sheaffer Crests, a Sheaffer Sovereign, two Sheaffer Saratogas and two Sheaffer Statesmen.

Until now…

After getting tons of great advice from readers and other repairmen, I finally dove into a Sheaffer Statesman in grey before the Chicago Pen Show got underway. After carefully deconstructing it, I completely reassembled it almost too easily. It worked as if I had be overhauling them for years.

Since then I have fixed 6 more. A 7th didn’t survive after I cleverly sliced my thumb open with its greased up razor-sharp snorkel. Ow! At least now I can say I have bled for my art.

Here is the first Sheaffer Snorkel repair to survive my workbench. It's snorkel is extended beneath its palladium silver nib.

Here is the first Sheaffer Snorkel repair to survive my workbench. Its snorkel is extended beneath its palladium silver nib.


Yet, with a total of 7 successful restorations, I feel confident enough to offer repair services for Sheaffer Snorkels and PFMs. I also am interested in buying old dead ones with hopes of bringing them back to life. The more colorful they are, the better.

Painting A Parker Vacumatic Blue Diamond

Use Testor's paints to fill in the blue diamond of your Parker Vacumatic clips. Some clips have old paint that tells how dark you should repaint it. Testor's 1111 Dark Blue paint is good for darker blue diamonds and 1110 is good for lighter blue diamonds. I used the 1110 Blue on the Vac Major you see in this photo. Also shown is a toothpick I use for the painting process.

Use Testors paints to fill in the blue diamond of your Parker Vacumatic clips. Some clips have old paint that tells how dark you should repaint it. Testors 1111 Dark Blue paint is good for darker blue diamonds and 1110 Blue is good for lighter blue diamonds. I used the 1110 Blue on the Vac Major you see in this photo. Also shown is a toothpick I use for the painting process.

You have successfully put a new diaphragm into your Parker Vacumatic. The celluloid and gold trim gleam from expert polishing. Now, how do you go about making the finishing touch and repainting the old blue diamond in the clip?

Some clips still have their enamel…or at least some of it. Most these days, do not have it.

Some purists say you should never paint in the blue diamond. Other experts say it is no big deal.

Me, I like finishing the look of the pen as close to factory fresh as I can make it. If you have an ultra rare model with partial paint, perhaps you should leave it as is. But for most of the working pens I deal with, fresh paint won’t effect the value.

The big trick is finding the right color paint to get the blue diamond as close to accurate as possible.

Having spent all of my teen years as an avid model airplane builder, I ran straight to the nearest hobby shop to turn to trusty Testors paints. I took a handful of clips with me and began comparing and contrasting the paint options.

That is when I noticed not all blue diamonds in the Parker Vacumatic clips were the same. Some were lighter and some were darker blue. I let the remnant paint/enamel in the old diamond guide me. I finally settled on two Testors blue paints from their myriad shades.

If you look on the bar code sticker on the back of the paint bottle, you will notice the name of the color and a number. That color number should be universal in any Testors paint display.

For the lighter blue diamonds, I found that the 1110 Blue by Testors is a near perfect match. The next shade darker  is the 1111 Dark Blue, which is a near perfect match for the darker blue diamonds. It sounds intuitive, but there are so many blues from which to pick.

Painting the diamond takes a steady hand and only a teeny-tiny amount paint. You can use a single-hair brush, but I find I prefer using a toothpick that I’ve whittled to an extra-fine point.

Dab in the paint until you have filled in the diamond. Use a magnifying glass to make sure you have filled in the corners. There is bound to be some spillage outside the raised lines of the diamond. I try to clean it up with the dry edges of the toothpick by rubbing a clean, dry edge of the toothpick along the edge of the diamond. If the paint gets down into the feathers of the arrow logo, a little paint thinner on a Q-tip can help get it out before it sets. Remember to make sure the Q-tip is not sopping wet with thinner, as spilling the thinner into the wet paint of the diamond can mess things up, too.

Best of luck on painting your diamonds blue!

J-Pressure Bar Repair Update

A friend and reader of “Drippy Musings” named Harv S. from Palatine, IL, reached out to me this past May to thank me for last November’s piece about making your own J-springs (pressure bars) at home.

Not only did he find the article helpful, he shared with me his own modification to duplicate the action of other pressure bars with an extra “leg” that helps to squeeze out a few extra drops of ink. Below are his photo and advice.


Reader Harv S. from Palatine showed us not only the J-spring pressure bar he made after reading our column, he gives his own advice for adding a second leg to the spring to make it perform like some other vintage J-springs.

Reader Harv S. from Palatine, IL,  showed us not only the J-spring pressure bar he made after reading our column, he gives his own advice for adding a second leg to the spring to make it perform like some other vintage J-springs.

“Here’s a picture of the original, weakened, corroded spring and the one I made to replace it.  I couldn’t find brass flashing material so I went with galvanized steel, which should be fairly resistant to rusting though not so much as non-ferrous metal, agreed.  Although the picture doesn’t show it well, I folded over the material so that there’s a secondary leg of the spring just like the original riveted one.  I have some diamond grit files that I de-burred the new spring with and it seems to work well.” — Harv S.

What I love about the fountain pen community is how much we help each other out with this hobby and occassional obsession.

Thank you, Harv. I look forward to seeing more of your’s and other reader’s projects. Please let me know how I can help.

Make Your Own ‘J’ Pressure Bars

See how the needle nose pliers have started making a box in the end of the brass flashing as I restored this Sheaffer 5-30.

See how the needle nose pliers have started making a box in the end of the brass flashing as I restored this Sheaffer 5-30.

When I first learned the art of fountain pen restoration, there weren’t as many readily available modern replacement “J” pressure bars to fix most standard lever-filling vintage pens. You could try to scavenge J-bars, but they were so old and brittle, they were prone to breaking.

Fortunately, the man who taught me the art of pen repair was a master of improvising repair work. He taught me a lot about do-it-yourself repairs and engineering. As our goal was fully restored pens that worked as good as new, instead of featuring only all original parts, we had a lot of leeway.

Probably the best and cheapest trick he taught me was to fashion a J-bar out of brass flashing that sells for about a dollar a foot at your local hardware store.

Insert the new pressure bar J first, and make certain the length of the new spring is resting on the lever. Pulling out the new J-bar can risk damaging the lever-filler assembly, so try never to pull the new J-bar if possible.

Insert the new pressure bar J first, and make certain the length of the new spring is resting on the lever. Pulling out the new J-bar can risk damaging the lever-filler assembly, so try never to pull the new J-bar if possible.

I suppose you could use steel flashing, but brass has the advantage of not rusting. Either way, be sure to select a very thin piece that has a lot of flexibility. You will also need scissors that can cut it and a pair of needle nose pliers. Once you get everything together at your work bench, follow these steps.

1. Cut the flashing to be the same length as the barrel of the pen you are restoring.

2. Trim the edge of the flashing along its length to get it to fit in the pen barrel. Remember, keep it wide enough to be engaged by the pen’s lever. Some levers don’t push straight down. Some slip to either side. Make sure you cut the flashing so it is wide enough to accomodate this deviation.

3. Test the flashing by inserting it–still straight/unbent–into the barrel to see if it fits well and gives the lever enough space to manuver.

4. Slip the flashing back out of the barrel.

5. Using your needle nose pliers bend one end of the flashing into an arc. You will only want to bend the last 1/4 inch to 1/2. I like to bend the flashing into 2 90-degree angles. This makes a boxy J. It is perfectly fine to make an arched J.

6.  Test to make sure the J is just wide enough to slide into the barrel, while also providing enough resistance against the barrel walls to anchor it.

7. MOST IMPORTANT: Before final installation, remember to line up the J-bar J first into the barrel with the outside portion of the pressure bar against the lever.

8. Insert the new pressure bar assembly into the pen with your needle nose pliers. Push it all the way into the tail. Be careful not to push the pliers deeper than they are meant to go into the pen. They can easily split or shatter the barrel.

9. Insert the resac’d section, and make sure it all fits okay. If it doesn’t you can either trim down the sac or pull out the new J-bar with care and trim it to make room. *** It is important to note that many lever fillers have a pin or pin-ring that holds the lever in place. Pulling out the new J-bar can snap or ruin that thin piece of metal holding in the lever, and that is a lot harder to fix.

It is always best to make sure you got all of your cuts measured correctly the first time.

Your new J-bar will likely never be as effective as the old one, but it will fill your pen reasonably well. Plus it will also have saved you plenty in parts and labor. Believe it or not, you’ll feel a lot closer to your pen once you’ve restored its guts on your own.

When Hard Rubber Misbehaves

A Waterman's #15 eyedropper soaks in water to help loosen the old ink sealing its threads.

A Waterman’s #15 eyedropper soaks in water to help loosen the old ink sealing its threads.

Old hard rubber pens, especially eyedroppers, can be a difficult repair because the pens are so old and frail. It is very easy to overtorque them and crack or crush them.

The problem, especially in eyedroppers, is that old ink effectively turns into glue on these old pens. Eyedroppers are so problematic because the ink always seeped into the threads that held the section to the hollow barrel that served as the pen’s ink reservoir. Other pens with ink sacs get ink-glued when the old sac gave out flooding the inner barrel with ink.

Lucky for you, the solution is really simple. Once again H2O comes to the rescue. Fill a cup with room-temperature water and soak the pen over the line separating the section from the barrel. Let it soak for 12 to 48 hours. This is usually enough time to loosen the old ink and allow the pen to open the way it should.

Sometimes it takes a little heat. Heat is the enemy of your old hard rubber pens. Open flames will melt or burn the pen very quickly. Hot water will discolor the pen, too. If you need the heat, just hold the pen briefly under warm to hot water flowing from your kitchen tap. Don’t expose the pen to the heat for more than a couple seconds, and keep an eye out for discoloration. It doesn’t take a lot of time or heat to start the discoloration process.

Pen Tip #1: Why Is My Favorite Nib Starting to Skip?

If you find that your favorite fountain pen won’t write any more or the nib is starting to skip and have trouble writing, it is quite possible your nib and inkfeed are clogging with old dried ink.

Soaking a fountain pen is often one of the fastest ways to help it write better. Just stick the nib in a cup of water, but not too deep--just enough to soak the nib and the inkfeed beneath it. This leaches out the old dried ink and helps to loosen the remaining ink inside the pen. Once the nib is clean, it likely will write as good as new.

Soaking a fountain pen is often one of the fastest ways to help it write better. Just stick the nib in a cup of water, but not too deep–just enough to soak the nib and the inkfeed beneath it. This leaches out the old dried ink and helps to loosen the remaining ink inside the pen. Once the nib is clean, it likely will write as good as new.

Infrequent use where you let your ink dry out inside the pen can often lead to clogged nibs and inkfeeds. Sometimes heavy use also leads to the same problem. If you fill and write your pen dry twice a week for years on end, the ink still builds up over time.

As a repairman, I find this is actually one of the most common problems pen users face. Whenever possible, I try to save my customers money with this simple advice.

Try to never let your pen dry out. If you know you won’t be using it for a while, empty it back into the inkwell or out in the sink. Of course, even constant use or careful emptying can lead to ink build up, eventually.

Always remember that room temperature tap water is your friend. (Hot and cold water can ruin your pen.) I find many repairs are easily avoided with a little H2O. Simply soak your pen overnight in a small cup or baby food jar, as in the photo. Don’t immerse the entire pen. Just soak the nib up to the section. The section is the part by which you most likely grip the pen. It is the black grip on this Parker Vacumatic. You can already see the old ink leaching off the nib.

After you let the pen soak for a few hours, the old ink remaining in the pen is softened. Empty out the container and fill it with more room temperature water. Then fill the pen with water several times, until the water is a uniform ink color. Empty and repeat until the pen starts running clear.

Empty the pen of water, and then shake out the remaining water over the sink. Be careful, that slightly tinted water sprays all over. Try your best to keep it in the sink. Wipe down the nib and inkfeed underneath with a paper towel. This helps drain out the last of the ink. I usually let the pen air dry for the remainder of the day. This way, when I refill the pen, the ink doesn’t seem watered down.