Tag Archives: pen repair

Painting A Parker Vacumatic Blue Diamond

Use Testor's paints to fill in the blue diamond of your Parker Vacumatic clips. Some clips have old paint that tells how dark you should repaint it. Testor's 1111 Dark Blue paint is good for darker blue diamonds and 1110 is good for lighter blue diamonds. I used the 1110 Blue on the Vac Major you see in this photo. Also shown is a toothpick I use for the painting process.

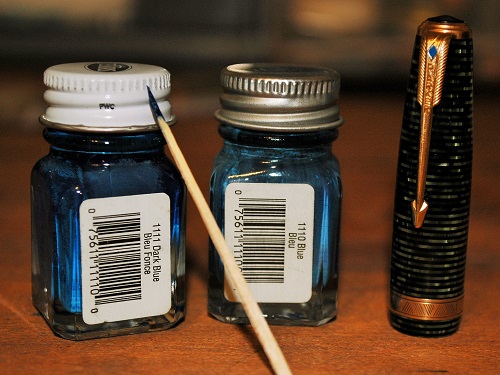
Use Testors paints to fill in the blue diamond of your Parker Vacumatic clips. Some clips have old paint that tells how dark you should repaint it. Testors 1111 Dark Blue paint is good for darker blue diamonds and 1110 Blue is good for lighter blue diamonds. I used the 1110 Blue on the Vac Major you see in this photo. Also shown is a toothpick I use for the painting process.

You have successfully put a new diaphragm into your Parker Vacumatic. The celluloid and gold trim gleam from expert polishing. Now, how do you go about making the finishing touch and repainting the old blue diamond in the clip?

Some clips still have their enamel…or at least some of it. Most these days, do not have it.

Some purists say you should never paint in the blue diamond. Other experts say it is no big deal.

Me, I like finishing the look of the pen as close to factory fresh as I can make it. If you have an ultra rare model with partial paint, perhaps you should leave it as is. But for most of the working pens I deal with, fresh paint won’t effect the value.

The big trick is finding the right color paint to get the blue diamond as close to accurate as possible.

Having spent all of my teen years as an avid model airplane builder, I ran straight to the nearest hobby shop to turn to trusty Testors paints. I took a handful of clips with me and began comparing and contrasting the paint options.

That is when I noticed not all blue diamonds in the Parker Vacumatic clips were the same. Some were lighter and some were darker blue. I let the remnant paint/enamel in the old diamond guide me. I finally settled on two Testors blue paints from their myriad shades.

If you look on the bar code sticker on the back of the paint bottle, you will notice the name of the color and a number. That color number should be universal in any Testors paint display.

For the lighter blue diamonds, I found that the 1110 Blue by Testors is a near perfect match. The next shade darker  is the 1111 Dark Blue, which is a near perfect match for the darker blue diamonds. It sounds intuitive, but there are so many blues from which to pick.

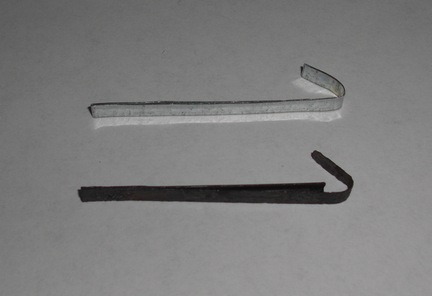
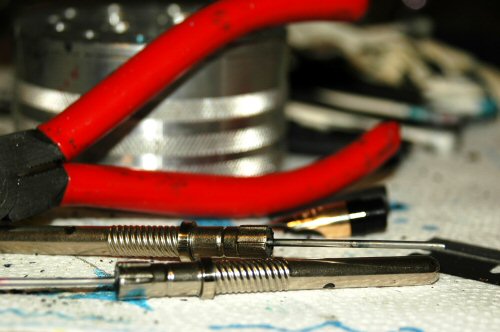
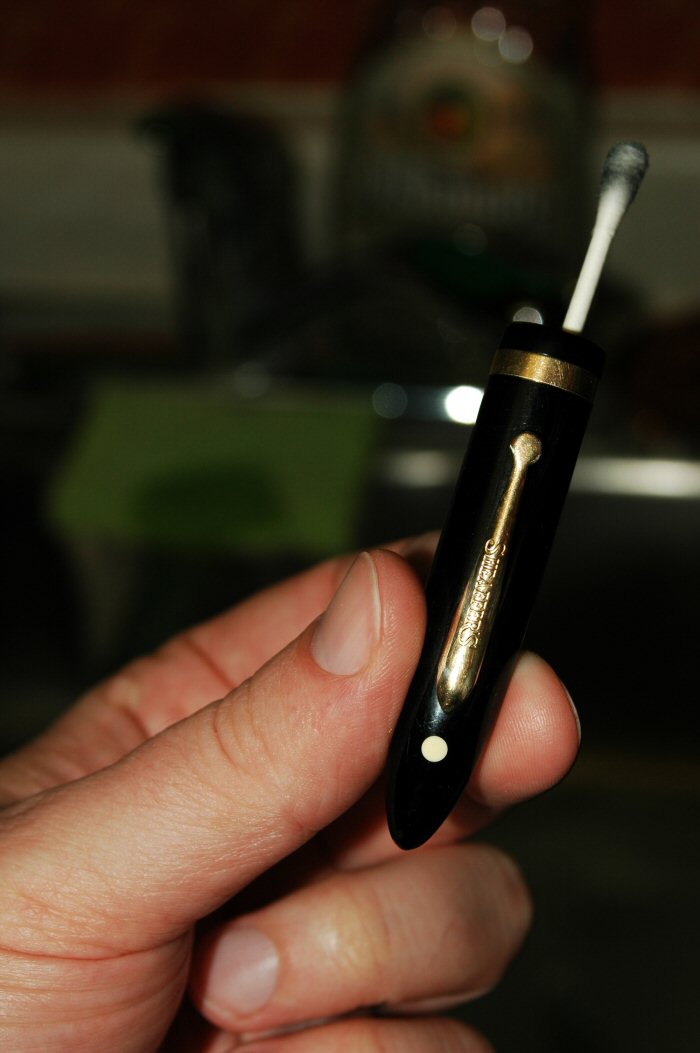
Painting the diamond takes a steady hand and only a teeny-tiny amount paint. You can use a single-hair brush, but I find I prefer using a toothpick that I’ve whittled to an extra-fine point.

Dab in the paint until you have filled in the diamond. Use a magnifying glass to make sure you have filled in the corners. There is bound to be some spillage outside the raised lines of the diamond. I try to clean it up with the dry edges of the toothpick by rubbing a clean, dry edge of the toothpick along the edge of the diamond. If the paint gets down into the feathers of the arrow logo, a little paint thinner on a Q-tip can help get it out before it sets. Remember to make sure the Q-tip is not sopping wet with thinner, as spilling the thinner into the wet paint of the diamond can mess things up, too.

Best of luck on painting your diamonds blue!

The Road to Hong Kong

Here is the view of Hong Kong from Victoria Peak, after the lights have come on at night. This is on Hong Kong Island looking over Victoria Harbour and Kowloon, the mainland part of Hong Kong.

Here is the view of Hong Kong from Victoria Peak, after the lights have come on at night. This is on Hong Kong Island looking over Victoria Harbour and Kowloon, the mainland part of Hong Kong.

This is the night view of the colorful lights on Hong Kong Island as seen from the deck of the Star Ferry in Victoria Harbour.

This is the night view of the colorful lights on Hong Kong Island as seen from the deck of the Star Ferry in Victoria Harbour.

While riding in one Star Ferry boat, we passed another in Hong Kong's Victoria Harbour.

While riding in one Star Ferry boat, we passed another in Hong Kong’s Victoria Harbour.

Wong Tai Sin Temple prepares for Chinese New Year's celebrations.

Wong Tai Sin Temple prepares for Chinese New Year’s celebrations.

A sliver of moon prepares to call it a night, as dawn begins lighting the sky.

A sliver of moon prepares to call it a night, as dawn begins lighting the sky.


My long-suffering friend Maria and I hit the skyway for Hong Kong, and I feel compelled to show off some of the sites. It is the ego-maniacle photographer in me that periodically must showcase some favorite shots.

In my attempts to process the whole trip, I have failed to come up with a unifying story arc to describe the trip. Instead, I’ll just tell you some of my favorite parts.

LIGHTS! Hong Kong is huge. The lights there out glitz Las Vegas and dwarf New York. Buildings don’t just festoon lights for advertising or showcase who is home or at work via lit windows. Whole skyscrapers are specially lit with colorful external displays. I couldn’t get a good photo of it from across Victoria Harbour, but twin mini skyscrapers (only 30 or 40 stories tall) had billions of LEDs that lit up to recreate a live koi pond. The fish looked lifelike, and the water rippled when they moved. Other buildings had very active and colorful displays.

A cheesy but popular thrill in Hong Kong is the nightly light show. Most of the major buildings on Hong Kong Island’s and Kowloon’s waterfronts synced with music to put on a light show from 8 to 8:15. Each building seemingly dances to the music, and the buildings even get introductions and veritable bows.

Victoria Harbour is beautiful, when you can see across it through the smog. I especially loved crossing it on the famed Star Ferry boats that only cost 65 cents a ride. Hong Kong Island’s Victoria Peak is great, too. Both offer stunning views of the city. The photos from each were among my favorites.

Yet, there are quieter places to go inside the city if you want to get away from the modern and materialistic. We enjoyed a nice trip to Wong Tai Sin Temple, where the Taoists explore their traditions. Chinese New Year was approaching, and the temple was especially festive while we were there.

Travel in Hong Kong is extremely easy. As a former British colony, almost everyone we met spoke English. The public transportation is extremely safe and easy to navigate, which is good as cars drive on the wrong side of the road from an American perspective. Drivers are also very aggressive, not stopping for pedestrians. Cross against the lights at your own risk. We were in the tourist neighborhoods, and it felt extremely safe, even though we didn’t see a single cop until we got into the more local residential neighborhoods. And even here, the cops seemed far more concerned with seeking out prodemocracy protestors than actual crime. (That was a little scary.)(You gotta give a lot of credit to the protestors willing to spend time in a quasi communist Chinese prison to fight for greater political rights and freedoms.)

The only other drawback was the smog. If you are of a belief that man-made pollution isn’t a threat to our health and environment, you really need to spend a week in a major Chinese city. My eyes stung and breath got short quickly. These pictures were taken on good air days. We had one day in which it was 100% sunny and clear, but the smog was so thick that the sky was as grey as any rainy day in Chicago. You could not see the sun on that sunny day. You couldn’t see roughly a mile across the harbor and the buildings hidden in the smog. Many local residents take to wearing surgical masks everywhere they go to filter out the particulates to help prevent from getting sinus and lung infections.

Yet, there is so much to see and do in Hong Kong, I highly recommend going and seeing it if you can. The people are so friendly, and there are thousands of more things to see and do than simply what I’ve listed. This was a truncated list of all we did, as I don’t want to bore you.

Fix Scratchy Nibs

WARNING: The following repair advice can easily mess up your favorite nib if you aren’t careful and experienced.

You think you’ve found the perfect pen at a show, estate sale or antique store. The color is good. The filling system still works. And then you try to write with it. Although the nib looks good, it is a very scratchy writer.

Learn how to fix a scratchy nib with only a little water and some ultra-fine grit sandpaper.

Learn how to fix a scratchy nib with only a little water and some ultra-fine grit sandpaper.

You can fix that scratchy nib with some patience and nerves of steel.

It doesn’t take much effort to ruin or at least alter the width of your nib with the accidental flick of the wrist. DO NOT try this on your favorite pen that has just picked up a hint of a scratch. Get some junkers with which you can build up some experience.

Get to know your nib before you attempt anything. Is it gold? Is it tipped with irridium? Is it a steel nib? Look very closely at the nib. Use a loupe or magnifying glass. Are the tines even? Is the tip bent?

If the tines are slightly misaligned, you can push them back into place with just your thumb nail. Be careful, as misaligned tines often snap very easily. Often, I prefer to raise the lower tine to be even with the upper tine. To do this, push directly up on the single lower tine with your thumb nail to a position just above the other tine. Hold it for a second and then relax it. Check it, and repeat the process as needed. Sometimes, I push the upper tine down. Learning which to redirect really just comes with experience.

If the tip is bent, forget about it. We’ll save that for a different article.

If the tines are even but just scratchy…

Check to see if the tip is gold, gold with a metal (usually irridium) tip or steel. If it is plain gold, which is rare, the sanding process will weardown the nib super quickly. If it is tipped, check to see if the tipping material is still complete. If it isn’t, you’ll need to get it retipped. If the tipping metal is still there, then you will be safer to try to sand the nib into submission. The steel nibs are also pretty safe to try to smooth, although by their nature, they generally won’t smooth as well as the gold nibs. It is rare to find a truely smooth steel nib on a vintage pen, unless it is from the Esterbrook 9000s line.

If you are into freakishly extra-fine nibs, send your pen to a nib expert (and I am not that type of nib expert). If you aren’t so picky as long as you can have a smooth writer…continue reading.

To try to sand the nib into a sweet spot, you will need a small glass of water, a clean sheet of your normal writing paper and some very fine-grit sandpaper. I recommend 2500 grit or finer. You also will want a tissue or paper towel.

Set up on a hard-topped desk or table. A cushioned writing surface will have you putting holes in the sandpaper with the nib and putting odd edges on the nib.

To get started, I like to make sure the pen is full. Then spread a little water on the sandpaper. Next write a figure 8 with the scratchy pen on the watered sandpaper. The water helps to lubricate the sandpaper so that you don’t take off too much from the nib. Your figure 8 should be about the size of your normal letters when writing…maybe a little bigger. Don’t worry about the ink on the sandpaper. And don’t think that the ink will naturally lube the paper enough without water. It won’t.

I like to have the pen full of ink, so I can immediately test the nib on a clean sheet of paper. After your first figure 8, shake the pen in the glass of water and dry off the tip. This just clears the tip of any sand, as you don’t want to keep sanding the nib when you don’t want to sand it. Test the nib on the clean sheet of paper and see how it feels. Patiently repeat one or two 8’s at a time on the sandpaper and repeat the process.

If you find that you need more than a couple figure 8’s, start writing 8’s from different angles, as you don’t want to flatten out the nib in your normal writing position.

If everything is almost perfect but you are still having scratches at the top or bottom of your loops, try to work out those parts of the letter on the sandpaper.

REMEMBER, every time that nib touches the sandpaper, it is going to get wider. Often, it only takes an 8 or two. It is not uncommon for your fine nib to become a medium or a medium a bold nib while trying this repair. If you want to be assured perfection with little change to your nib’s writing characteristics, it is best to find an expert.

J-Pressure Bar Repair Update

A friend and reader of “Drippy Musings” named Harv S. from Palatine, IL, reached out to me this past May to thank me for last November’s piece about making your own J-springs (pressure bars) at home.

Not only did he find the article helpful, he shared with me his own modification to duplicate the action of other pressure bars with an extra “leg” that helps to squeeze out a few extra drops of ink. Below are his photo and advice.


Reader Harv S. from Palatine showed us not only the J-spring pressure bar he made after reading our column, he gives his own advice for adding a second leg to the spring to make it perform like some other vintage J-springs.

Reader Harv S. from Palatine, IL,  showed us not only the J-spring pressure bar he made after reading our column, he gives his own advice for adding a second leg to the spring to make it perform like some other vintage J-springs.

“Here’s a picture of the original, weakened, corroded spring and the one I made to replace it.  I couldn’t find brass flashing material so I went with galvanized steel, which should be fairly resistant to rusting though not so much as non-ferrous metal, agreed.  Although the picture doesn’t show it well, I folded over the material so that there’s a secondary leg of the spring just like the original riveted one.  I have some diamond grit files that I de-burred the new spring with and it seems to work well.” — Harv S.

What I love about the fountain pen community is how much we help each other out with this hobby and occassional obsession.

Thank you, Harv. I look forward to seeing more of your’s and other reader’s projects. Please let me know how I can help.

When Hard Rubber Misbehaves

A Waterman's #15 eyedropper soaks in water to help loosen the old ink sealing its threads.

A Waterman’s #15 eyedropper soaks in water to help loosen the old ink sealing its threads.

Old hard rubber pens, especially eyedroppers, can be a difficult repair because the pens are so old and frail. It is very easy to overtorque them and crack or crush them.

The problem, especially in eyedroppers, is that old ink effectively turns into glue on these old pens. Eyedroppers are so problematic because the ink always seeped into the threads that held the section to the hollow barrel that served as the pen’s ink reservoir. Other pens with ink sacs get ink-glued when the old sac gave out flooding the inner barrel with ink.

Lucky for you, the solution is really simple. Once again H2O comes to the rescue. Fill a cup with room-temperature water and soak the pen over the line separating the section from the barrel. Let it soak for 12 to 48 hours. This is usually enough time to loosen the old ink and allow the pen to open the way it should.

Sometimes it takes a little heat. Heat is the enemy of your old hard rubber pens. Open flames will melt or burn the pen very quickly. Hot water will discolor the pen, too. If you need the heat, just hold the pen briefly under warm to hot water flowing from your kitchen tap. Don’t expose the pen to the heat for more than a couple seconds, and keep an eye out for discoloration. It doesn’t take a lot of time or heat to start the discoloration process.

My Battle with Snorkels Advances, Stymies

Two Snorkel filling units mock me from my work bench, as I try to sort out the final mysterious reasons they won't draw ink.

Two Snorkel filling units mock me from my work bench, as I try to sort out the final mysterious reasons they won’t draw ink.

For roughly 10 years, I have struggled to find a way to fix the beautiful and brilliant Sheaffer Snorkel. Years ago I saw a poll that asked pen collectors what they prefered: the Parker 51 or the Sheaffer Snorkel. I sided with the 25% that preferred the Snorkel.

Among other things, I am a clean freak. Snorkels are the most mess-free pens of the vintage era. The Parker 61 was/is mess-free, too, but it is static and just aborbs ink. There is no Rube Goldberg intricacy.

The Snorkel satisfies my need for cleanliness and order as well as my need for complicated and elaborate. When they work, they are wonderful pens.

However, in my effort to learn to restore these beautiful devils, I have littered the junkyard with the corpses of those steel filler units.

The reason there was a delay in updating this blog or the vintage pens in the past week was because I had made not one but two restoration breakthroughs with the Snorkel fountain pen. ONE: I finally found a way to remove the plug that holds the ink sac and seals the pneumatic casing without damaging anything. TWO: I found a way to insert a new ink sac and that plug back into said casing.

I already know how to restore the touchdown filler O-rings and assembly. I even know how to replace the Snorkel tube’s gasket between the nib and the section.

All done. Right! NO! Frustratingly, miserably no. I have an air leak or blockage somewhere that won’t allow the pen to fill. Whatever the problem is, I know it is a simple small easy little tweak that is likely staring right at me. I just don’t see it. That is all that is standing between me and finishing about a dozen classic Sheaffer Snorkels that are just dying for the opportunity to work again and be sold into loving homes that will use them and cherish them.

If you know the secret inner psychology of what it takes to fix a Snorkel, please let me know.

Pen Tip #2: I Flushed My Pen. So Why Am I Still Getting Ink on My Hands?

A Q-tip can be one of your best tools for helping to clean out a pen cap and keeping your fingers from getting inky. Even after rinsing this Sheaffer Lifetime cap, you can still see plenty of ink on the cotton.

A Q-tip can be one of your best tools for helping to clean out a pen cap and keeping your fingers from getting inky. Even after rinsing this Sheaffer Lifetime cap, you can still see plenty of ink on the cotton.

Periodically flushing your pen with water often helps eliminate leaks as well as helping to get your nib to start writing well, again, as we discussed in Pen Tip #1.

Nevertheless, after you’ve gotten your pen cleaned and filled, you notice that you still have a little or a lot of ink on your fingers the next morning after you’ve decided to write with it.

The trouble often comes from old ink still inside your cap. Even if you rinsed your cap when you flushed your pen, that is not usually nearly enough to get all the old ink out.

Inside the caps of nearly all vintage and modern pens is an inner cap. It usually seals the nib compartment of your cap when the section (writing grip) of your pen screws up and against it. This keeps your pen from drying out. However, as fountain pens are wont to occasionally leak, drip or see some evaporation with heat, ink gets into these inner caps. Worse, it gets between your inner cap and outer cap shell. Once enough accumulates, your fingers are bound to get inked.

Your best bet is to soak your cap overnight in room temperature water.

Are you sensing a theme? Room temperature water and soakings are our friend.

Make sure the whole cap is immersed, and make sure that there is no air trapped inside the cap.

After a good, long soak, shake the cap empty over a sink. This gets messy in a hurry, so be careful.

Your next move is to hold the cap under running room-temperature water from the tap while scrubbing its insides with a small plastic-brissle brush that is like a toothbrush but smaller. Some hardware stores, tobacco shops and gun shops sell ones that work pretty well. I often use a plastic-brissle brush I found in an air rifle cleaning kit. I don’t have an air rifle to clean, but I spent the money just to get that little brush used on the air rifle barrels. Whatever you do, do not use a metal-wire brush used on regular hand guns and rifles. It will tear apart your cap.

Once the ink stops coming out of the cap in the sink, shake out the cap again. Use a Q-tip to dry out the cap. Odds are good that there is still plenty of ink in the cap, and you will go through many Q-tips trying to clean it out. You will have to keep getting Q-tips wet to keep getting the old gunk out. Pay special attention to the cap threads and the lip of the inner cap. Keep cleaning until you are satisfied.

This process takes a while, but if you only have one or two pens you have to do this for, it is worth just doing this to them once every several years. If you are a hardcore collector, we can discuss inner cap pullers and ultrasonic cleaners on another day.

Click here to see the finished restoration of the Sheaffer Lifetime cap in the photo above.

Please write in with your pen repair questions.

Pen Tip #1: Why Is My Favorite Nib Starting to Skip?

If you find that your favorite fountain pen won’t write any more or the nib is starting to skip and have trouble writing, it is quite possible your nib and inkfeed are clogging with old dried ink.

Soaking a fountain pen is often one of the fastest ways to help it write better. Just stick the nib in a cup of water, but not too deep--just enough to soak the nib and the inkfeed beneath it. This leaches out the old dried ink and helps to loosen the remaining ink inside the pen. Once the nib is clean, it likely will write as good as new.

Soaking a fountain pen is often one of the fastest ways to help it write better. Just stick the nib in a cup of water, but not too deep–just enough to soak the nib and the inkfeed beneath it. This leaches out the old dried ink and helps to loosen the remaining ink inside the pen. Once the nib is clean, it likely will write as good as new.

Infrequent use where you let your ink dry out inside the pen can often lead to clogged nibs and inkfeeds. Sometimes heavy use also leads to the same problem. If you fill and write your pen dry twice a week for years on end, the ink still builds up over time.

As a repairman, I find this is actually one of the most common problems pen users face. Whenever possible, I try to save my customers money with this simple advice.

Try to never let your pen dry out. If you know you won’t be using it for a while, empty it back into the inkwell or out in the sink. Of course, even constant use or careful emptying can lead to ink build up, eventually.

Always remember that room temperature tap water is your friend. (Hot and cold water can ruin your pen.) I find many repairs are easily avoided with a little H2O. Simply soak your pen overnight in a small cup or baby food jar, as in the photo. Don’t immerse the entire pen. Just soak the nib up to the section. The section is the part by which you most likely grip the pen. It is the black grip on this Parker Vacumatic. You can already see the old ink leaching off the nib.

After you let the pen soak for a few hours, the old ink remaining in the pen is softened. Empty out the container and fill it with more room temperature water. Then fill the pen with water several times, until the water is a uniform ink color. Empty and repeat until the pen starts running clear.

Empty the pen of water, and then shake out the remaining water over the sink. Be careful, that slightly tinted water sprays all over. Try your best to keep it in the sink. Wipe down the nib and inkfeed underneath with a paper towel. This helps drain out the last of the ink. I usually let the pen air dry for the remainder of the day. This way, when I refill the pen, the ink doesn’t seem watered down.

Welcome to The Pen Market.com’s Blog

Hello, and welcome!

It has been a long time coming, but we are very happy to have our very own blog. It is a space dedicated to pen lovers old and new. In it we hope to entertain our readers and customers with pen history, classic–if not somewhat cheesy–pen ads, repair advice and much more.

One of our upcoming favorite features will be trying to identify the pens of famous people. We will also try to identify the pens you see in the movies!

As for further entertainment, we might even add fun musings, short stories, song parodies or more.

Naturally, we’ll keep you up to date on all of the latest and greatest things happening at ThePenMarket.com, to make sure you don’t miss out on great bargains or rare pens.

Last, but not least, we want to learn about you. Ask us questions. Tell us about you. We love better getting to know our customers, and we want to do all we can to make your shopping and reading experience the best one you have online!

Tell your friends, and come back soon.

Yours,
Nathaniel Cerf
President, Repairman
ThePenMarket.com