 Shopping Cart


The Sheaffer Pen for Men, more commonly known as the Sheaffer PFM, was a luxury fountain pen first released in 1959. Like the Ford Edsel, it wasn’t quite as popular in its time as it should have been and was made for only several years. Years later, it has become an iconic pen for vintage pen collectors.
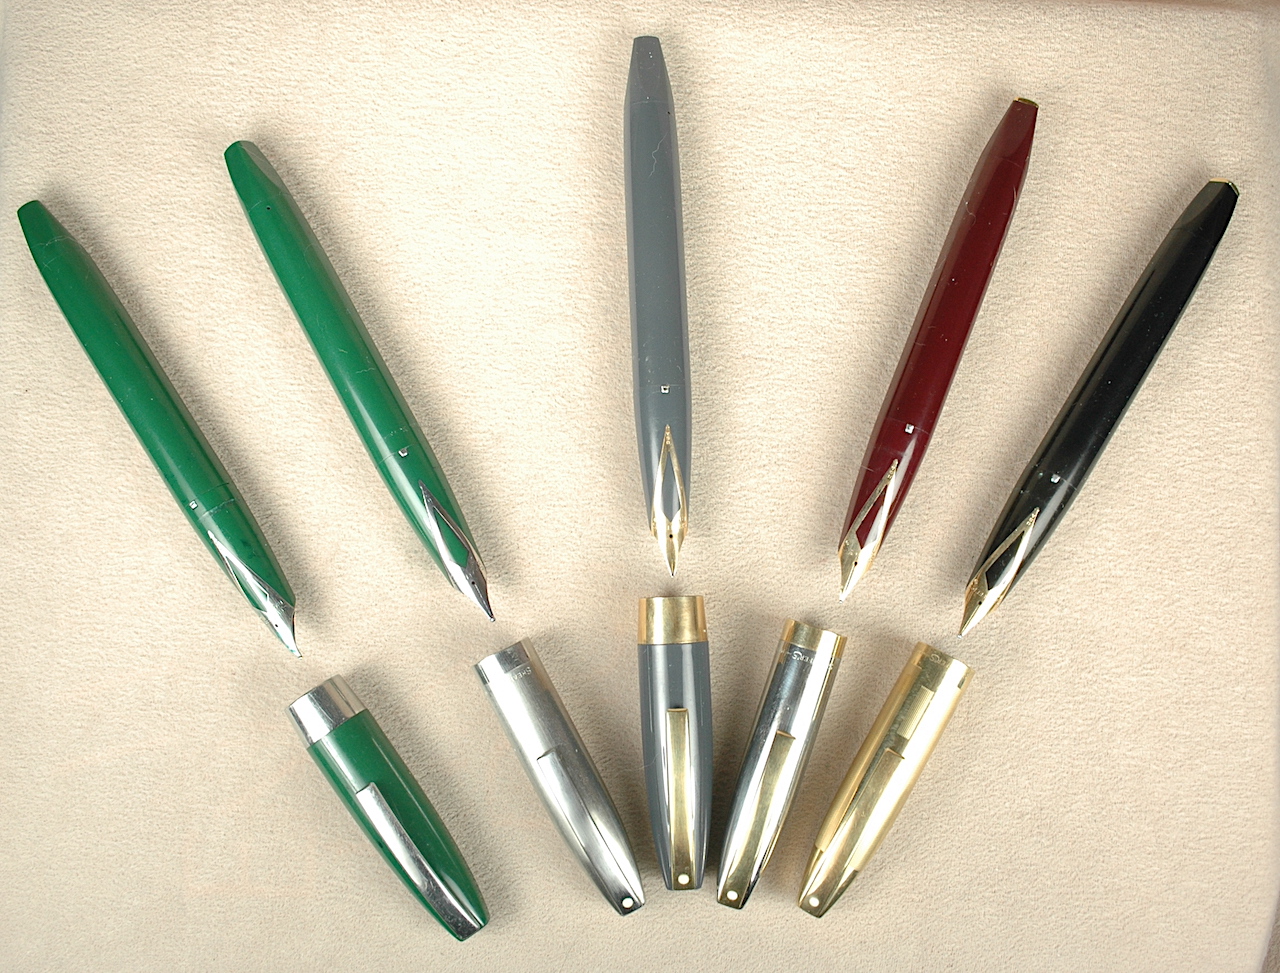
From left to right are a Sheaffer PFM I, II, III, IV and V. Notice the changes in the caps and nibs.
Keeping a car analogy in mind, PFMs came in 5 trim lines counted out in Roman numerals: I, II, III, IV and V.
• SHEAFFER PFM-I—This was the most basic and inexpensive trim line. It sports the same plastic cap and body as in higher trim lines, but the cap clip and band are steel, instead of gold plate. Its inlaid nib is made of “palladium silver,” which today is likely more valuable a precious metal than gold. All trim lines of the pen filled with a larger version of the Sheaffer Snorkel filler.
• SHEAFFER PFM-II—This pen was identical to the PFM-I except for its cap. The PFM-II cap was made of steel. It also should be noted that the palladium nibs feel much firmer than their 14k counter parts.
• SHEAFFER PFM-III—Some collectors choose to focus the most on these pens, as they were a gold upgrade with a matching plastic cap and barrel. The cap trim was gold plated and the nib was an inlaid 14k gold nib. Many collectors find these nibs to feel a little softer and smoother.
• SHEAFFER PFM-IV—PFM-IVs sport a polished chrome cap with gold plated trim. You also spot a flat gold-plated plate on the back of the blind cap. The rest of the pen remains the same as the III.
• SHEAFFER PFM-V—The pinnacle of the line, Vs were the same as IVs, except they had a completely gold-plated cap that featured an etched pattern reminiscent of the New York skyline.
In addition to the five standard trim lines, Sheaffer made a “Demonstrator” version of the pen so that pen stores and traveling Sheaffer reps could show how these complicated fountain pens worked on the inside. These pens were not for sale to the general public and were made in very small quantities. Worse still, their fragile clear plastics are known to get little cracks in them called “fractals.” The pens, which are effectively PFM-III models that are clear, are valued on clarity, internal ink staining, cracks like a normal pen and these little fractals.
An average to bad PFM Demonstrator might still command more money than a PFM-V, which normally gets more money than the other trim lines. A near perfect Demonstrator can cross into $2,000-plus territory in the year 2023.
In addition to the clear model, PFMs came in black, blue, burgundy, green and grey. Grey seems to be the rarest of the colors and also commands the highest prices. A PFM-III in grey would likely get more money than a grey PFM-V because the grey caps are so hard to find.
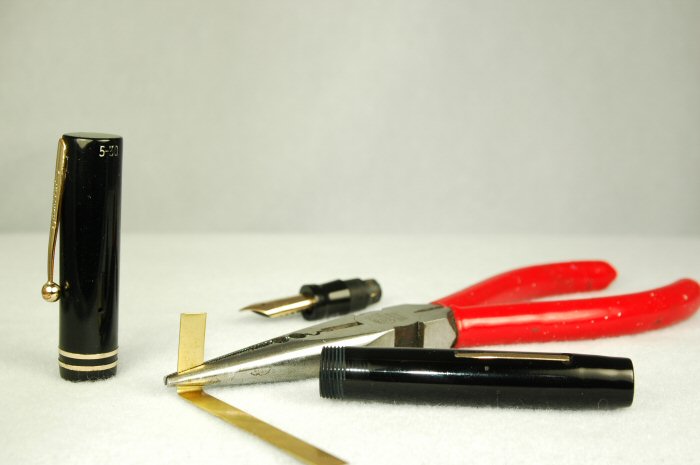
Cracks in the pen are the bane of collectors’ everywhere. Sheaffer, and the world, was still experimenting with plastic. The plastic chosen by Sheaffer for the PFMs tends to get increasingly brittle with age. When shopping for a Sheaffer PFM, you want to look very closely for tiny hair-line cracks in both ends of the barrel, at the start of the section nearest the barrel, around the inlaid nib and under the nib around the feed area. A crack in the barrel all but guarantees that the pen won’t fill properly, as there will be too many air leaks for the pneumatic filler to function properly. Cracks around the section and nib might equate to seepage of ink. This bothers some people more than others.
Sometimes, whatever held the inlaid nibs in place to begin with starts to deteriorate, and the nibs can seep through no fault of anyone. Yes, PFMs are a little more high maintenance and problematic than many other vintage pens, but they can also the pen you want to turn to most.
Restoration of these pens is a bit complicated, as are all snorkels. The O-ring and sac replacement are basically the same as the thinner, earlier model Snorkels. However, the PFM requires a special tool to unscrew a part of the section to reveal an inner chamber to replace the point seal. Larger O-rings and Point Seals are required for PFMs compared with standard Sheaffer Snorkels. Replacing the point seal can be challenging and risk cracking the section through no fault of a restorer. Don’t be surprised to see restoration costs span $50 to $75 for a simple overhaul with a new sac, O-ring and point seal. Those 3 parts are cheap, but you are really paying for the extra-time and expertise that go into fixing these pens.