Tag Archives: pen repair

Pen Collecting Time Capsule

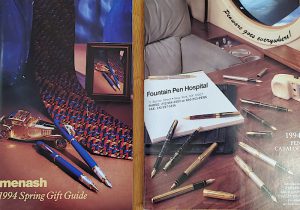
Here are two 5″ X 7″ pen catalogs from 1994! I was intrigued by the Menash catalog as I don’t know what became of that company.

Leaving the pen-collecting life behind, a friend of mine has given me his stash of catalogs and advertising from 1992 through 1994. Its contents blew my mind.

Most of the material was from 1994, the spring I graduated high school. While it is difficult for me to comprehend that was 27 years ago, what is harder to comprehend was how big pen collecting was becoming that long ago!

I found my first fountain pen in 1985 when I was 9 and adored it. It belonged to my late grandfather, and it still worked: a 1928 Sheaffer Lifetime Balance. I used it until it finally broke down, and I became obsessed with finding other fountain pens. They just didn’t exist. Not in my 10-year-old world or the various circles I moved in. I asked adults for them, and all the adults laughed and said they threw their fountain pens out years ago because ballpoints were “so much better.” Even then, I knew that was heresy.

Sheaffer sent me an Imperial to replace my grandfather’s pen, which they could no longer fix. I snatched up those terrible Sheaffer Student Pens at the grocery store. Yet, I was the only person of any age I knew who loved fountain pens. Studying German while in a San Diego high school, my teacher told us that most German kids and adults still preferred using fountain pens. San Diego had no pen stores that I knew of, and the internet did not exist. I worked a part-time job and saved most of my money to pay for my trip as an exchange student to Germany. Most of my fellow American exchange students saved up their money so they could drink heavily in a nation where the drinking age was 16. I begged my German family to be taken to a proper stationary shop. I gleefully purchased a stub-nibbed elegant black Rotring and a bottle of Pelikan royal blue ink. I wrote with that poor beast until its threads wore off. It wasn’t until the internet got more advanced that I could search for fountain pens and finally start finding them in about 2005.
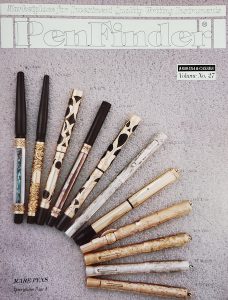
A 1992 edition of “Pen Finder” by Glen Bowen.

And sooo, it surprises me now to see that while I was searching the world over for fountain pens, there was a ground swell of people who did still love fountain pens…and vintage pens, at that! Plus, many of the people I know on the pen show circuit were innovators of the vintage pen revival.

For example, when I first met Glen Bowen, I did not know he founded “Pen World” magazine. He had already sold his stake in it, but his wife Susan was still the circulation director at Pen World. She and I bonded over the fact she went to journalism school at Northwestern with my father. When she later introduced me to Glen, I thought he was just a pen newbie helping his wife at the Pen World table. Ooops!

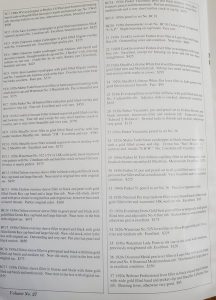
In this stack of publications is a protean “Pen World” magazine catalog he published in 1992 called the “Pen Finder.” It was printed at the same time as the early “Pen Worlds” but was a catalog of vintage pens he restored that collectors could buy. You had to subscribe to it. There were simply several glossy photos of capped fountain pens and some inner pages that served as an index of what the pens were and how much they cost. No nib photos. As people didn’t yet know the history of the pens as well then as they do now, I think I even spotted a few pens with mismatched caps and barrels.

The catalog index of pens for sale in “Pen Finder.” Back then it was too expensive to print color on every page of a magazine. As such there would be color pages and B&W pages.

Without the internet, vintage pen research was a slow and ongoing process. So many of those early collectors had to do their own research into the histories of pens. And much of that was very hit and miss. The internet really made it easier for everyone to get together and compare notes and research.

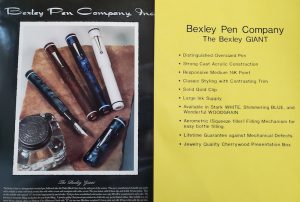
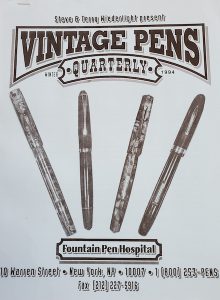
I love the low-tech feel of these publications. The world-famous Fountain Pen Hospital vintage pen catalog was just a photo-copier copy of pens and prices. Bexley Pens advertised new models with a beautiful glossy photo paired with a home-printer list of features and benefits.

The more professional catalogs for new merchandise were more sophisticated, but I sure as hell wish I could get my hands on some of this Montblanc and Omas at their original pricing. Brand-new, factory-fresh Montblanc 164 Classique models for $99. Omas fountain pens for $325 to $100! FPH was selling a stash of 14k gold #5 Waterman MUSIC NIBS for $50 a piece!

Vintage pen prices were all over the map. There were rare pens for $100 or $200. Really common pens for up to $800. And, yet, other pen prices haven’t changed. Standard Parker Vacumatics went for around $125.

Ads for the Bexley Giant. Note the glossy one-page sheet paired with a home-printer fact sheet. That was not unusual advertising back then. It was fairly slick and affordable.

When I finally got some guidance from my buddy Hans who taught me about vintage pens and how to repair them in 2005, I felt like we were the last two people on earth who loved old fountain pens. With his instructions, I felt as if I was somehow reinventing the wheel or reviving a long dead religion. Yet, this is evidence I was never truly alone back then. I was just searching in all the wrong ways and places.

It is easy to be glib and say, “Oh, gee, I wish I knew in 1994 what I know now.” While that wouldn’t be untrue, I really wish I knew my pen tribe then and could take the journey with them to where we are today. Fountain pens have always brought me joy, and they clearly bring many other people joy. And while I am very happy we have found each other in this grand and glorious age of the internet, it would have been nice to have learned and shared at an even earlier age.


How Do I Restore a Conklin Crescent

We are by no means done with the Decameron 2020 Project. However, I felt like getting back to pens for a posting. If you’ve been mostly coming for the storytelling, who knows, maybe you’ll get a kick out of a deeper dive into old fountain pens.

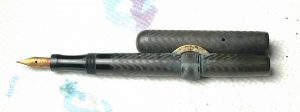
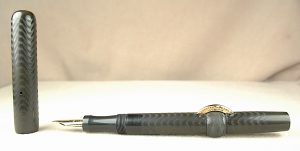
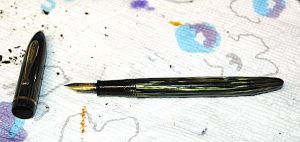
Here is a Conklin Crescent 2NL fountain pen in need of restoration.

Let’s look at one of the oldest “self-filling” fountain pen filling systems. In the earliest days of fillable fountain pens, any pen with a bladder or ink sac was considered self-filling. Before that you had dips and eyedroppers. Conklin invented the crescent filler in 1898. For as cumbersome as it looks, it was an insanely simple design. The pen is hollow like an eyedropper, but there is a rubber ink sac affixed to the nipple of the section. A crescent is fitted to a flat steel bar, and when the safety ring is rotated into the proper position, the crescent can be depressed, flattening the rubber ink sac within. The rubber ink sac wants to re-inflate, which fills the sac with ink and pushes the crescent back out of the barrel. Way less messy than an eyedropper, it was an instant hit. Even the famed American author Mark Twain was hired to be an advertising spokesman for the pen.

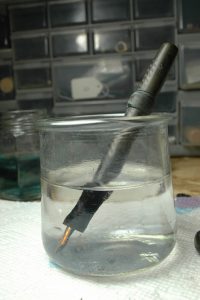
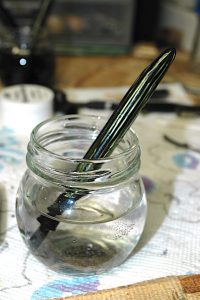
Don’t soak a Conklin hard rubber pen for very long, as it will discolor the old hard rubber. Be sure to get the water over the end of the section and on to the barrel threads.

If you already read our “How Do I Re-Sac a Vintage Pen” article, this isn’t very different. However, most of these pens are made from black hard rubber more than 100 years ago, and they are very brittle. You want to make sure you are pretty comfortable with restoring plastic/celluloid pens first. These early Conklins are getting much older and harder to find, and they break much more easily.

As with before, you will need some ink sacs, a pair of spark-plug/section pliers, a long dental pick, sac shellac or rubber cement, scissors that can cut through rubber ink sacs, a jar or cup, clean water, polish, a cloth rag, paper towels, a hairdryer, a razor blade and an ultra-sonic cleaner.

  1. Always start by soaking the nib in room temperature water over the threads of the barrel. Now the trick with old hard rubber is that water discolors it quickly. A shiny black will quickly turn to a chocolate brown haze. Don’t soak it for long, just enough to start to leech out old ink and maybe lubricate the friction fit of the section into the barrel. I certainly wouldn’t soak it for more than an hour. I’d probably soak it for much shorter a time.
  2. Next, remove the nib and section from the water and dry them off.
  3. Warm them up just a little with the hair dryer or heat gun. You only want them to be warm to the touch. Heat will also discolor the hard rubber. Plus, it can melt it.
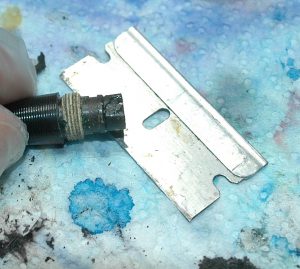
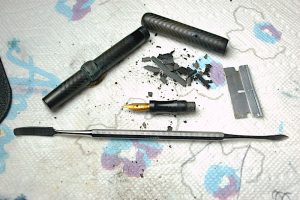
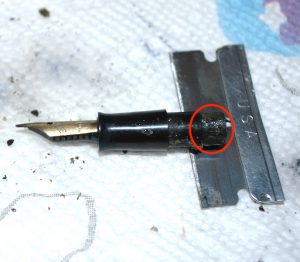
  4. Scrape the dead ink sac out of the barrel. Be sure to be especially careful shaving the ink sac remains off the section nipple.

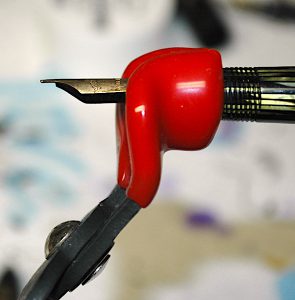
    Using your section pliers, gently grip and twist the section counter clockwise in an unscrewing motion. Sometimes it takes nerves of steel, patience and experience to discern the difference between the old ink sac inside the pen cracking and the barrel of the pen cracking. If the barrel cracks, you’ve likely killed the pen and made it nothing more than a parts donor.

  5. Once you get the section to start coming out, gentle, small wiggles can work it out without further stressing it from twisting. Very small wiggles. You can easily break the barrel, especially when the section looks as if it is almost out of the barrel. The more the section wiggles, the more it can act as a lever to crack the barrel. Some people choose the give the nib and section a sonic cleaning and others don’t. The sonic action can destroy the part if there is a crack already starting in it. More than 30 seconds to a minute will start discoloring the rubber. However, I’ve also found that pens this old often are filled with sediment-based inks that need something special like a sonic cleaning to remove the caked-in old ink.
  6. After the section is out, the rest is fairly easy. Scrape out all of the old ink sac from inside the barrel and very gently shave off the remaining sac on the nipple. Your razor can easily cut the nipple or cave in a wall of the nipple. Go super slow and easy with only small motions.
  7. Polishing old hard rubber is difficult. You can wear away a lot of rubber very quickly, ruining imprints and chasing.

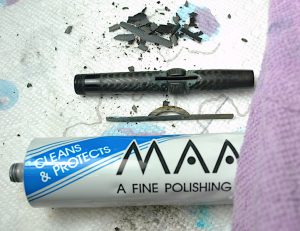
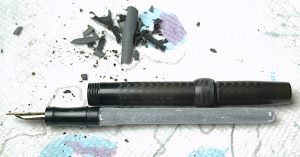
    With everything cleaned out and disassembled, that is when I like to polish the pen and parts. You cannot go as rough on century-old hard rubber as you can plastics. I like to use MAAS metal polish on a soft terry cloth rag. Mostly I just give a light going over of the pen and cap with the polish and rag because both strip away the top layers of the rubber and can remove chasing and other imprints. It also removes some of the chocolate hazing. Using a Q-tip, I also polish the nib and crescent.

  8. Reinstall the crescent filler and lock it in place with the safety ring.
  9. Dust the ink sac in talcum power to help preserve it.

    Size and trim an ink sac that isn’t too snug inside the barrel. If you don’t have the crescent filler with the bar reinstalled first, you won’t get the proper fit.

  10. Use orange shellac to attach the sac to the section nipple.
  11. Dust the sac in pure talcum powder
  12. Very gently and slowly reinstall the sac and section into the barrel. This is another high-risk move that can crack the barrel so take it easy. You might even want to warm-up the barrel a bit.

Wait 24 hours for the shellac to dry before filling the pen. Then you are ready to write.

The finished pen should look much cleaner and be ready to write.

How Do I Re-Sac a Vintage Pen

You can’t make an omelette without breaking a few eggs, the old saying goes, and it is true for learning how to fix vintage pens. Today, we are going to learn how to restore a lever-filling fountain pen…or re-sac it, as they say. But first, you are going to have to get used to the concept that you’re going to destroy a few pens along the way—even if you’re careful.

Find a few good, cheap vintage pens to practice restoring before experimenting with more expensive models. This deformed Sheaffer Balance 350 is a great starter pen.

When you are starting out, don’t begin with an unrestored version of your grail pen. Find some broken-down cheap pens such as Wearevers, Esterbrooks or even this banana’d Sheaffer 350 Balance. The longer you are on the hunt, the more you will find vintage pens that turn into the shape of bananas. The deformation happens when the pen is left in the sun or near a heater for too long, which warps the plastic/celluloid.

In addition to a good practice pen, you will need some ink sacs, a pair of spark-plug/section pliers, a long dental pick, sac shellac or rubber cement, scissors that can cut through rubber ink sacs, a jar or cup, clean water, polish, a cloth rag, paper towels, a hairdryer, a razor blade and, if at all possible, an ultra-sonic cleaner. You can get most of these items pretty cheaply. One trick of the professionals is to buy a pair of rubber coated spark-plug pliers, instead of formal “section pliers” that you can find on many pen restoration sites. Why? Spark-plug pliers can be had for less than $10 at most auto parts stores. Section pliers are almost always the same, exact pliers but marked up to $20 or $30. In the early days of pen restoration as a hobby in the 1970s and ’80s, a lot of guys used regular pliers and cut off two one-inch sections of hose to cover the teeth of their normal pliers. That’s how I was first taught.

Attempting to keep this simple, I’m going to break this down into what I hope are very simple steps to make this as fun and easy an experience as possible.

  1. I like small mustard or baby food jars to use for filling with just enough water to get the pen wet from the tip of the nib to just over the threads of the barrel.

    Fill a cup with just enough room-temperature water that you can stick your pen in and go just a little bit over the section and past the cap threads. (Sections are the writing grip into which the nib and feed are inserted in one end.) Let it soak for at least an hour. (Never use hot water.) This leaches out a lot of the dried old ink in the nib and inkfeed, while also potentially softening any glue or shellac used to hold the section tightly into the barrel. Many of the old factory repair manuals encouraged repairmen to use a dab of sac shellac to hold the sometimes loose pressure-fit sections into the barrel. WARNING: Water is necessary, but it also isn’t your friend. Black hard rubbers turn chocolatey brown in water fairly quickly. (An hour might be too long for some rubbers.) Some celluloids get more brittle or discolored when in water too long. Be sure to dry off the pen as soon as you remove it from the water.

2. Use the hairdryer to warm up the space where the section and barrel meet. DO NOT melt the plastic or set the celluloid on fire. All you need is a little warm to the touch. Until you get comfortable, keep the heat to barely noticeable to the touch. Grip the section, and only the section, with your rubber coated pliers. Very gently and slowly begin to twist counter clockwise as you hold the barrel in your other hand. It is common to hear some very scary cracking sounds. Usually, that sound is the petrified rubber ink sac in the pen breaking apart as you open. Sometimes it is the pen barrel breaking. Experience will teach you the difference. If you feel the section coming loose,

Grip only the section with rubber coated pliers, such as these spark-plug pliers. Don’t grip too tightly, just enough not to let go.

keep twisting slowly and gently. If you do not feel it turning or you feel it actively resisting, stop twisting. Some sections—especially Parker Duofolds and Vacumatics—were threaded into the pen barrels, which is why we usually start with a twist. Most pens of all brands were straight pressure-fit sections. HOWEVER, some brands—especially Wahl-Eversharp, although they were extremely inconsistent—used little pins in the barrel or section to hold the section firmly in place. You CANNOT twist those sections without destroying the barrel or section. If a section resists twisting, hit it with a little more heat and very gently start trying to wiggle it in teeny, tiny side-to-side motions while pulling straight out.

This is the most dangerous part of the entire restoration job. This is where probably 80% of all pens break, if they are going to break. ALSO, celluloid is insanely flammable. DO NOT get it hot. If it catches fire, it burns like a magnesium flare. It is an extremely hot burning flame that burns extremely quickly. Early on, I accidentally set a Vacumatic on fire. It scared the hell out of me, and it was a miracle I didn’t burn down my house. Even after getting it under running water it didn’t go out right away. I had to drop it in the steel sink and flood it to put the fire out. In about 10 seconds, it burned away the majority of the barrel. Be careful with the heat.

Use a razor to scrape the old sac pieces off the section nipple.

3. Once the section is free, scoop out the old sac guts from inside the barrel with the dental pick. Sometimes those guts stick pretty good to the inside of the barrel. A flashlight or gun light can help you see in to make sure you got it all. Do not put water in the barrel to clean out the sac or old ink. This will likely ruin and rust-out the pressure-bar assembly.

4. Use the razor to scrape the remnants of the old ink sac from the nipple of the section. Be careful not to cut yourself or split open the nipple.

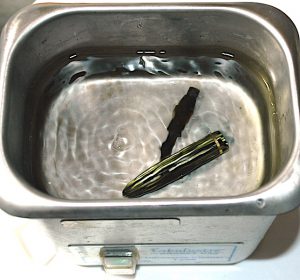
5. Fill your ultra-sonic cleaner with clean, room-temperature water. Sometimes a drop or two of ammonia will help badly clogged pens. Put enough water in to completely submerge the cap and section assembly. Before you turn it on, let the cap soak for a minute or so. This allows the water to penetrate the inner cap, where a lot of old ink is usually trapped. After the cap and section have had a minute to soak, turn on the ultra-sonic cleaner for no more than 2 minutes.

If feasible, an ultra-sonic cleaner is the easiest way to remove old ink.

You might not see a lot of “action” with your eyes, but the vibrations are practically violent to the parts that are submerged. It can shake free most of the old ink in two minutes or less. If a cap lip is cracked, I’ve seen some caps crumble in the ultra sonic cleaner. That’s how powerful it is.

NEVER stick your fingers in the ultra-sonic cleaner when it is turned on. It can damage your fingers and their joints. Also, don’t leave your parts in for much longer than two minutes because the cleaner will get hot and potentially damage or discolor your parts.

Turn off the ultra-sonic cleaner, collect your parts and drain the old dirty water. Then rinse the parts under the faucet with room temperature water for a few seconds. Shake the parts dry, and then dry them with a paper towel on the outside. Q-tips are perfect for drying and removing the remaining ink from inside the cap.

6. I like to polish the pen next, especially the nib. It allows me to see any major flaws I might need to work on, such as replacing the nib while the section is exposed. I use a pin-head dollop of MAAS metal polish on a Q-tip to get the nib shining like new. I use the clean side of the Q-tip to wipe off the remaining polish. Then I dip the nib in water and dry it with a clean rag to get off the remaining, invisible polish remnants. I repeat the process with a pea-size drop of MAAS metal polish on the rag and polish up the rest of the pen, rubbing it down several times with the clean parts of the rag…avoiding water.

Every repairman I know seems to have a different process for polishing a pen. The method above is adequate for most pens. Yet, if you’re a detail-oriented person, there are myriad methods of multiple polishes or wet sanding that do a much more factory-fresh looking job. Yet, those methods take up to an hour and are worthy of their own article.

This photo illustrates how to eyeball the spot you need to trim the ink sac.

7. Sizing an ink sac. How detail oriented are you? You can easily research what size sacs went into what pens. You can measure the nipple with a fine ruler using increments of 1/64th of an inch, the way old pen repair manuals did to find the right aperture width of the ink sac. Or, you can eyeball it.

The real trick to eyeballing it isn’t fitting the sac to the nipple but finding the right sac to fit inside the barrel. You do not want the edges of the sac to snug against the inside of the barrel. It is best if the sac can easily slide in and out of the barrel, preferably with a little space all around the sac. If one is to carry a pen in their shirt pocket, the goal is not to transfer body heat through the barrel to the sac and ink, which might effect the interior pressure of the ink in the pen and have it leak a bit on you with a full pen.

Regardless of how you choose the sac size, you will likely need to trim the ink sac before installing it. Most ink sacs are longer than the pen barrels. My rule of thumb is quite literally a rule of thumb. I stick the sac in the barrel as far as it will go. I then pinch the end of the barrel at the threads, with my thumb having just enough reach to go past the threads. Pinching awkwardly down on the sac, right where it exits the barrel, I remove the sac. Gaging where my thumb tip is, I trim the sac at the tip of my thumb. Usually, this allows just enough room for the section and nipple inside the pen so that the sac can be as long as it needs to be. You can double check the length by putting the section and sac next to the empty barrel, as they would fit inside it.

Use Talc to powder and preserve your new ink sac before final re-assembly.

8. Most modern pen restorers use orange shellac to affix the sac to the nipple. Before most of us learned how to make or knew where to find orange shellac for sale, rubber cement was the go-to adhesive. Orange shellac is nearly perfect, as it can harden and still be water soluble. Rubber cement forms a good seal at first but can be more easily effected by heat and aging. Yet, it better fills-in tiny hairline cracks in the nipple, hopefully extending the functional life of the pen. (NEVER use super glues of any kind. The rubber ink sacs will give out long before the super glue ever does and you can ruin the pen by forever getting the section stuck in the barrel…or sticking other wrong parts together.)

On this pen, we painted only the nipple with a thin layer of shellac. Then we slipped the sac over it. After that, we dusted the sac with pure talcum powder, which helps to extend the life of the sac.

9. Fitting the section back into the barrel is the second most dangerous part of the restoration process. Sometimes the barrel opening shrinks while the section is out and cracks open if you put the section back in too quickly or roughly. If the section feels like it is having difficulty going back in, maybe warm up the barrel end a little and gently wiggle the section back into place. Although it doesn’t really matter, I like twist the section into place where the top of the nib is even with the lever on the pen.

Congrats! Your pen is fully restored, looking beautiful and ready to write.

If the section is too loose, you can tighten it up with a tiny cut out of a piece of onion-skin paper. Or, like the old repair manuals, you can use a small drop or two of shellac on the section. Just wipe off the excess shellac and keep it out of the threads.

10. Let the shellac dry. As the shellac is water soluble, I wait about 24 hours before I test the pen with water or ink. Once the shellac is dry and the pen tests well, you’re all done. Congrats!

It took longer to read this article than it likely will take you to restore a pen—at least once you get used to the process. Fixing and writing with vintage pens is my favorite part of the hobby. If you like seeing how things work and getting your hands dirty, you’ll love pen repair. The only thing that improves it for me might be repairing pens while listening to a Cubs game on the radio and nursing a cold beer.

Always feel free to write in with questions. And always remember to go slowly and take your time. It isn’t a race. Enjoy the zen of pen repair, and best of luck to your future projects!

How Do I Replace a Lamy Nib?

(There is risk in doing any repair. We will not be held liable for what happens to your pen if you break it while trying the following advice.)

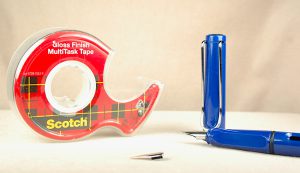
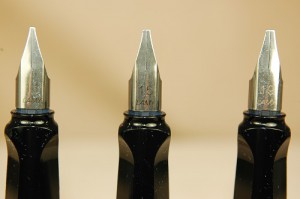
Changing a nib on a Lamy Safari or AL-Star is easy. All you need is the pen, tape and a replacement nib.

Changing a nib on a Lamy Safari or AL-Star is easy. All you need is the pen, tape and a replacement nib.

Lamy Safari and AL-Star pens are among the most popular pens on the market today. Bright, modern, affordable and made to work well under the most trying conditions, what is not to love? Many people’s favorite feature is that the nib is easily changed.

The genius German engineers and designers behind this pen put the nib on a pressure-fit track system for easy assembly and repair.

How easy is it? The only tool you need is a piece of tape. Go ahead. Get your tape, and I’ll teach you how it is done.

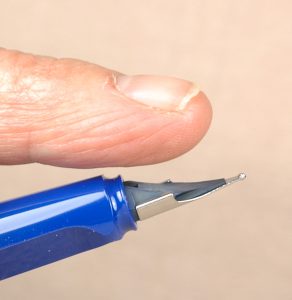
Place your index finger on the inkfeed to stabilize and support the fragile feed when you change a nib.

Place your index finger on the inkfeed to stabilize and support the fragile feed when you change a nib.

First, it helps if your pen is empty and dry.

Next, gently grip the section (writing grip) of your pen and place your index finger gently on the plastic inkfeed under the nib to brace it.

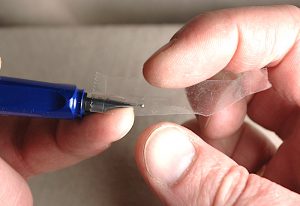
With the top of the nib facing you, place a piece of tape on the entire nib. Be careful as the plastic inkfeed under the nib is easily broken if you are not careful, and those are much more difficult to replace, as Lamy doesn’t give out those parts.

Put your other index finger on top of the tape and nib. Using your thumb, grip the ball of the nib from underneath it.


Tape helps your fingers gain added traction to slip off the nib.

Tape helps your fingers gain added traction to slip off the nib.

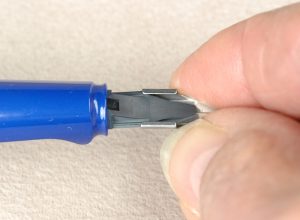
Pull, gently and straight out, on the tape and nib tipping. The nib should slide right off the inkfeed.

Turn the pen over, with the bottom of the inkfeed facing you. Turn your replacement nib upside down and align the little runners with the tracks of the inkfeed.

Slide it into place until it stops. Turn it over again to see the top of the nib. There should only be about a millimeter or so of inkfeed visible.

Voila! You have successfully changed the nib. Congratulations!


Turn the inkfeed upside down where you can see the tracks for the runners of the nib to slide into place. Gently pinch the side of the Lamy replacement nib and slowly slide or wiggle the nib into place.

Turn the inkfeed upside down where you can see the tracks for the runners of the nib to slide into place. Gently pinch the side of the Lamy replacement nib and slowly slide or wiggle the nib into place.

2018 DC Pen Show or Bust!

After last year’s chaotic but successful pen show, we are hitting the road for the 2018 DC Pen Super Show!

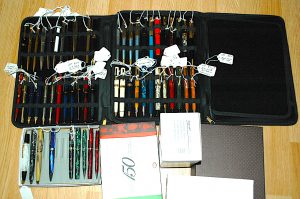
We’ve spent the past month cleaning, polishing and organizing more than 300 vintage and modern pre-owned luxury pens not yet online for this show. This photo shows only a tiny fraction of what we will have available.

This is just a tiny fraction of the more than 300 vintage and pre-owned modern pens not currently on our website that we shall carry on our table at the DC Pen Show this weekend.

Omas, Delta, S.T. Dupont, Namiki, Montegrappa and rare Pelikans will make a splash. Plus, we’ve loaded up on Montblanc from the 1970s and ’80s. In addition to that we’ve been adding a dozen ultra-rare Esterbrook pens, rare vintage Waterman pens and many great vintage Parker and Sheaffer fountain pens.

Naturally, we are returning with our Lamy nib testing station that was a huge hit last year. It will be loaded with this year’s limited edition Safari and Al-Star designs, as well as many great traditional colors. We’ve restocked Lamy ink, too!

We will have something for everyone. With a total of more than 600 pens in every price range on our table, if you can’t find a new treasure to love…you just don’t like pens.

Catching Up Part I: Our First ‘Pen World’ Write Up!

It has been a crazy year for us at ThePenMarket.com. As some of you might know, I was working a full-time job…in addition to working full-time hours on ThePenMarket.com…while also coaching youth fencing competitions…while also writing a novel, seeing it published and ultimately being nominated for (and losing) a Pulitzer Prize. Toss in lots of pen repairs and a handful of pen shows…it was tough keeping up with these Drippy Musings.

I am very excited to say that I am now working full-time for myself at ThePenMarket.com. Good-bye, corporate America.  All the thanks goes to you, our customers, for helping me to live out a dream as a full-time pen entrepreneur!

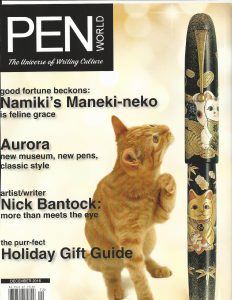
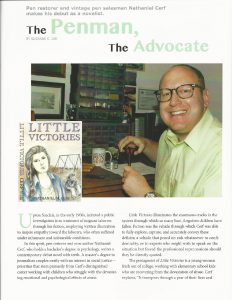
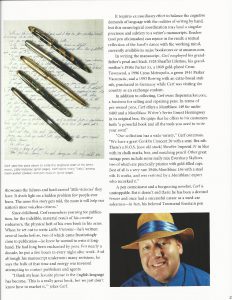
The joy of the freedom of working for myself means that I can bring this blog up to speed. As such, it is time to thank “Pen World Magazine” for writing a story about my novel “Little Victories” in the December 2016 issue. With their permission to share it, here it is:

The 'Pen World Magazine' cover December 2016.

The ‘Pen World Magazine’ cover December 2016.


Controversy in Chicago Part III: Let’s Help the Rookies

Now that veteran vendors and rookie pen collectors are breaking the ice, let’s lend some veteran assistance to the rookies navigating their first pen shows.

1421 Waterman PhileasYour first pen show is bound to be an overwhelming affair. There will be tens of thousands, if not hundreds of thousands, of vintage and modern pens. You will find rarities you never dreamed of seeing in the flesh, and you will probably want to spend 10 times the amount of money you intended to spend. Plus, there are all of the custom services, which might take months to get performed through the U.S. mail but you can have satisfactorily completed in a single morning or afternoon at a pen show. And then there are the spare parts, inkwells, papers and cases!

To help you safely navigate your first pen shows, here is some advice that ought to help you breakdown the experience and keep it positive.

PRE-GAME STRATEGY
Set a budget and a goal for the show. Need some repairs done? Want a nib ground to perfection? Looking for certain pens? Organize all that you hope to achieve.

1324 Waterman 100 Year PenYour best bet is to put together a list of all the things you’re looking for and hope to do. This way you can take some time to marvel at the splendor of the distractions before you check in on your list to focus on your goals.

Loyal reader Justin P. recommends contacting your favorite eBay and other online vendors to see if they will be at the show. If they are, let them know you can’t wait to see them there and give them a heads up to your list of pens or merchandise that you want. Many will gladly set it aside for you so that you can have first dibs. Plus, it always helps to put names to faces by meeting in person.

Many shows are offering more and more seminars about repairs and the histories of the brands. Check out the show schedule online or in your show pamphlet to see what special events you don’t want to miss. Set an alarm on your phone or watch to help you remember it is time to head over to the seminar. Time passes remarkably quickly, and it is easy to get sidetracked.

If the show offers a weekend pass, you might want to get it. To make the most of the show, it helps to attend all of the days it is open. Day one is your best opportunity to pick up a really rare pen before somebody else snatches it. If it is a 4-day show, days 2 and 4 are quieter days, which are better for meeting new people and asking more questions about the pens and the hobby. Day 3/Saturday will be the busiest day. During trading hours, few vendors will likely want to talk for long because this is their best opportunity to sell the most and pay for their expenses.

Glass Topped CaseYet, some of the best times are after the formal trading closes for the day. You’ll often find clusters of vendors and collectors hanging out, talking or getting a drink. Strike up a conversation with them and get to know who they are, what their pen passions are and let them get to know you. Pen People, regardless of their experience with the hobby, are usually very friendly and chatty. People can usually be found talking pens in the lobby of the venue well into the wee hours of the morning.

SERVICES:
As I don’t do any nib grinding or Mont Blanc piston repair work, I love coming to the shows to take advantage of these services. The trick to navigating these services is to be there the minute the doors to the show open in the morning. If you are one of the first on the repair-person’s list, you can guarantee your pens get done that day.

Be sure to clearly explain to the repair folks what you want done and ask for an estimate first, so you know their prices and aren’t hit with sticker shock. Most repairs are fairly affordable, but it is always best to know what to expect. Vendors won’t mind fixing 2 or 3 pens for you at the show, but don’t expect for them to fix an entire shoebox full of pens at the show. They might ask to take that many pens home with them to work on later.

L15S Lamy Calligraphy NibsAt most shows you can expect to find full-time repair specialists such as Mike and Linda Kennedy of Indy-Pen-Dance, Ron Zorn, Richard Binder and “Mike It Work.” All four of these vendors are nationally known for their excellence. You can’t go wrong with any of them. If you do have 15 to 20 pens you want restored at the show, it might be best to spread 3 or 4 amongst each of them to see who’s work you like best. Expect also a minimum repair bill to be $20 to $25 per pen. It could be up around $40 to $50 if you want your nib ground to a new size and shape.

If you are having nib work done, be patient and remember it is very precise and time-consuming work. Don’t rush your grinder. However, as you are asking for a very specific and personalized repair, don’t be afraid to say the nib still doesn’t feel right when they ask you to test it. They want you to be happy with their services, and they will work hard to get the precise feel you want in your nib. If they spend an inordinately long amount of time getting your pen just right, they might charge you an extra $5 or $10, which is okay. Time is money, and you will get to enjoy that pen and nib for the rest of your life.

DEALING WITH VENDORS
It came as a great shock to me that not all vendors are there to sell. Some table holders are just there to meet with old friends, show off an impressive collection or to do any number of other things. For most of us, it is a business.

To avoid getting overwhelmed or making rash purchases of the first things you see, spend some time walking around and keeping an eye out for the merchandise on the tables. I like to make a complete sweep of the show before making any purchases…unless I spot something rare that I must buy quickly or not see again.

Don’t be shy. Say hi to the vendors and don’t be afraid to tell them what you’re looking for. It is really easy to overlook the pens you’re looking for on tables that seem lightly populated with pens.

Keep a running tally of prices in your head or on a notepad. It is safe to assume you will find dozens of similar pens at the show. Prices and quality could range all over. Plus, it will help you keep from going over your budget…or show you there is room from an extra new treasure.

1262CWhen you are ready to get serious about buying a pen, there is a whole checklist of things to do:

  • ASK the vendor if you can pick up and examine his or her pen (You’d be surprised at how many people break pens or inadvertently mess up an organizational system.)
  • Look over the pen carefully for cracks, dents, imprint quality and brassing
  • ALWAYS try first to UNSCREW the cap. NEVER YANK on a cap.
  • Search for cracks on the lip of the cap with your thumbnail. If you spin the lip of a cap over your thumbnail, it will gently pick up any crack that might not be visible to the eye.
  • Use a loupe to examine the nib. Are there cracks? Is the tipping good? Are the tines aligned? Are one of the tine tips cracked just below the tipping and about to pop free?
  • If the nib looks okay, then test it for flex with your thumbnail. Put the underside of the nib’s tip on the top of your thumbnail and gently add pressure.
  • ASK if you can test the filling system. If you feel any pressure or resistance in the filling system, don’t force it. Ask the vendor if it needs restoration? (Lots of vendors complain about people breaking levers and other pen parts while checking out the filling system.)
  • Finally, ask if the vendor has ink and if you can dip the pen to try it out.

CLOSING THE DEAL
Cash is king. All pen dealers accept cash. However, many are now accepting credit cards due to the simplicity of smart phones and apps by Square and PayPal.

Before you start negotiating the final price, ask if they accept credit cards…if that is all you have with which to pay. This might save everybody some time and trouble. Don’t be upset if they say yes but also tack on an extra 2% or 3% to cover the fee charged by the credit card company. Some deals run the profit margin pretty thin, and it is fair to pay the processing fee.

1265 Pelikan 400NNTo negotiate a deal well, it helps to be well informed about the pen you are buying and its current prices. Be sure to highlight any flaws in the pen and make an offer that is fair and realistic. Don’t be afraid to walk away from a deal that is still too high for you. Yet, don’t be afraid to accept a counter offer that is reasonable, especially if you received good customer service.

Many vendors don’t put prices on their pens. Some of them like to game you a bit to see how much you are willing to pay. Let’s say you’re looking at an aerometric Parker 51 in black with a lustraloy cap. You ask how much, and the vendor replies $100. It’s okay to smile, say thanks and put it back down. Unless it has something rare like a stub nib or some other uncommon feature, he or she will likely counter, “Well how much were you hoping it would be?” You can honestly say–because you know there are 3 bajillion black 51s in the world–that you were hoping for around $50. The vendor will likely acquiesce with something like, “Well, I can do $55.”

Feel free to ask vendors lots of questions, BUT understand that they might expect you to buy something if you take up too much of their time. If you have tons of questions, but aren’t ready to buy, save them until you are with a vendor whose pens you will be buying or until the show slows down and the vendor has more free time to talk.

And, of course, if you do get a cranky vendor who doesn’t treat you as you feel you should be treated, just move on to the next. There are often well over 100 vendors at most shows, and somebody nice will likely have just what you’re looking for.

Have fun!

Atlanta Pen Show 2016: Final Analysis

Wow! What a show this year in Atlanta! Tons of pen lovers, just as many young as old, all sharing in the inky goodness!

We had a heck-of-a-time. It was so much fun seeing our old friends like the great Texas pen trader Joe Lowe and making many new friends. And there was so much to learn.

I loved finding these great pens at the Atlanta Pen Show in 2016: a Pelikan 800, a Dunn Pen and a Twsbi Eco. Each is an absolute treat with which to write.

I loved finding these great pens at the Atlanta Pen Show in 2016: a Pelikan 800, a Dunn Pen and a Twsbi Eco. Each is an absolute treat with which to write.

My table neighbors were The Southern Scribe, Rick Horne, and An Tran, who has more pens than any 7 people I know. Both were as personable and fun to talk to as ever. Rick shared tons of great stories and advice that will help immensely as we move forward as a business and repair hub.

The pens this year at the show were unbelievable. For our own pleasure we picked up an incredible bargain on this “burnt orange” Pelikan 800, which I’ve been coveting since its release. From Rick, I bought this incredible–fully restored–Dunn Pen with a pump filler. As many of you know, I got into pens partly because of my love of obscure filling systems. This Dunn needs to be pumped 20 or 30 times like a bicycle pump to get a full fill. Awesome 1920s tech at work.

And my last little find is a Twsbi Eco. To be perfectly honest, I’ve been a bit of a snob with regard to these new-fangled cheap pens out of Asia. Well, now that I’ve used one, I’m hooked. It has a 1.1mm nib that writes exceedingly well for a steel nib and is just plain fun to play with. That crystal clear barrel with Adventurine green ink…too cool. I’m sold.

All three days of the show were packed with trading and stories. I wasn’t sure I was going to survive that first day, as I was running on no sleep for 36 hours. Work, packing, early flight, pen show…. I almost fell asleep during the Friday night cookout. I barely made it back to my room before collapsing and sleeping the sleep of the dead until sunrise. Although I missed some good cigars and drinks, every ounce of sleep was wonderful.

And now it is time to unpack, repair at least 50 more pens and pack up for our home show next week in Chicago! Can’t wait to see you at the 2016 Chicago Pen Show.

When Nipples Go Bad…Section Nipples, That Is

Once in a rare while, I find that the section of a pen has lost its nipple to attach an ink sac. Sometimes, an old nipple is just too heavily damaged to patch together or seat a bladder. On the vintage Wahl fountain pen below from the 1920s, the nipple actually was still attached to the remnants of the old ink sac but cleanly detached from the section.

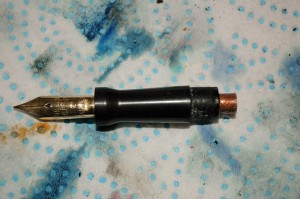
A piece of copper tubing has been fit into a vintage fountain pen section to serve as a nipple, to which you can attach a fresh ink sac.

A piece of copper tubing has been fit into a vintage fountain pen section to serve as a nipple, to which you can attach a fresh ink sac.

As Wahl sections from the 1920s aren’t easy replacement parts to find, I find it is best to jury rig a solution. This means it is time for a trip to McDonald’s or the local hardware store.

I have used a variety of objects such as straws (from McDonald’s) to metal pipes over the years. All it needs to be is strong enough to hold a shellacked ink sac.

In this case, the hardware store had a small copper pipe that fit perfectly. Luckily for the pen, the section hole was deep enough to accommodate the inkfeed at proper depth while allowing enough room for the  pipe to hold tight. If the feed rested above the hole, then I would have been out of luck.

To get started, use a rotary tool or hacksaw to cut the pipe to the proper length. Use said rotary tool or some heavy sand paper to smooth the newly cut piece. This keeps it from not fitting or from leaving sharp pieces to hurt the ink sac. Remember to keep the replacement nipple fairly short to avoid it coming into contact with the inner pressure bar or spring. If it is too long, it might trap the filling mechanism and not allow you to fill the pen.

Coat the outside of the tube with some rubber cement, before setting it down in the section. This will seal the microscopic gap between the section and tube if you have a good fit. Plus, rubber cement won’t harm the plastic or hard rubber. Nor will it stick so tightly that you cannot remove the new nipple for any reason.

Make sure no rubber cement is clogging the inkfeed channel, preventing you from using the pen you have worked so hard to restore.

After everything is clear, use a little more rubber cement to affix the new ink sac. As long as you keep the pen away from heat, which you should always do anyway, the rubber cement makes for a good seal for the bladder. Until orange shellac became more available to pen collectors in recent years, rubber cement had been the go-to sealant for putting on new ink sacs. As I wasn’t sure how much I could trust the shellac between metal and rubber surfaces, I went with the old standby that I knew I could trust.

Upon completing this. let everything set and dry for 24-hours. Test it with water or ink to make sure the seals are good. If the pen goes for another 24-hours on its side without any leaks in the nipple, section or sac, you are good to go.

If the sac will fill but cannot retain any fluid, then there is an air leak you will need to find and seal. It might be a well hidden hairline crack elsewhere in the section. It also could be a hole in the ink sac, which is unlikely. Mostly it will be a gap somewhere between the section and the new nipple.

Once everything is tested and holding, put the rest of the pen together as you would any other repair job.

SPECIAL REMINDER: DO NOT force a piece of metal tubing into the remaining hole. Metal tubes are stronger than old hard rubber or plastic. It will crack your remaining part if forced into place.. If that happens, it is time to find a new pen to work on. Be careful.

Painting A Parker Vacumatic Blue Diamond

Use Testor's paints to fill in the blue diamond of your Parker Vacumatic clips. Some clips have old paint that tells how dark you should repaint it. Testor's 1111 Dark Blue paint is good for darker blue diamonds and 1110 is good for lighter blue diamonds. I used the 1110 Blue on the Vac Major you see in this photo. Also shown is a toothpick I use for the painting process.

Use Testors paints to fill in the blue diamond of your Parker Vacumatic clips. Some clips have old paint that tells how dark you should repaint it. Testors 1111 Dark Blue paint is good for darker blue diamonds and 1110 Blue is good for lighter blue diamonds. I used the 1110 Blue on the Vac Major you see in this photo. Also shown is a toothpick I use for the painting process.

You have successfully put a new diaphragm into your Parker Vacumatic. The celluloid and gold trim gleam from expert polishing. Now, how do you go about making the finishing touch and repainting the old blue diamond in the clip?

Some clips still have their enamel…or at least some of it. Most these days, do not have it.

Some purists say you should never paint in the blue diamond. Other experts say it is no big deal.

Me, I like finishing the look of the pen as close to factory fresh as I can make it. If you have an ultra rare model with partial paint, perhaps you should leave it as is. But for most of the working pens I deal with, fresh paint won’t effect the value.

The big trick is finding the right color paint to get the blue diamond as close to accurate as possible.

Having spent all of my teen years as an avid model airplane builder, I ran straight to the nearest hobby shop to turn to trusty Testors paints. I took a handful of clips with me and began comparing and contrasting the paint options.

That is when I noticed not all blue diamonds in the Parker Vacumatic clips were the same. Some were lighter and some were darker blue. I let the remnant paint/enamel in the old diamond guide me. I finally settled on two Testors blue paints from their myriad shades.

If you look on the bar code sticker on the back of the paint bottle, you will notice the name of the color and a number. That color number should be universal in any Testors paint display.

For the lighter blue diamonds, I found that the 1110 Blue by Testors is a near perfect match. The next shade darker  is the 1111 Dark Blue, which is a near perfect match for the darker blue diamonds. It sounds intuitive, but there are so many blues from which to pick.

Painting the diamond takes a steady hand and only a teeny-tiny amount paint. You can use a single-hair brush, but I find I prefer using a toothpick that I’ve whittled to an extra-fine point.

Dab in the paint until you have filled in the diamond. Use a magnifying glass to make sure you have filled in the corners. There is bound to be some spillage outside the raised lines of the diamond. I try to clean it up with the dry edges of the toothpick by rubbing a clean, dry edge of the toothpick along the edge of the diamond. If the paint gets down into the feathers of the arrow logo, a little paint thinner on a Q-tip can help get it out before it sets. Remember to make sure the Q-tip is not sopping wet with thinner, as spilling the thinner into the wet paint of the diamond can mess things up, too.

Best of luck on painting your diamonds blue!