Tag Archives: vintage pens

Parker Pen Heists

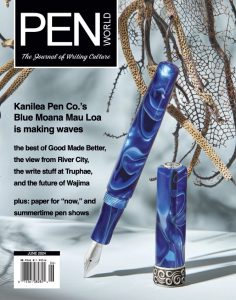
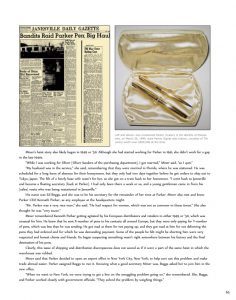
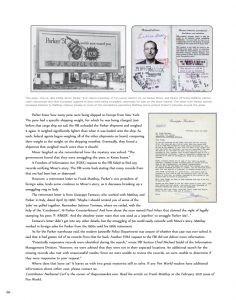
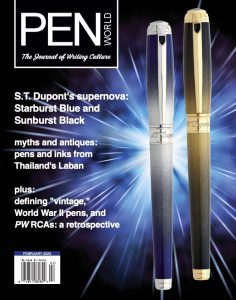
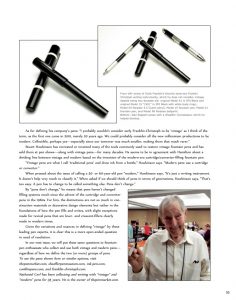
It has been a little while, but I have a new story in Pen World Magazine! In it I uncover not one but TWO pen heists that targeted the Parker Pen Co. in the late 1940s. This story is reproduced here with permission from Pen World. Please click on the individual images to see the story close-up. Please also use the QR code at the end to subscribe to Pen World Magazine.


How Do I Restore a Sheaffer TouchDown

Fixing a Sheaffer TouchDown filler can be easy with a little practice. Personally, I love the functionality and simplicity of the design that uses pneumatics to collapse an ink sac and allow its natural vacuum to draw ink back into the pen.
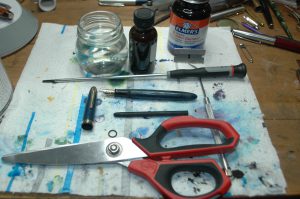
Most of what you need to fix a Sheaffer TouchDown filler is right here in this photo.

In the first photo, you will see almost all that you need to restore a Sheaffer TouchDown filler. We forgot to include a bottle of “Super Lube: O-Ring Silicon Lubricant.” In case you have trouble seeing the photo, you will need: a Sheaffer TouchDown-filling pen, a long-shaft flathead screwdriver, dental pick, scissors, razor blade, a size 15 latex rubber ink sac, an O-ring, sac shellac, rubber cement and jar of room-tempeture water. A couple of Q-tips, paper towels, corn starch and a wooden dowel might also be useful.

To get started, unscrew the cap from the fountain pen, and stick the pen nib first in water. You do not want to soak the entire pen in water, just up to the division between the section (finger-grip part) and the blue barrel of this pen. Let it soak for anywhere from an hour to overnight. This leaches out most of the old ink and softens any possible glue a past repairer might have used to secure the threaded section to the barrel.

Once the pen is finished soaking, dry it off with a tissue or paper towel. Frequently these pens can unscrew without any assistance from section pliers. Grip the section (finger grip) between your thumb and forefinger on one hand and the barrel with your other hand. Unscrew the section with a steady, gentle pressure counterclockwise (lefty loosey.)

When the section unscrews, you will see the “sac protector” and inner remains of the ink sac come out with the section. The sac protector is friction fit, and you can remove it simply by pulling straight back. Some times the old ink sac has petrified and stays on the section nipple. Sometimes it is in pieces inside the sac protector. Sometimes the old sac has melted to the inside of the sac protector. The first two scenarios are very easy to manage. The melted sac takes a long time to remove. Q-tips, wooden dowels or anything else you can use to safely scrape the inside of the sac protector clean will help. It is very important to remove all the debris from inside the sac protector to allow the new sac to slide in and operate properly.
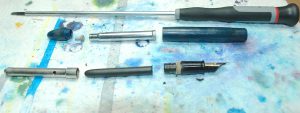
This photo shows a complete disassembled Sheaffer TouchDown pen.

After you have finished with the sac protector, unscrew the blindcap on the tail of the pen barrel and, if possible, pull the blind cap back as far as it will go. (Don’t force it if it is frozen inside the pen.) Now take the long-shaft flathead screwdriver and ease it up the barrel until you can feel the screw at the end of the barrel and metal tube. Turn the screwdriver slowly until you feel it find the slot of the screw. Hold the blind cap tightly with one hand and gently unscrew the screw to the left. You will feel the screw come free. It seems easiest to let gravity help it fall out on to your work bench. With some gentle pressure, the plastic blind cap will pop off the metal tube. Next, you push the tube back down and out the section-end of the barrel.

Until you get used to it, the trickiest part of the restoration is replacing the latex-rubber O-ring in the blindcap-end of the barrel. You can see the black O-ring imbedded in a groove of the barrel in this photo. If you are lucky, the O-ring will still have a little pliability and it will come right out with the help of the dental pick. If you are unlucky, the O-ring will have petrified, and you’ll have to carefully dig it out little piece by little piece.

Once the old O-ring is out, you might want to use a Q-tip to clean out any dirt in that end of the barrel. The barrel on TouchDowns are often still quite clean, and cleaning it with a Q-tip might not be necessary.
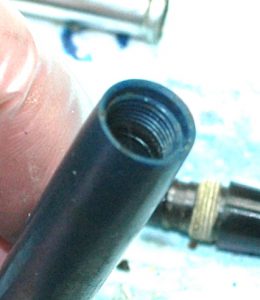
You can see the old O-ring inside this Sheaffer TouchDown barrel. Use a dental pick to carefully remove the old O-ring.

Sheaffer TouchDown fountain pens used one of two different size O-rings. Most pen-part suppliers list them as either a “small O-ring” or a “large O-ring.” Large O-rings were only used in first-year Sheaffer TouchDowns (1948), which have noticeably thicker barrels than the remaining “Thin Model” TouchDowns (1949-1952), which use small O-rings. If you ever feel like dabbling in Sheaffer Snorkels, the large O-rings are also used on PFMs and Snorkel Desk Pens.

I find it is easiest to place the new O-ring into its groove with the dental pick. I fold the O-ring a little and insert it into the blind-cap opening. Then I use the dental pick to carefully get one side of the O-ring into the groove. If all goes well, I use the dental pick to drag the opposite end of the O-ring into the groove. With two-points in the groove, I go the next high point of the sack and work it into the groove. Once that is accomplished, I try to get the last high point of the O-ring into the groove. It sounds easy, but it takes some practice to do it quickly. NEVER lube the O-ring before trying to install it. A slippery O-ring will make your life miserable.

Now it is time to start reassembling the barrel apparatus. Clean off the metal tube you had to unscrew from the blind cap with a paper towel to get any old shmutz off. Then drop the screw threads-first down the tube. Use the screwdriver to help find the tube’s hole for the screw. Leave the screwdriver in the tube slotted into the screw. Put a thin layer of silicon O-ring lube around the shoulder of the tube on the screw-end of the tube. Then insert the screw and tube, screw first, into the section hole of the barrel and gently glide it with the screwdriver all the way through the blind-cap side’s hole in the barrel until the tube won’t go any farther. Rest the barrel and tube on its side with the screwdriver still slotted into the screw.

Take the plastic blind cap and fill its cup with rubber cement. (There should be a rubber washer in there, but often it is blown and the rubber cement acts as a sealant that can replace it.) You might find a way that works better for you, but I hold the blind cap with the rubber cement in my left hand and pick up the barrel assembly by the screwdriver with my right hand. It gets a little messy, but I then screw the screw into the blindcap. You know you have found the screw hole in the blind cap when you see the tube going into the blind cap’s cup and rubber cement starts smooshing out. It is important to make sure the screw is in tightly, but you have to be very careful not to overtighten the screw because it can split the blind cap in half and make it useless for the necessary air seal to make the filler work. It is important for the tube to be extended all the way to prevent the rubber cement from getting into the O-ring. Wipe the excess rubber cement off with a paper towel. Now you can work the tube back and forth to spread the silicon lube around the O-ring and get smooth operation from the barrel assembly.
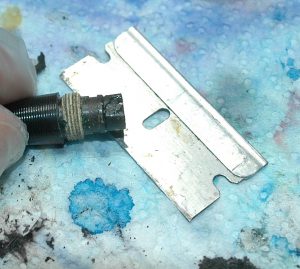
Here you can see where the hardened ink sac has been scraped off to reveal the nipple underneath.

Getting back to the section assembly part of the pen, take the razor and clean the usually hardened old ink sac off the nipple of the section. Be very careful not to accidentally chip off a piece of the nipple. That will ruin your pen. Some people will insist you need to give the nib assembly a sonic cleaning at this point, but if you soaked it long enough, you likely already removed most of the old ink.

To move forward, you need to trim your ink sac to fit perfectly into the sac protector. I don’t have a definitive way to do this. I usually stick the sac (closed end first) in the sac protector, pinch it at large opening of the sac protector, pull out the sac from the protector while maintaining the pinch and then trim it with scissors. Make sure the nipple on the section is dry. Put the sac on the nipple and then put the ink sac protector over the sac to see how well it fits. If the sac is a shade too long, trim it just a bit more. If the sac is a millimeter or so short, that is perfectly fine. Remove the sac protector and then ink sac. Paint a thin layer of sac shellac on the nipple of the section and then replace the properly trimmed ink sac. Wipe off the excess shellac and let the assemble dry for a few minutes. Next rub down the ink sac with pure talcum powder (old skool and potentially cancerous, as talc is mined with naturally occurring asbestos) or corn starch. The corn starch (or death talc) helps preserve the rubber. Snap the sac protector into place over the sac.

Final assembly is easy. Screw the section back into the barrel in a clockwise (righty tighty) fashion. Some old manuals say that you should put rubber cement on the threads (you can see the remains of old rubber cement on the starting photos) to help seal the barrel, but it isn’t necessary and only gives future restorers a bigger headache. The threads seal the section and barrel nicely on their own.

At this point, you have a pen that is ready to write. I, generally, give the pen 24 hours to let the shellac set completely. Then I test it with water, flushing out any remaining old ink while making sure it fills properly.
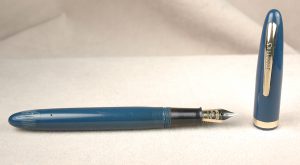
If you want it to looks its best, you can do a wet sanding that will remove a thin layer of the plastic, removing most surface scratches and stains. It also can enhance the color a bit. Unfortunately, it also makes the remaining imprint shallower or removes it entirely, which is a reason to be judicious in deciding which pens to wet sand. Yet, how to wet sand a pen is worthy of an article on to itself.

When Pelikan Tried to Level Up

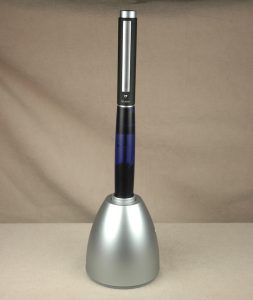
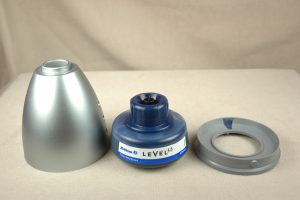
Here stands a blue Pelikan Level 5 fountain pen in its inkwell egg filling unit.

The number one thing that attracts me to fountain pens and their history is all the many unique filling systems. One of the last great attempts at making a unique new filling system was the Pelikan Level system for its Level 65 and Level 5 pens.

Made between 1995 and 2001, the Pelikan Level pens held up to 4 milliliters of ink–more ink than just about any pen on the market.

The key to the whole operation was a valve system within the pen and a specialized ink bottle that engaged the valve assembly in the tail of the pen. There are two reservoirs within the pen. One chamber near the nib holds the ink used for writing, and the larger chamber holds the reserve ink.

Filling the pen should be easy, but it gets complex in a hurry. You turn the silvery tail piece on the pen until one engraved dot lines up over a dot on the barrel, while the pen is nib down. You engage the egg (which holds the ink bottle) by pushing down on the tail of the pen. In theory this is supposed to squirt ink into the reserve chamber of the pen. In practice with our own pen, we had to take the ink bottle out of the egg and try squirting ink into the pen, which only seemed to do one or two drops at a time. Once the chamber is full, you turn the silvery tail piece until a triangle appears over the barrel dot. This opens the chamber to the writing ink chamber, allowing ink to drop in from the reserve. This sometimes needed a couple shakes. Then you could realign the dots and top off the reserve chamber, if you wanted.

Disassembling the ink unit and pen stand is easy. Notice the special nozzle on top of the plastic bottle of ink.

On paper, it is a brilliant system and design. In practice, it is a little more challenging than necessary. One could easily forgive the challenge, if the pen wrote well. On the pen I bought, the steel nib was delightfully smooth. Unfortunately, I found I could only write about 3/4ths of a page before the flow of ink through the feed got disrupted. At that point, it became a battle to write with until the pen was given time to rest on its side or nib down so that the air exchange could complete and restore ink to the nib.

The Pelikan Level 65 started life as a student pen with the Level 5 for nonstudents following a couple years later. Since the pens were discontinued in 2001, Pelikan no longer makes the specialty ink bottles required for filling the pens. If you have an ultra fine syringe, you can fill the pens with that, but otherwise you are out of luck.

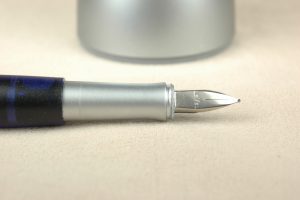
A close-up view of the Pelikan Level 5’s steel nib and section.

If you love constantly changing ink colors, as so many of us do, it is nearly impossible to clean these pens out without completely disassembling the pen, which it was never really designed for. I have yet to verify this, but rumor has it that Pelikan only made blue and black inks for this pen, anyway.

In the final breakdown, I love this pen and filling system for my curio cabinet of horrors. However, the one I own certainly doesn’t live up the to practical writing capacity and flawless functionality I have come to trust and love in the overall Pelikan brand.

A Nib by Any Other Number…Is Still Confusing

Even for experienced professionals, it is really difficult to gauge a nib by its number. We get calls and e-mail with some regularity asking for a nib of a certain number. The trouble is, we often aren’t sure what the customer really wants. If the nib brand isn’t specified it can be a really challenging to know what is really desired.

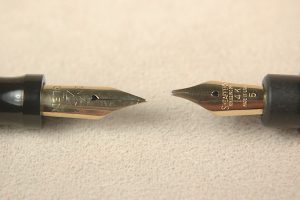
A number on a nib doesn’t always mean what it seems to mean. Here a #4 is larger than a #5.

Take this 14k gold Conklin #4 and 14k gold Sheaffer #5 for example. It is often assumed that nibs always followed a standardized system of sizing. After all, that would make the most sense. Unfortunately, especially in the golden era of vintage pens, many of the companies sized their own brands differently from their competitors. The only thing that seems uniform is that within each brand a #0 or #1 nib was the smallest and the sizes could go up to 12 or higher, though many seemed to top out around 8. Here you have a Conklin #4 being larger than a Sheaffer #5.

The closest to a standard setter in the 1920s and ’30s might have been “Warranted” nibs. These were usually 14k gold nibs that were used by a wide variety of 2nd tier pen brands and repairmen looking to get a pen up-and-running, again, if they didn’t have the proper branded nib. In some ways, these were the JoWo or Bock nibs of their time.

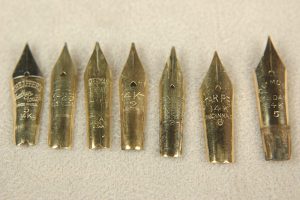
Nib sizes vary widely by brand in this photo.

Check out these nibs lined up together. From left to right: Sheaffer Feather Touch #5; Sheaffer 3-25; Waterman 2A; Unbranded #2; Mabie Todd #2; Star PE #6 and Diamond Medal #5. Note their lengths and widths in relation to their numbers and each other.

To size a nib properly, especially if it isn’t a branded nib, it is important to measure the nib. To do that, let’s discuss the anatomy of a nib. Let us start with the writing tip, which usually has a special tipping material to keep the nib from deforming with a lot of writing. The tip grows into the two (or three for music nibs) tines. The breather hole allows for the exchange of air and ink inside the pen, helping to facilitate ink flow. Usually the breather hole is centered at the widest part of the nib known as its shoulders. As the nib tapers down to its tail, that part is known as the body of the nib.

Here are 3 more numbered nibs muddying the waters of size referencing. The 6 is a little bigger than the 3, but it is definitely smaller than a JoWo 6, which I didn’t have in time for this article.

If you are looking for a good replacement nib, measure the length of your nib from tip to tail. (It is easier in centimeters and milimeters than 32nds and 64ths.) Then measure the shoulder. These two measurements will get you pretty close. Probably close enough in 90% of cases. Yet there is one last  bit to account for, which is the width of the gold. As the technology improved nibs got stamped thinner and thinner. It is easy to feel the difference between a 1920s Sheaffer Lifetime and a 1950s Sheaffer Snorkel nib of open design.

This brings us to some of the more confusing numbers on nibs. Earlier you saw a photo of a Sheaffer 3-25 nib. Although most 3-25 nibs are the same general size, that number referenced the price and warranty length of the pen from the date it was purchased: $3 and 25 years. You might also see Sheaffer 5-30 and 7-30 nibs. If you ever find a 7-30 nib, snatch it up. Those are pretty rare. It was a clever marketing tactic by Sheaffer. For an extra dollar, you got the Lifetime warranty pen. If someone back then could already afford the $7, they could afford $8. Yet, how many people really used their Lifetime pens for 30 years or more? That is a question I would love to know the answer to. I’m sure a few did, but, for many, pens were a fashion accessory and statement, as well as a useful tool.

Sheaffer Lifetime pens of the 1920s and ’30s had elaborate serial numbers, which had for more to do with fighting black-market pen dealing than tracking customer pens.

Showcasing the 1950s Sheaffer numbering system are two more nibs. M1 = Medium Steel Open Nib and F5 = Fine-Point, Two-Tone 14k gold Triumph Nib.

In the 1950s Sheaffer started an alphanumeric nib classification system, which was really quite inspired and gave a great deal of information about the nib. The first letter of the code was the point style: A = accountant (extra, extra razor-thin fine); B = Broad; F = Fine; G = Gregg Shorthand; M = Medium; S = Stub and X = Extra Fine. On hyper-rare occasions there could be two starting letters led by an F for flexible such as an FB5, as you will soon read.

The numbers that followed the first letter were: 1 = Steel Open Nib; 2 = Monotone 14k Gold Open Nib; 3 = Two-Tone 14k Gold Open Nib; 4 = Palladium Silver Triumph (conical) Nib; 5 = Two-Tone 14k Gold Triumph Nib and 6 = Palladium Silver Open Nib. And for those keeping score at home, the two-tone nibs were solid 14k gold with a decorative Palladium plating over about half the nib.

On rare occasions there was another letter that followed the number: L = Left Oblique and R = Right Oblique.

And there you have it. At the very least it is a start to understanding the numbers we see on nibs and what they might mean. I hope you found it to be helpful.

Apologies to a Parker 51

Time and again, I’ve mentioned the fountain pen that got me hooked into this crazy lifestyle. It was my mother’s father’s Sheaffer Balance Lifetime. Yet, I have another grandparental pen that never gets much publicity. It is a Parker 51 from my father’s side of the family.

This Parker 51 once belonged to either my father’s mother or father. I suspect it was Granddad’s, but either way it is a treasured keepsake.

The Parker 51 showed up in my life about 15 years after the Sheaffer. It was right around the year 2000. My father’s mother was getting sick and had to live with my parents. As they packed up her house, they discovered a Parker 51 in a desk drawer. They knew I liked old pens and sent it to me in Montana. At the time my collection was meager. My only other pens were a Sheaffer Imperial, a Rotring, a Waterman Phileas, Lamy Safari and Cross Townsend.

I recently pulled out the aforementioned 51 to write a letter and was struck by how little I knew about pens in 2000, when it showed up in my life. It would be several more years before I learned how to restore pens. I had never heard of a Parker 51. I had heard of Parker Duofolds because I had seen a modern Parker Duofold MacArthur Special Edition at Marshall Fields in Chicago. It was well out of my price range, and although its literature mentioned the original Duofolds, I assumed that none were left in existence! Honestly, I assumed that my Sheaffer was such a rare treasure that no other old-fashioned fountain pens could possibly exist. Good Lord, when I saw that modern Duofold in 1994, I was 18, and my 60-year-old pen might well have been what the dinosaurs wrote with.

That’s how little I knew. The internet only barely existed. I didn’t know a single soul who liked fountain pens. My parents thought they were archaic and messy. My friends parents thought the same. My relatives thought the same. I had not stumbled into any of the early pen catalogs and mailing lists. Only bank presidents wrote with Montblanc 149s to show off. In my tiny world, I was the last hold out.

Enter the 51, and my ignorance was on full display. It still worked and had an Aerometric filler with a silicon (sorry, pli-glass) ink sac. I assumed it was some deranged promotional pen my grandmother must have gotten in the 1980s for one of her many charitable donations. It didn’t look like a vintage pen to me. I didn’t know how to look for and understand a date code then. I didn’t know that the 51 was originally released in 1941 with the advertising stating that it was 10 years ahead of its time! The design certainly fooled me, as I thought it was from the 1980s. The date code that I now understand said it was made in 1950.

My paternal grandparents were both very formal people. The black barrel and lustraloy cap could have belonged to either of them, but as my grandmother was far more into flowery and feminine design, this pen, I now understand, was likely my grandfather’s.

My granddad, as he was called, died when I was only 8 or 9 years old. I never got to know him very well. He was always nice, but he was of a generation and upbringing that children were meant to be seen and not heard. He wasn’t the type of guy to romp around on the floor with me, but I don’t have any bad memories. As I grew up, I learned he had a business in professional sales in New York City. He was into electronics, fast cars, Broadway, a little bit of baseball and cocktail parties with witty conversation. As an adult, I’m surprised at how much we have in common, and I wish I could have known him as an adult. Our similarities baffle my own father, who wonder’s how his father’s tastes could have so completely skipped a generation.

My own father and I share the love of writing. My dad prefers ballpoints and typewriters to fountain pens and computers, but, hey, nobody’s perfect. All the same, I don’t think my grandfather likely wrote much besides orders, quite possibly on carbon copy paper. This might explain why the Parker 51 has such a firm extra-fine nib. The pen barely looked used when I got it. I suspect Granddad put it away as soon as he could get his hands on reliable ballpoint pens. I wonder if in the things left behind were a first or second-year Parker Jotter. I can see him zipping down the road in his much-beloved candy-apple red 1955 Ford Thunderbird and a Parker Jotter in his shirt pocket.

Of course, it would be nice to have that Thunderbird or any one of the myriad Lincoln Continentals that he drove over the years. I am very happy with his pen, but he sure had great taste in cars, too.

How Do I Start Collecting Pens: Why Are Some Pens More than Others?

A good friend recently asked me why some pens cost more than others. The cheeky, glib and true answer is supply and demand. But, it is more than that. Sometimes it is marketing. Sometimes its trends in the marketplace.

This is a “Big Red” senior Parker Duofold made of orange Permanite.

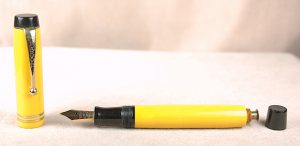
However, he was asking for something more specific. When looking at vintage pens, he saw wildly fluctuating prices for pens that looked almost the same to him. Why does the average super-famous senior Parker Duofold “Big Red” (orange) go for $100 or $200 and the average senior Parker Duofold in Mandarin Yellow go for $800 or $900?

Big Reds are pretty common, especially the later 1920s’ version made of “permanite.” Most vintage collections have several of these pens. Mandarin Yellow versions of the same pen are fairly rare. They didn’t make as many, and the material used to make the yellow turns very brittle with age. As such, a large percentage of the senior Mandarin Yellow Duofolds broke. Nevertheless, these are still beautiful pens, and their scarcity makes them all the more desirable. Senior-sized Duofolds cost the most back when they came out, so many people bought the smaller Junior and Lady Duofold models to save money. As such, collectors have chosen the rarer senior models to be the favorite, which is why junior and Lady Duofold versions of the pen in mandarin yellow sell for much less than the seniors.

Mandarin yellow was a much more fragile substance to make Parker Duofolds, and it didn’t age well. These Mandarin Duofolds are much more sought after because they are more scarce.

This also is a good place to demonstrate trends in the marketplace, too. I am writing this in October of 2022. Where as a reasonable price to pay for a senior Mandarin Parker Duofold is $800 to $900, five to seven years ago, these same pens were getting $1,200 to $1,500. These pens were in higher demand back then, and dealers couldn’t keep them in stock. The market has softened some since then. Why? 2 factors. 1.) Just about everybody who wanted one of these pens back then got one if they could afford it. 2.) Sadly, we are starting to see a passing of a generation of vintage pen collectors. There are more and more of these pens on the market, and younger generations of pen users and collectors are not as excited about vintage pens. ALSO, the younger generation is paying off insanely large sums of college debt and paying tons more for skyrocketing housing prices. In their hierarchy of stuff to pay for, a rare 100-year-old pen is not as pressing as next month’s rent or feeding a young family.

Staying in the Parker Duofold family, Senior Big Reds made of orange hard rubber are usually much more valuable than the more common and less fragile “permanite.” Streamlined Senior Parker Duofolds are rarer and tend to get more than the “traditional” flat-top designs. Pristine Lapis (blue) Senior Duofolds can command a lot more money due to the fact most Lapis Duofolds turned dark and nearly black in some cases. The same goes for the Pearl and Black Duofolds. They turned brown with discoloration. If you find a pristine one, those are going to get a lot more money. Another feature on a Parker Duofold that is highly regarded is the bandless senior Parker Duofold Big Red. These pens are also really hard to find. Most Duofolds had one, two or even three bands near the lip of the cap. The bands help to protect the cap when posting it on the tail of the pen. Bandless models weren’t common, and the caps often broke when people posted them. Soooo, many people will pay top dollar for a bandless senior Duofold.

We haven’t even left the Parker Duofold family, yet.

Flexible nibs, such as this Conklin #4 nib, are in high demand in 2022.

Flexible nibs are king right now. Everybody wants one, and so few pens came with flexible nibs over the years. All flex nib pens command top dollar. Basic Waterman 52s would sell for maybe $50 ten to fifteen years ago. Yet, many of their tiny #2 nibs have a little to a lot of flex, and these same pens now get between $100 and $150.

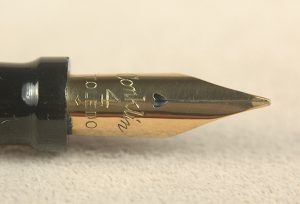
Conversely, one of the several Waterman pens that really draw big bucks are early 1920s Waterman #7 Pink pens. These were oversized…or close to it…. The distinguishing feature of these pens is a pink ring around the top of the cap AND the word “Pink” imprinted on the 14k gold nib. Waterman made these nibs specifically to be very flexible writers. All of the color-ring Waterman #7’s are fairly desirable, but Pink is the most sought. As such, these pens command much more money. You can probably find a Waterman 56 or 58 in black hard rubber from the same general time period for less…with the same basic flex nib…and save a bundle over the Pink.

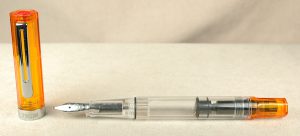
Apparently, even cheap TWISBI fountain pens made in China are falling down this pricing rabbit hole. You can buy most TWISBI Eco fountain pens for around $15 to $20 brand new. However, just the other day I saw a “limited edition” transparent orange cap TWISBI Eco sell at an auction for more than $230! It was a discontinued color that people love enough to get into a bidding war over.

Most TWISBI Eco fountain pens are pretty inexpensive but this rare color model goes for more than $200 on some auctions sites.

There are probably hundreds of vintage pens (and modern) such as these to ask these questions of, and so I shall revisit this topic and question from time to time to help sort out why some pens are so much more valuable than others.

Pen Books: Waterman Past & Present

Staring at a shelf full of pen books, it struck me that I ought to share with you some of what these great tomes have to offer. As such, I would like to start with a pen-collecting classic.

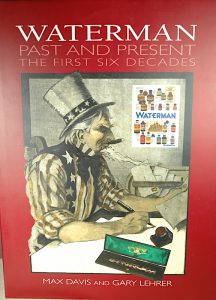
Here is the cover to “Waterman Past & Present,” a definitive guide to Waterman pens spanning 1883 to 1958. It is a great resource for identifying each model of Waterman pens.

“Waterman Past & Present: The First Six Decades” by authors Max Davis and Gary Lehrer.

If you are just getting into vintage pens and/or Waterman pens, this book is an absolute must. Most professional collectors and dealers I know still use this book as one of their favorite references to identify classic Waterman pens.

The book’s authors are among the most trusted dealers in vintage pens. Max Davis once owned a pen shop in New York City, before moving to Europe to start several very successful websites. According to the book, he contributes most of the European advertising for Waterman and most of the ink displayed in one chapter. The rest of the book was completed by renowned pen expert Gary Lehrer, whose personal Waterman collection was possibly second-to-none. He also created with his wife Myrna one of the most successful vintage pen catalogs online and in print. I had the good fortune to know Gary and Myrna on the pen show circuit, and I was very sorry to learn of Gary’s passing earlier this year. He was an honest, kind and hard working pen man who helped to build pen collecting into the hobby it is today. He also was an excellent pen repairman.

Published in 2008, “Waterman Past & Present” is a 236 page book. Hardbound and coffee-table book size, it sports full-color on almost all of its thick, quality paper pages. After a very brief history about Louis Edson Waterman and his pens from 1883 to 1958, there is very little writing in this book.

Instead, it is a feast of images from common Waterman pens to some of the only known remaining rare models. Most of the pen photos are printed at their actual size, with specific details called out to help differentiate between models that might look similar. Along with the photos of pens are clear, easy to read images of original Waterman catalog pages AND magazine advertisements. Additionally, many of the original bottles of Waterman ink are present.

The only thing missing from this book appears to be Waterman pencils. Some appear in the ads and catalog pages shown, but few are photographed or given much thought.

Nevertheless, this remains a phenomenal resource for identifying Waterman pens, and it is wonderful to be able to see real samples of some rare pens that you and I might never seen in real life.

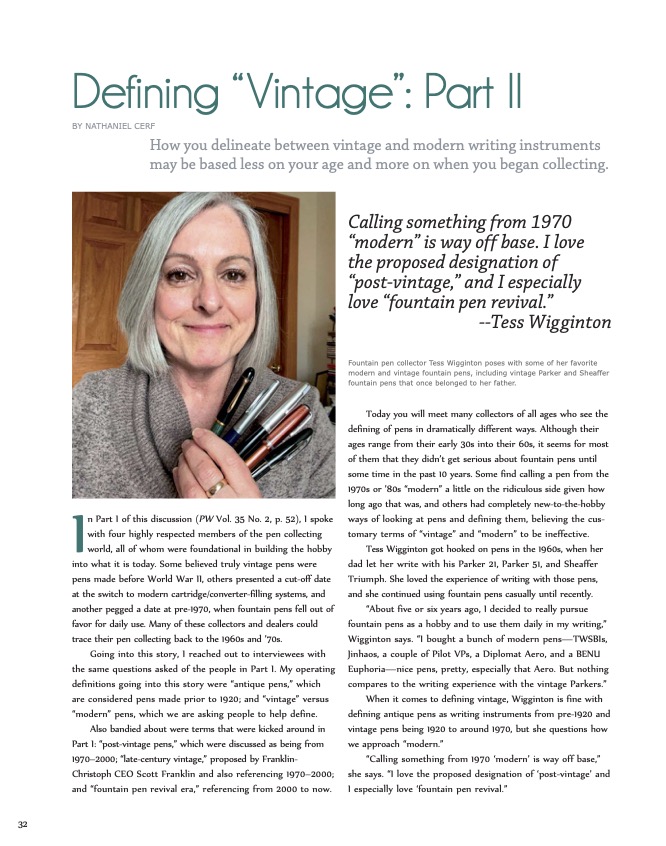
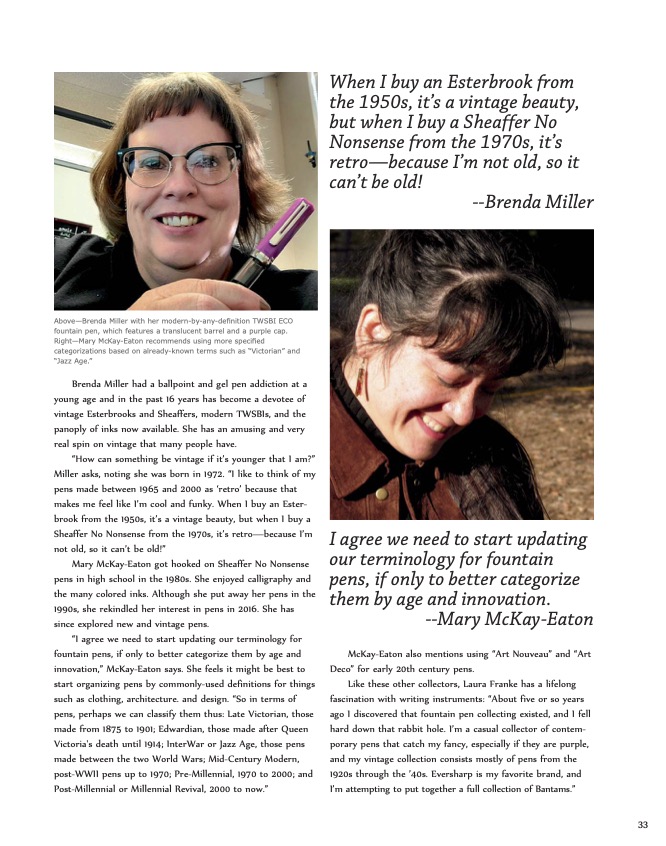
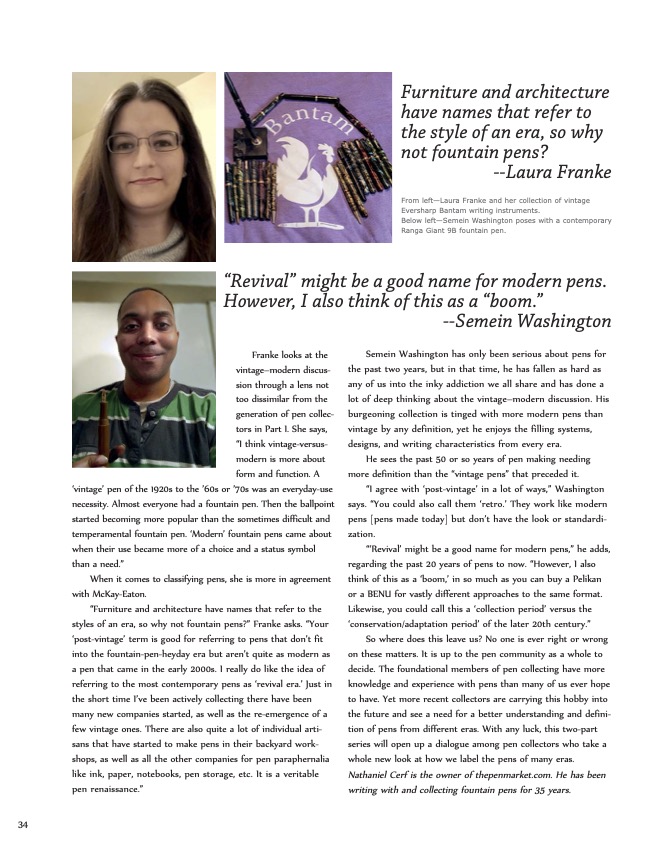
Pen World: Defining Vintage Part 2

The sequel to my story in Pen World Magazine is now on news stands. Click each photo to read each page of the story. We have permission to reprint it here from Pen World editor Nicky Pessaroff. Be sure to subscribe to Pen World to read this and many other great stories about pens.

Click the image to better read the story.

Click the image to better read the story.

Click the image to better read the story.

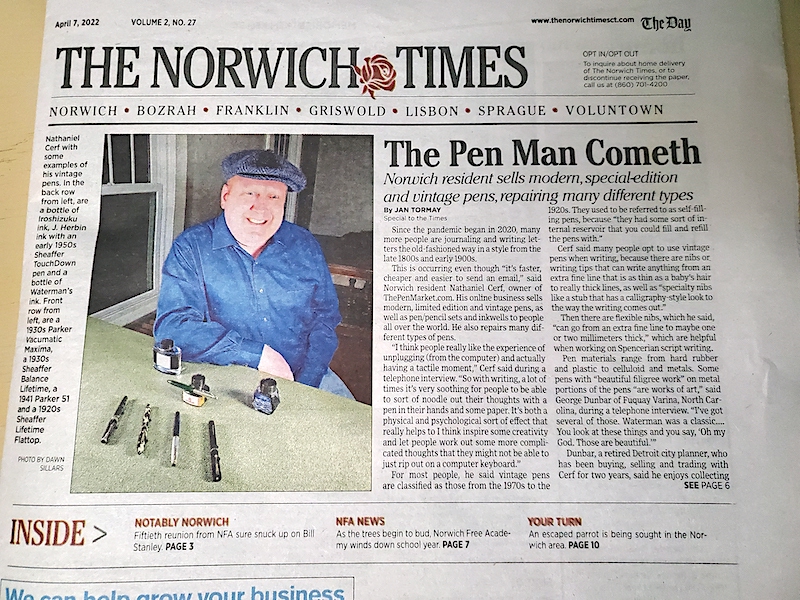
Front Page News

News about ThePenMarket.com is spreading. I was lucky enough to be honored by a front-page feature in The Norwich Times! We’ve been featured before in “Pen World” magazine. However, I think this is our first time in a newspaper. Check it out: https://www.theday.com/local-news/20220406/norwich-resident-specializes-in-modern-vintage-pens

ThePenMarket.com makes good front page news in The Norwich Times. It is such an honor to get a nice write-up in the local paper.

Pen World: Defining Vintage Part 1

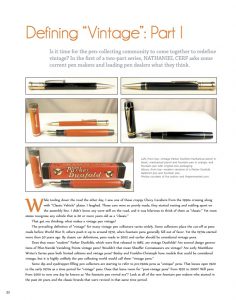
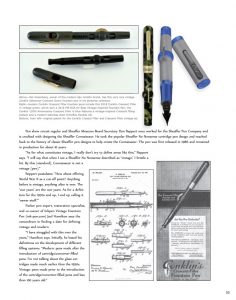
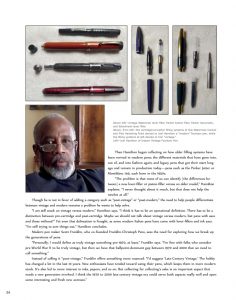
Just what is it that makes a pen vintage? Many people are asking that question these days. As time advances, are the old definitions of “vintage” and “modern” really holding up? My article in Pen World Magazine is the first of a two part series. In Part 1, I put the question to 4 legendary experts who helped to build the pen collecting hobby into what it is today. In part 2, I will put the same questions to a new generation of collectors and users. Yet, for now, here is Part 1, reprinted here with permission from Nicky Pessaroff, editor of Pen World Magazine.

To better read each page, click the individual images.