Tag Archives: #vintagepenrepair

How Do I Restore a Sheaffer TouchDown

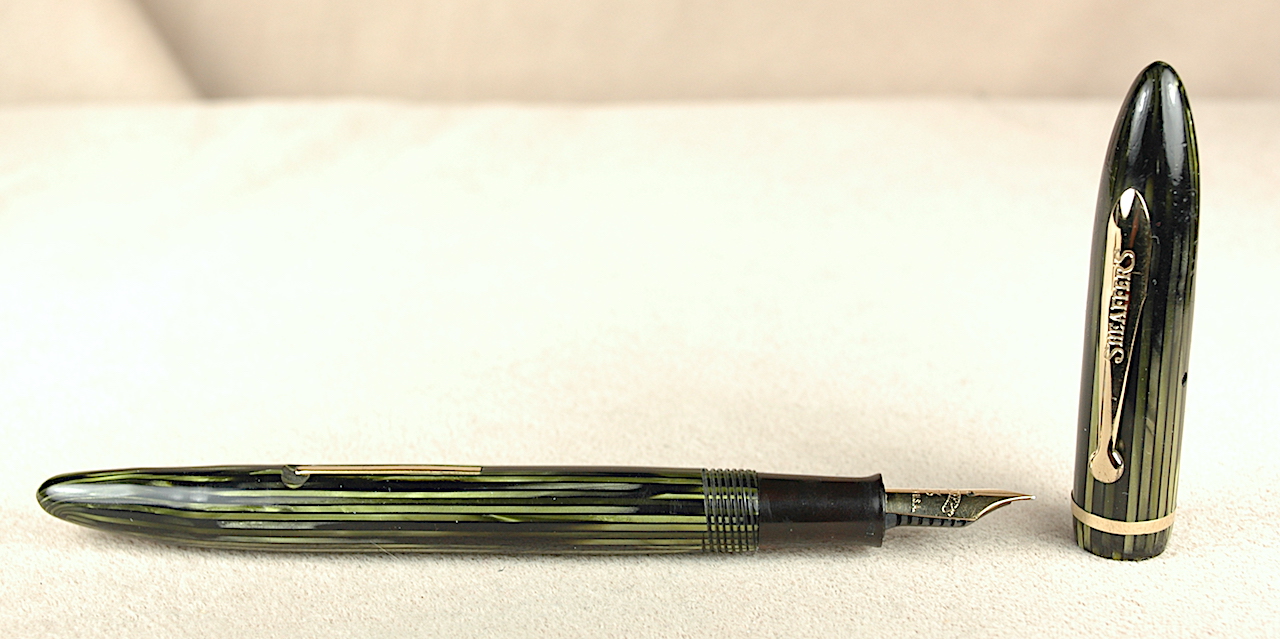
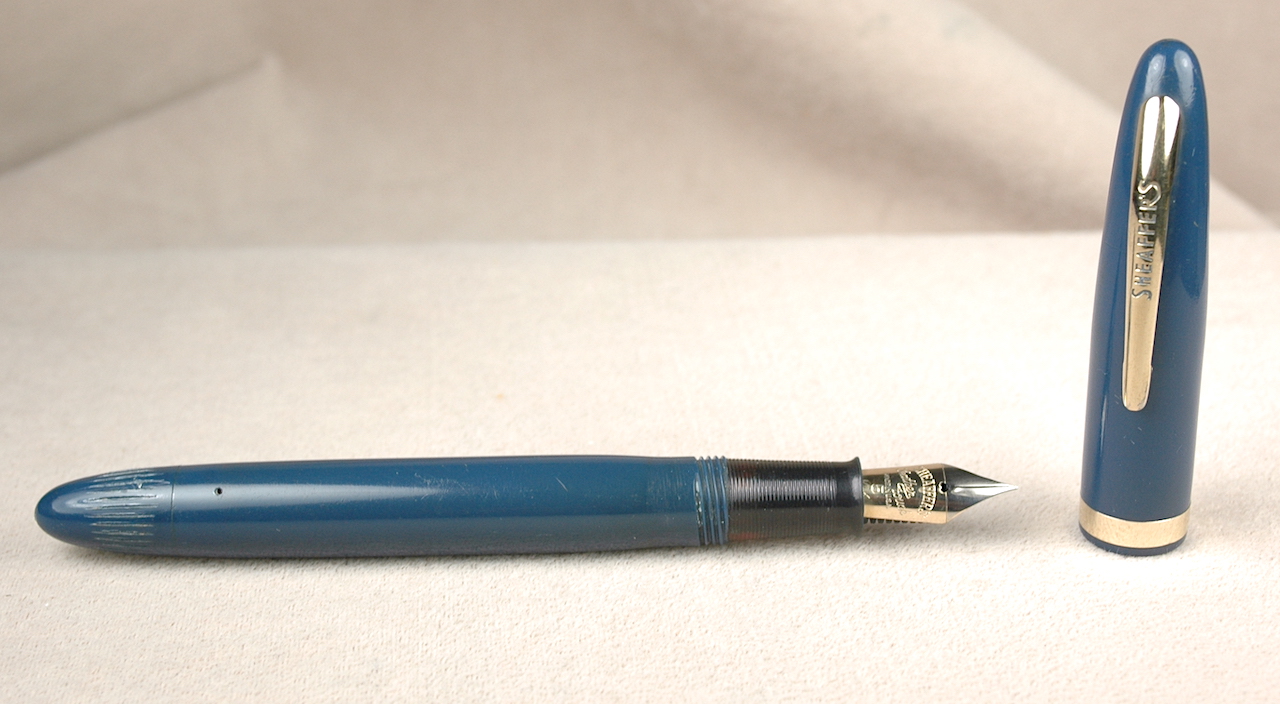
Fixing a Sheaffer TouchDown filler can be easy with a little practice. Personally, I love the functionality and simplicity of the design that uses pneumatics to collapse an ink sac and allow its natural vacuum to draw ink back into the pen.

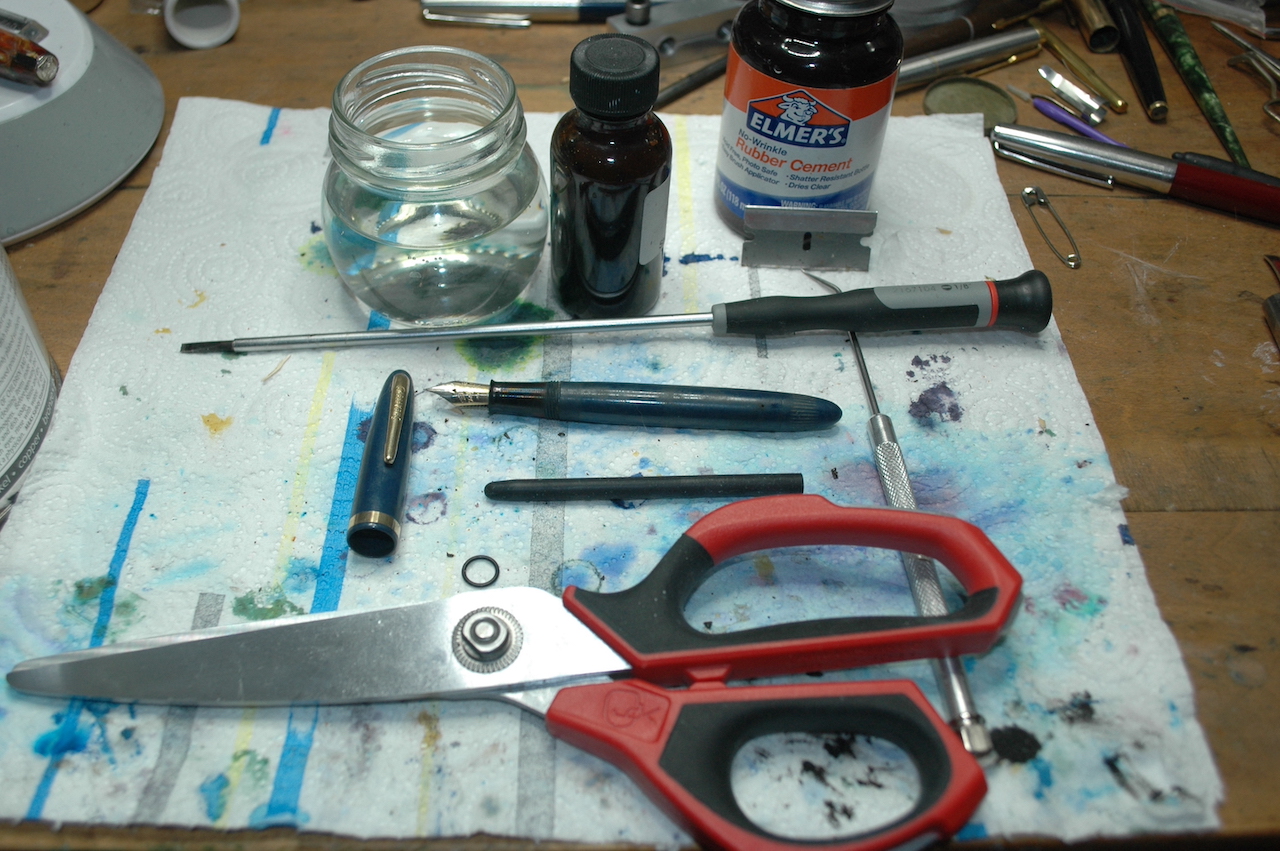
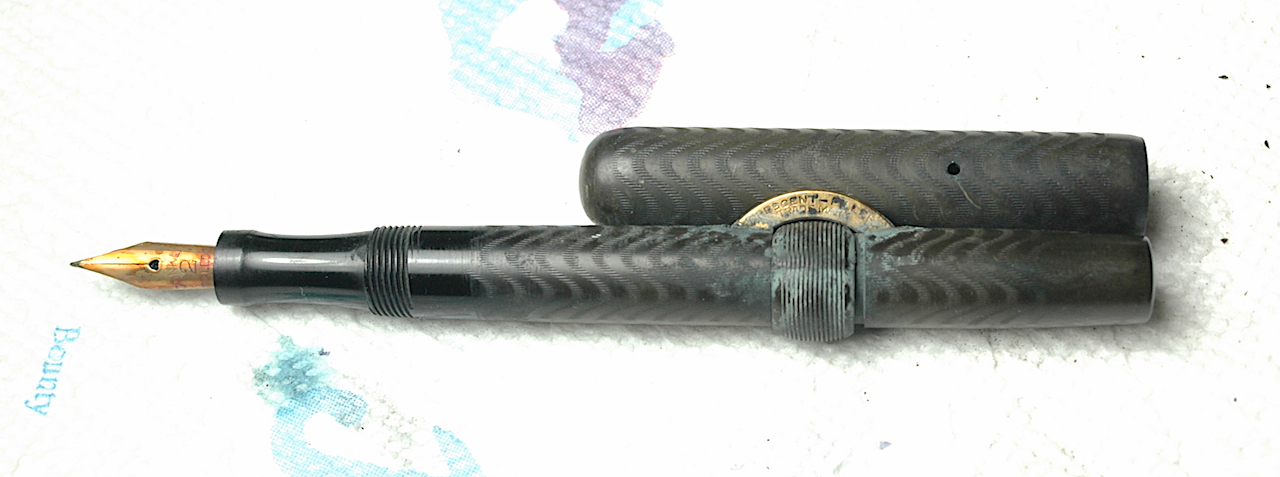
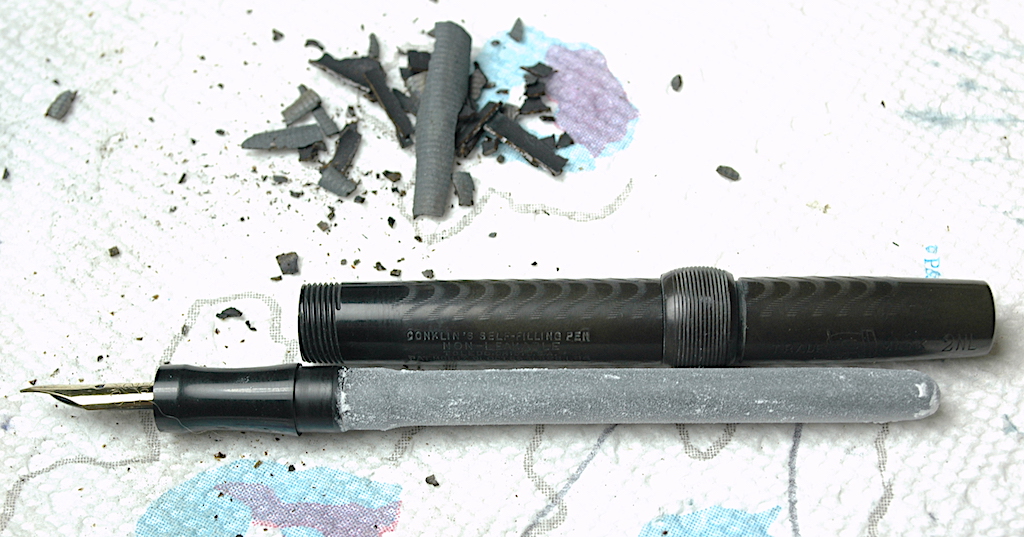
Most of what you need to fix a Sheaffer TouchDown filler is right here in this photo.

In the first photo, you will see almost all that you need to restore a Sheaffer TouchDown filler. We forgot to include a bottle of “Super Lube: O-Ring Silicon Lubricant.” In case you have trouble seeing the photo, you will need: a Sheaffer TouchDown-filling pen, a long-shaft flathead screwdriver, dental pick, scissors, razor blade, a size 15 latex rubber ink sac, an O-ring, sac shellac, rubber cement and jar of room-tempeture water. A couple of Q-tips, paper towels, corn starch and a wooden dowel might also be useful.

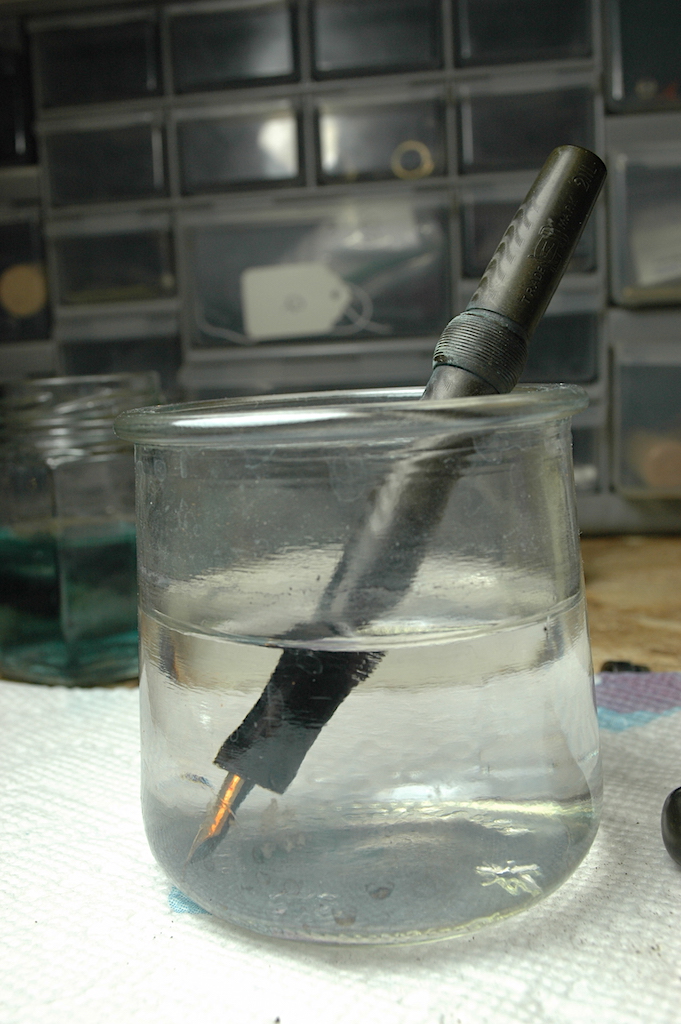
To get started, unscrew the cap from the fountain pen, and stick the pen nib first in water. You do not want to soak the entire pen in water, just up to the division between the section (finger-grip part) and the blue barrel of this pen. Let it soak for anywhere from an hour to overnight. This leaches out most of the old ink and softens any possible glue a past repairer might have used to secure the threaded section to the barrel.

Once the pen is finished soaking, dry it off with a tissue or paper towel. Frequently these pens can unscrew without any assistance from section pliers. Grip the section (finger grip) between your thumb and forefinger on one hand and the barrel with your other hand. Unscrew the section with a steady, gentle pressure counterclockwise (lefty loosey.)

When the section unscrews, you will see the “sac protector” and inner remains of the ink sac come out with the section. The sac protector is friction fit, and you can remove it simply by pulling straight back. Some times the old ink sac has petrified and stays on the section nipple. Sometimes it is in pieces inside the sac protector. Sometimes the old sac has melted to the inside of the sac protector. The first two scenarios are very easy to manage. The melted sac takes a long time to remove. Q-tips, wooden dowels or anything else you can use to safely scrape the inside of the sac protector clean will help. It is very important to remove all the debris from inside the sac protector to allow the new sac to slide in and operate properly.

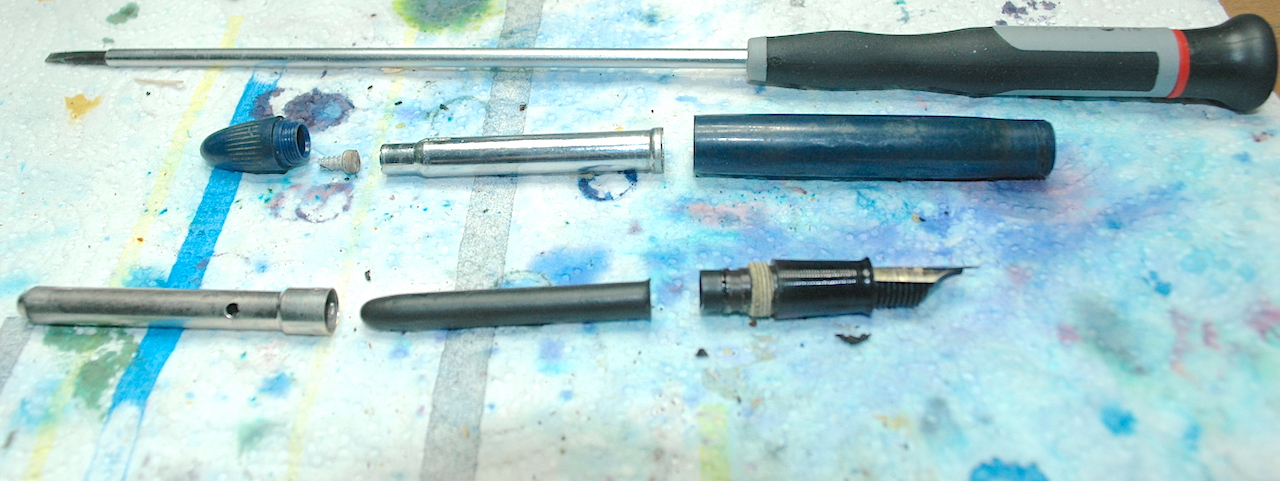
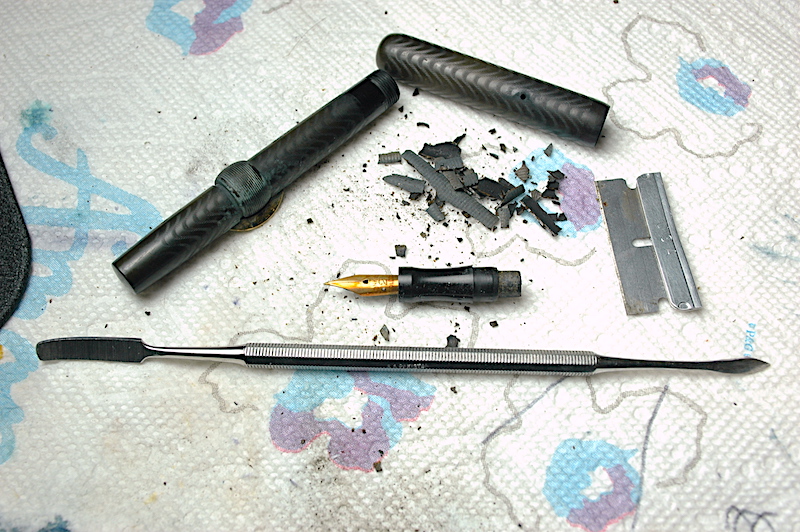
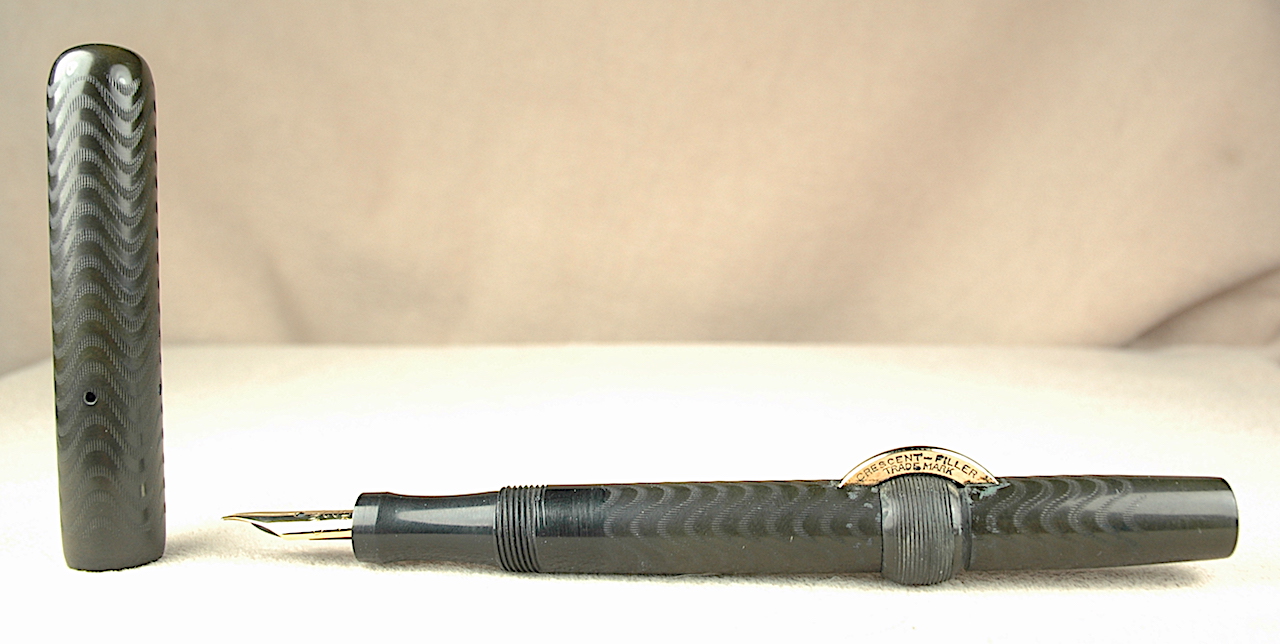
This photo shows a complete disassembled Sheaffer TouchDown pen.

After you have finished with the sac protector, unscrew the blindcap on the tail of the pen barrel and, if possible, pull the blind cap back as far as it will go. (Don’t force it if it is frozen inside the pen.) Now take the long-shaft flathead screwdriver and ease it up the barrel until you can feel the screw at the end of the barrel and metal tube. Turn the screwdriver slowly until you feel it find the slot of the screw. Hold the blind cap tightly with one hand and gently unscrew the screw to the left. You will feel the screw come free. It seems easiest to let gravity help it fall out on to your work bench. With some gentle pressure, the plastic blind cap will pop off the metal tube. Next, you push the tube back down and out the section-end of the barrel.

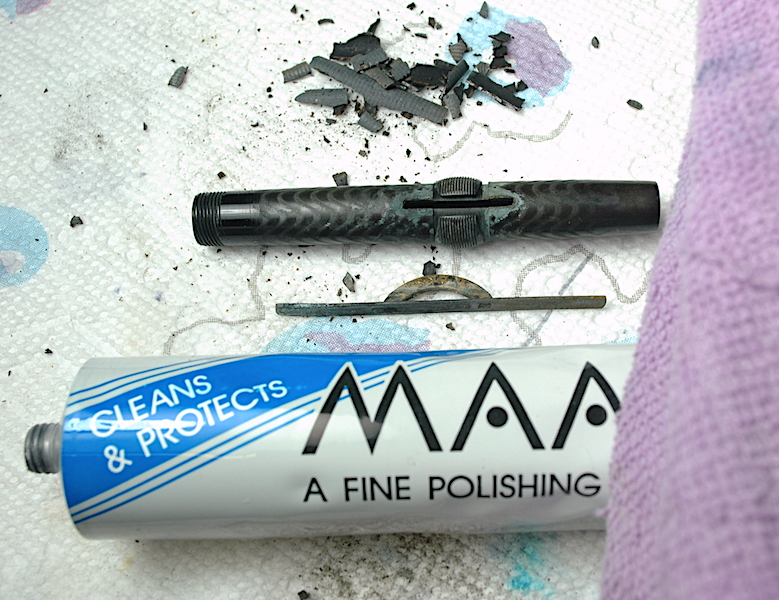
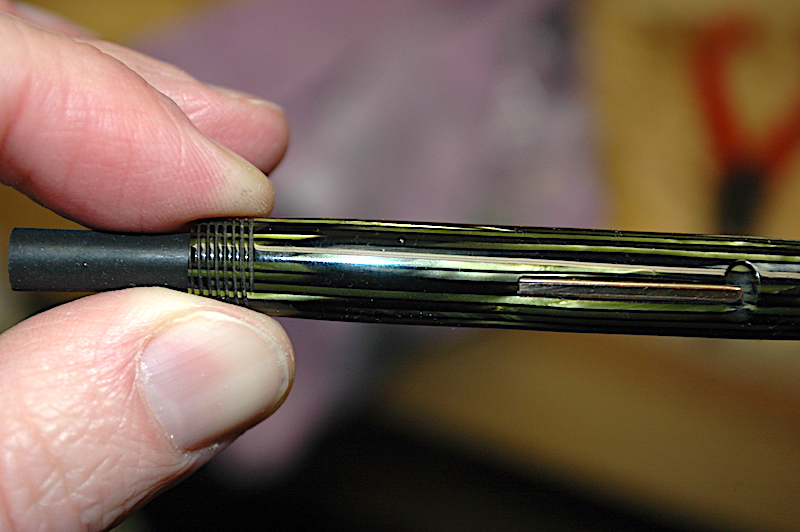
Until you get used to it, the trickiest part of the restoration is replacing the latex-rubber O-ring in the blindcap-end of the barrel. You can see the black O-ring imbedded in a groove of the barrel in this photo. If you are lucky, the O-ring will still have a little pliability and it will come right out with the help of the dental pick. If you are unlucky, the O-ring will have petrified, and you’ll have to carefully dig it out little piece by little piece.

Once the old O-ring is out, you might want to use a Q-tip to clean out any dirt in that end of the barrel. The barrel on TouchDowns are often still quite clean, and cleaning it with a Q-tip might not be necessary.

You can see the old O-ring inside this Sheaffer TouchDown barrel. Use a dental pick to carefully remove the old O-ring.

Sheaffer TouchDown fountain pens used one of two different size O-rings. Most pen-part suppliers list them as either a “small O-ring” or a “large O-ring.” Large O-rings were only used in first-year Sheaffer TouchDowns (1948), which have noticeably thicker barrels than the remaining “Thin Model” TouchDowns (1949-1952), which use small O-rings. If you ever feel like dabbling in Sheaffer Snorkels, the large O-rings are also used on PFMs and Snorkel Desk Pens.

I find it is easiest to place the new O-ring into its groove with the dental pick. I fold the O-ring a little and insert it into the blind-cap opening. Then I use the dental pick to carefully get one side of the O-ring into the groove. If all goes well, I use the dental pick to drag the opposite end of the O-ring into the groove. With two-points in the groove, I go the next high point of the sack and work it into the groove. Once that is accomplished, I try to get the last high point of the O-ring into the groove. It sounds easy, but it takes some practice to do it quickly. NEVER lube the O-ring before trying to install it. A slippery O-ring will make your life miserable.

Now it is time to start reassembling the barrel apparatus. Clean off the metal tube you had to unscrew from the blind cap with a paper towel to get any old shmutz off. Then drop the screw threads-first down the tube. Use the screwdriver to help find the tube’s hole for the screw. Leave the screwdriver in the tube slotted into the screw. Put a thin layer of silicon O-ring lube around the shoulder of the tube on the screw-end of the tube. Then insert the screw and tube, screw first, into the section hole of the barrel and gently glide it with the screwdriver all the way through the blind-cap side’s hole in the barrel until the tube won’t go any farther. Rest the barrel and tube on its side with the screwdriver still slotted into the screw.

Take the plastic blind cap and fill its cup with rubber cement. (There should be a rubber washer in there, but often it is blown and the rubber cement acts as a sealant that can replace it.) You might find a way that works better for you, but I hold the blind cap with the rubber cement in my left hand and pick up the barrel assembly by the screwdriver with my right hand. It gets a little messy, but I then screw the screw into the blindcap. You know you have found the screw hole in the blind cap when you see the tube going into the blind cap’s cup and rubber cement starts smooshing out. It is important to make sure the screw is in tightly, but you have to be very careful not to overtighten the screw because it can split the blind cap in half and make it useless for the necessary air seal to make the filler work. It is important for the tube to be extended all the way to prevent the rubber cement from getting into the O-ring. Wipe the excess rubber cement off with a paper towel. Now you can work the tube back and forth to spread the silicon lube around the O-ring and get smooth operation from the barrel assembly.

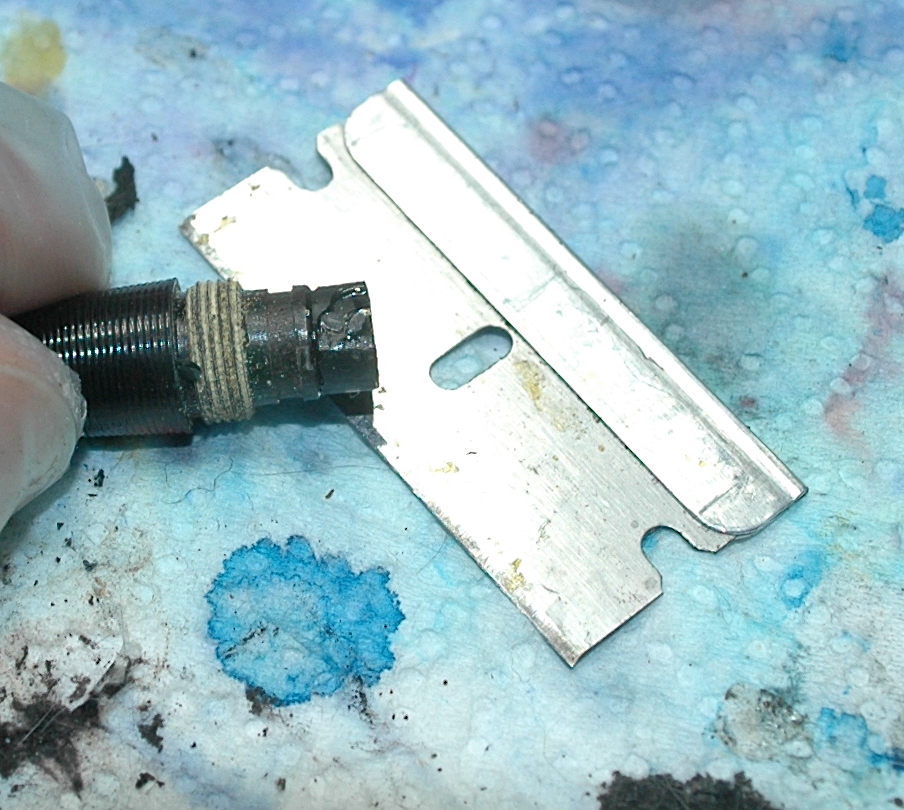
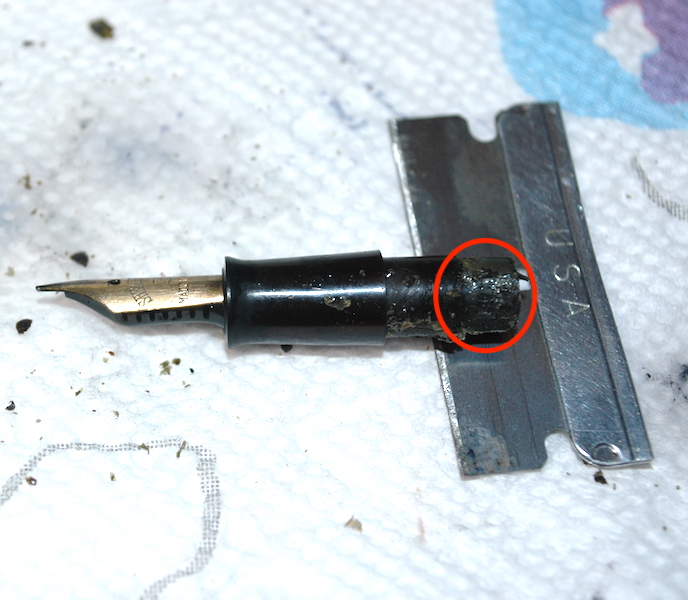
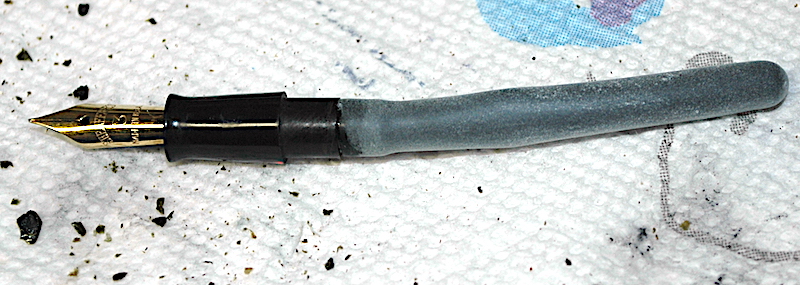
Here you can see where the hardened ink sac has been scraped off to reveal the nipple underneath.

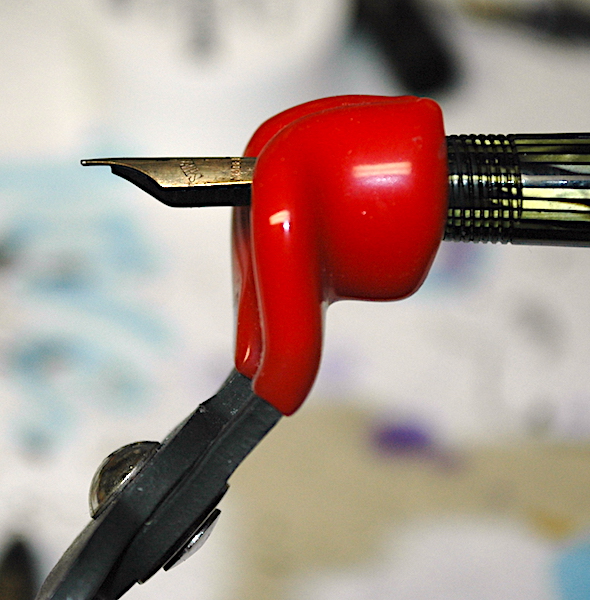
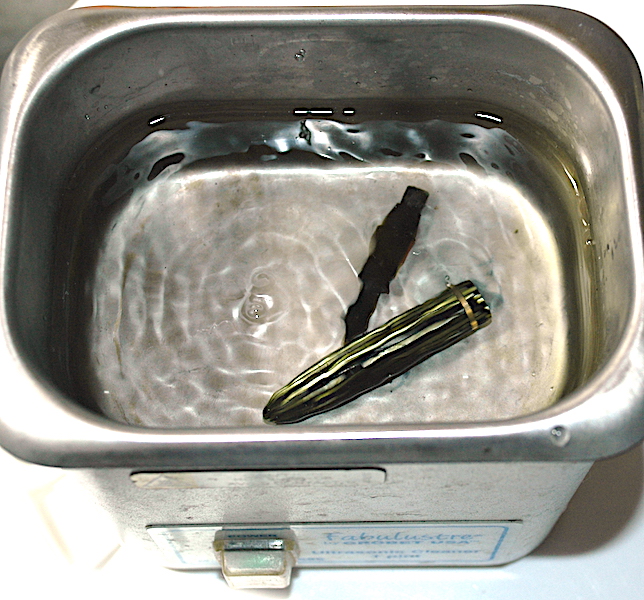
Getting back to the section assembly part of the pen, take the razor and clean the usually hardened old ink sac off the nipple of the section. Be very careful not to accidentally chip off a piece of the nipple. That will ruin your pen. Some people will insist you need to give the nib assembly a sonic cleaning at this point, but if you soaked it long enough, you likely already removed most of the old ink.

To move forward, you need to trim your ink sac to fit perfectly into the sac protector. I don’t have a definitive way to do this. I usually stick the sac (closed end first) in the sac protector, pinch it at large opening of the sac protector, pull out the sac from the protector while maintaining the pinch and then trim it with scissors. Make sure the nipple on the section is dry. Put the sac on the nipple and then put the ink sac protector over the sac to see how well it fits. If the sac is a shade too long, trim it just a bit more. If the sac is a millimeter or so short, that is perfectly fine. Remove the sac protector and then ink sac. Paint a thin layer of sac shellac on the nipple of the section and then replace the properly trimmed ink sac. Wipe off the excess shellac and let the assemble dry for a few minutes. Next rub down the ink sac with pure talcum powder (old skool and potentially cancerous, as talc is mined with naturally occurring asbestos) or corn starch. The corn starch (or death talc) helps preserve the rubber. Snap the sac protector into place over the sac.

Final assembly is easy. Screw the section back into the barrel in a clockwise (righty tighty) fashion. Some old manuals say that you should put rubber cement on the threads (you can see the remains of old rubber cement on the starting photos) to help seal the barrel, but it isn’t necessary and only gives future restorers a bigger headache. The threads seal the section and barrel nicely on their own.

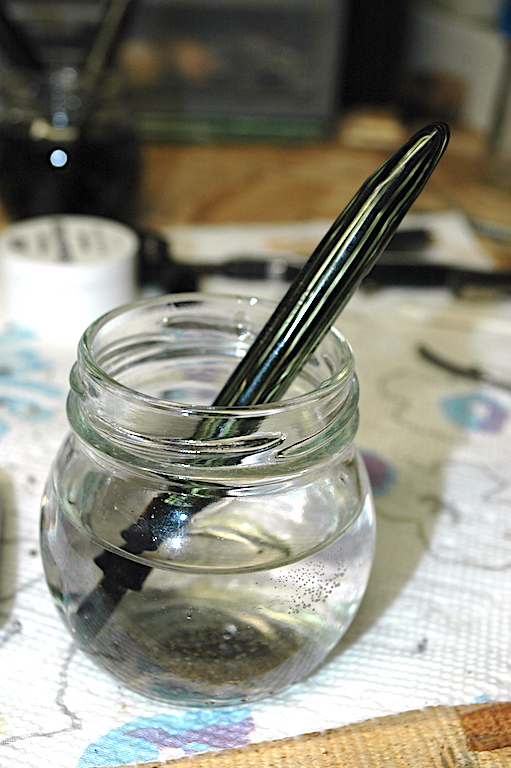
At this point, you have a pen that is ready to write. I, generally, give the pen 24 hours to let the shellac set completely. Then I test it with water, flushing out any remaining old ink while making sure it fills properly.

If you want it to looks its best, you can do a wet sanding that will remove a thin layer of the plastic, removing most surface scratches and stains. It also can enhance the color a bit. Unfortunately, it also makes the remaining imprint shallower or removes it entirely, which is a reason to be judicious in deciding which pens to wet sand. Yet, how to wet sand a pen is worthy of an article on to itself.

How Do I Restore a Conklin Crescent

We are by no means done with the Decameron 2020 Project. However, I felt like getting back to pens for a posting. If you’ve been mostly coming for the storytelling, who knows, maybe you’ll get a kick out of a deeper dive into old fountain pens.

Here is a Conklin Crescent 2NL fountain pen in need of restoration.

Let’s look at one of the oldest “self-filling” fountain pen filling systems. In the earliest days of fillable fountain pens, any pen with a bladder or ink sac was considered self-filling. Before that you had dips and eyedroppers. Conklin invented the crescent filler in 1898. For as cumbersome as it looks, it was an insanely simple design. The pen is hollow like an eyedropper, but there is a rubber ink sac affixed to the nipple of the section. A crescent is fitted to a flat steel bar, and when the safety ring is rotated into the proper position, the crescent can be depressed, flattening the rubber ink sac within. The rubber ink sac wants to re-inflate, which fills the sac with ink and pushes the crescent back out of the barrel. Way less messy than an eyedropper, it was an instant hit. Even the famed American author Mark Twain was hired to be an advertising spokesman for the pen.

Don’t soak a Conklin hard rubber pen for very long, as it will discolor the old hard rubber. Be sure to get the water over the end of the section and on to the barrel threads.

If you already read our “How Do I Re-Sac a Vintage Pen” article, this isn’t very different. However, most of these pens are made from black hard rubber more than 100 years ago, and they are very brittle. You want to make sure you are pretty comfortable with restoring plastic/celluloid pens first. These early Conklins are getting much older and harder to find, and they break much more easily.

As with before, you will need some ink sacs, a pair of spark-plug/section pliers, a long dental pick, sac shellac or rubber cement, scissors that can cut through rubber ink sacs, a jar or cup, clean water, polish, a cloth rag, paper towels, a hairdryer, a razor blade and an ultra-sonic cleaner.

  1. Always start by soaking the nib in room temperature water over the threads of the barrel. Now the trick with old hard rubber is that water discolors it quickly. A shiny black will quickly turn to a chocolate brown haze. Don’t soak it for long, just enough to start to leech out old ink and maybe lubricate the friction fit of the section into the barrel. I certainly wouldn’t soak it for more than an hour. I’d probably soak it for much shorter a time.
  2. Next, remove the nib and section from the water and dry them off.
  3. Warm them up just a little with the hair dryer or heat gun. You only want them to be warm to the touch. Heat will also discolor the hard rubber. Plus, it can melt it.
  4. Scrape the dead ink sac out of the barrel. Be sure to be especially careful shaving the ink sac remains off the section nipple.

    Using your section pliers, gently grip and twist the section counter clockwise in an unscrewing motion. Sometimes it takes nerves of steel, patience and experience to discern the difference between the old ink sac inside the pen cracking and the barrel of the pen cracking. If the barrel cracks, you’ve likely killed the pen and made it nothing more than a parts donor.

  5. Once you get the section to start coming out, gentle, small wiggles can work it out without further stressing it from twisting. Very small wiggles. You can easily break the barrel, especially when the section looks as if it is almost out of the barrel. The more the section wiggles, the more it can act as a lever to crack the barrel. Some people choose the give the nib and section a sonic cleaning and others don’t. The sonic action can destroy the part if there is a crack already starting in it. More than 30 seconds to a minute will start discoloring the rubber. However, I’ve also found that pens this old often are filled with sediment-based inks that need something special like a sonic cleaning to remove the caked-in old ink.
  6. After the section is out, the rest is fairly easy. Scrape out all of the old ink sac from inside the barrel and very gently shave off the remaining sac on the nipple. Your razor can easily cut the nipple or cave in a wall of the nipple. Go super slow and easy with only small motions.
  7. Polishing old hard rubber is difficult. You can wear away a lot of rubber very quickly, ruining imprints and chasing.

    With everything cleaned out and disassembled, that is when I like to polish the pen and parts. You cannot go as rough on century-old hard rubber as you can plastics. I like to use MAAS metal polish on a soft terry cloth rag. Mostly I just give a light going over of the pen and cap with the polish and rag because both strip away the top layers of the rubber and can remove chasing and other imprints. It also removes some of the chocolate hazing. Using a Q-tip, I also polish the nib and crescent.

  8. Reinstall the crescent filler and lock it in place with the safety ring.
  9. Dust the ink sac in talcum power to help preserve it.

    Size and trim an ink sac that isn’t too snug inside the barrel. If you don’t have the crescent filler with the bar reinstalled first, you won’t get the proper fit.

  10. Use orange shellac to attach the sac to the section nipple.
  11. Dust the sac in pure talcum powder
  12. Very gently and slowly reinstall the sac and section into the barrel. This is another high-risk move that can crack the barrel so take it easy. You might even want to warm-up the barrel a bit.

Wait 24 hours for the shellac to dry before filling the pen. Then you are ready to write.

The finished pen should look much cleaner and be ready to write.

How Do I Re-Sac a Vintage Pen

You can’t make an omelette without breaking a few eggs, the old saying goes, and it is true for learning how to fix vintage pens. Today, we are going to learn how to restore a lever-filling fountain pen…or re-sac it, as they say. But first, you are going to have to get used to the concept that you’re going to destroy a few pens along the way—even if you’re careful.

Find a few good, cheap vintage pens to practice restoring before experimenting with more expensive models. This deformed Sheaffer Balance 350 is a great starter pen.

When you are starting out, don’t begin with an unrestored version of your grail pen. Find some broken-down cheap pens such as Wearevers, Esterbrooks or even this banana’d Sheaffer 350 Balance. The longer you are on the hunt, the more you will find vintage pens that turn into the shape of bananas. The deformation happens when the pen is left in the sun or near a heater for too long, which warps the plastic/celluloid.

In addition to a good practice pen, you will need some ink sacs, a pair of spark-plug/section pliers, a long dental pick, sac shellac or rubber cement, scissors that can cut through rubber ink sacs, a jar or cup, clean water, polish, a cloth rag, paper towels, a hairdryer, a razor blade and, if at all possible, an ultra-sonic cleaner. You can get most of these items pretty cheaply. One trick of the professionals is to buy a pair of rubber coated spark-plug pliers, instead of formal “section pliers” that you can find on many pen restoration sites. Why? Spark-plug pliers can be had for less than $10 at most auto parts stores. Section pliers are almost always the same, exact pliers but marked up to $20 or $30. In the early days of pen restoration as a hobby in the 1970s and ’80s, a lot of guys used regular pliers and cut off two one-inch sections of hose to cover the teeth of their normal pliers. That’s how I was first taught.

Attempting to keep this simple, I’m going to break this down into what I hope are very simple steps to make this as fun and easy an experience as possible.

  1. I like small mustard or baby food jars to use for filling with just enough water to get the pen wet from the tip of the nib to just over the threads of the barrel.

    Fill a cup with just enough room-temperature water that you can stick your pen in and go just a little bit over the section and past the cap threads. (Sections are the writing grip into which the nib and feed are inserted in one end.) Let it soak for at least an hour. (Never use hot water.) This leaches out a lot of the dried old ink in the nib and inkfeed, while also potentially softening any glue or shellac used to hold the section tightly into the barrel. Many of the old factory repair manuals encouraged repairmen to use a dab of sac shellac to hold the sometimes loose pressure-fit sections into the barrel. WARNING: Water is necessary, but it also isn’t your friend. Black hard rubbers turn chocolatey brown in water fairly quickly. (An hour might be too long for some rubbers.) Some celluloids get more brittle or discolored when in water too long. Be sure to dry off the pen as soon as you remove it from the water.

2. Use the hairdryer to warm up the space where the section and barrel meet. DO NOT melt the plastic or set the celluloid on fire. All you need is a little warm to the touch. Until you get comfortable, keep the heat to barely noticeable to the touch. Grip the section, and only the section, with your rubber coated pliers. Very gently and slowly begin to twist counter clockwise as you hold the barrel in your other hand. It is common to hear some very scary cracking sounds. Usually, that sound is the petrified rubber ink sac in the pen breaking apart as you open. Sometimes it is the pen barrel breaking. Experience will teach you the difference. If you feel the section coming loose,

Grip only the section with rubber coated pliers, such as these spark-plug pliers. Don’t grip too tightly, just enough not to let go.

keep twisting slowly and gently. If you do not feel it turning or you feel it actively resisting, stop twisting. Some sections—especially Parker Duofolds and Vacumatics—were threaded into the pen barrels, which is why we usually start with a twist. Most pens of all brands were straight pressure-fit sections. HOWEVER, some brands—especially Wahl-Eversharp, although they were extremely inconsistent—used little pins in the barrel or section to hold the section firmly in place. You CANNOT twist those sections without destroying the barrel or section. If a section resists twisting, hit it with a little more heat and very gently start trying to wiggle it in teeny, tiny side-to-side motions while pulling straight out.

This is the most dangerous part of the entire restoration job. This is where probably 80% of all pens break, if they are going to break. ALSO, celluloid is insanely flammable. DO NOT get it hot. If it catches fire, it burns like a magnesium flare. It is an extremely hot burning flame that burns extremely quickly. Early on, I accidentally set a Vacumatic on fire. It scared the hell out of me, and it was a miracle I didn’t burn down my house. Even after getting it under running water it didn’t go out right away. I had to drop it in the steel sink and flood it to put the fire out. In about 10 seconds, it burned away the majority of the barrel. Be careful with the heat.

Use a razor to scrape the old sac pieces off the section nipple.

3. Once the section is free, scoop out the old sac guts from inside the barrel with the dental pick. Sometimes those guts stick pretty good to the inside of the barrel. A flashlight or gun light can help you see in to make sure you got it all. Do not put water in the barrel to clean out the sac or old ink. This will likely ruin and rust-out the pressure-bar assembly.

4. Use the razor to scrape the remnants of the old ink sac from the nipple of the section. Be careful not to cut yourself or split open the nipple.

5. Fill your ultra-sonic cleaner with clean, room-temperature water. Sometimes a drop or two of ammonia will help badly clogged pens. Put enough water in to completely submerge the cap and section assembly. Before you turn it on, let the cap soak for a minute or so. This allows the water to penetrate the inner cap, where a lot of old ink is usually trapped. After the cap and section have had a minute to soak, turn on the ultra-sonic cleaner for no more than 2 minutes.

If feasible, an ultra-sonic cleaner is the easiest way to remove old ink.

You might not see a lot of “action” with your eyes, but the vibrations are practically violent to the parts that are submerged. It can shake free most of the old ink in two minutes or less. If a cap lip is cracked, I’ve seen some caps crumble in the ultra sonic cleaner. That’s how powerful it is.

NEVER stick your fingers in the ultra-sonic cleaner when it is turned on. It can damage your fingers and their joints. Also, don’t leave your parts in for much longer than two minutes because the cleaner will get hot and potentially damage or discolor your parts.

Turn off the ultra-sonic cleaner, collect your parts and drain the old dirty water. Then rinse the parts under the faucet with room temperature water for a few seconds. Shake the parts dry, and then dry them with a paper towel on the outside. Q-tips are perfect for drying and removing the remaining ink from inside the cap.

6. I like to polish the pen next, especially the nib. It allows me to see any major flaws I might need to work on, such as replacing the nib while the section is exposed. I use a pin-head dollop of MAAS metal polish on a Q-tip to get the nib shining like new. I use the clean side of the Q-tip to wipe off the remaining polish. Then I dip the nib in water and dry it with a clean rag to get off the remaining, invisible polish remnants. I repeat the process with a pea-size drop of MAAS metal polish on the rag and polish up the rest of the pen, rubbing it down several times with the clean parts of the rag…avoiding water.

Every repairman I know seems to have a different process for polishing a pen. The method above is adequate for most pens. Yet, if you’re a detail-oriented person, there are myriad methods of multiple polishes or wet sanding that do a much more factory-fresh looking job. Yet, those methods take up to an hour and are worthy of their own article.

This photo illustrates how to eyeball the spot you need to trim the ink sac.

7. Sizing an ink sac. How detail oriented are you? You can easily research what size sacs went into what pens. You can measure the nipple with a fine ruler using increments of 1/64th of an inch, the way old pen repair manuals did to find the right aperture width of the ink sac. Or, you can eyeball it.

The real trick to eyeballing it isn’t fitting the sac to the nipple but finding the right sac to fit inside the barrel. You do not want the edges of the sac to snug against the inside of the barrel. It is best if the sac can easily slide in and out of the barrel, preferably with a little space all around the sac. If one is to carry a pen in their shirt pocket, the goal is not to transfer body heat through the barrel to the sac and ink, which might effect the interior pressure of the ink in the pen and have it leak a bit on you with a full pen.

Regardless of how you choose the sac size, you will likely need to trim the ink sac before installing it. Most ink sacs are longer than the pen barrels. My rule of thumb is quite literally a rule of thumb. I stick the sac in the barrel as far as it will go. I then pinch the end of the barrel at the threads, with my thumb having just enough reach to go past the threads. Pinching awkwardly down on the sac, right where it exits the barrel, I remove the sac. Gaging where my thumb tip is, I trim the sac at the tip of my thumb. Usually, this allows just enough room for the section and nipple inside the pen so that the sac can be as long as it needs to be. You can double check the length by putting the section and sac next to the empty barrel, as they would fit inside it.

Use Talc to powder and preserve your new ink sac before final re-assembly.

8. Most modern pen restorers use orange shellac to affix the sac to the nipple. Before most of us learned how to make or knew where to find orange shellac for sale, rubber cement was the go-to adhesive. Orange shellac is nearly perfect, as it can harden and still be water soluble. Rubber cement forms a good seal at first but can be more easily effected by heat and aging. Yet, it better fills-in tiny hairline cracks in the nipple, hopefully extending the functional life of the pen. (NEVER use super glues of any kind. The rubber ink sacs will give out long before the super glue ever does and you can ruin the pen by forever getting the section stuck in the barrel…or sticking other wrong parts together.)

On this pen, we painted only the nipple with a thin layer of shellac. Then we slipped the sac over it. After that, we dusted the sac with pure talcum powder, which helps to extend the life of the sac.

9. Fitting the section back into the barrel is the second most dangerous part of the restoration process. Sometimes the barrel opening shrinks while the section is out and cracks open if you put the section back in too quickly or roughly. If the section feels like it is having difficulty going back in, maybe warm up the barrel end a little and gently wiggle the section back into place. Although it doesn’t really matter, I like twist the section into place where the top of the nib is even with the lever on the pen.

Congrats! Your pen is fully restored, looking beautiful and ready to write.

If the section is too loose, you can tighten it up with a tiny cut out of a piece of onion-skin paper. Or, like the old repair manuals, you can use a small drop or two of shellac on the section. Just wipe off the excess shellac and keep it out of the threads.

10. Let the shellac dry. As the shellac is water soluble, I wait about 24 hours before I test the pen with water or ink. Once the shellac is dry and the pen tests well, you’re all done. Congrats!

It took longer to read this article than it likely will take you to restore a pen—at least once you get used to the process. Fixing and writing with vintage pens is my favorite part of the hobby. If you like seeing how things work and getting your hands dirty, you’ll love pen repair. The only thing that improves it for me might be repairing pens while listening to a Cubs game on the radio and nursing a cold beer.

Always feel free to write in with questions. And always remember to go slowly and take your time. It isn’t a race. Enjoy the zen of pen repair, and best of luck to your future projects!