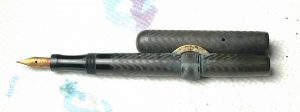
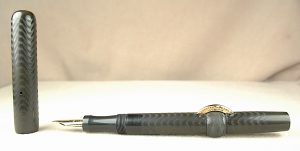
Fixing a Sheaffer TouchDown filler can be easy with a little practice. Personally, I love the functionality and simplicity of the design that uses pneumatics to collapse an ink sac and allow its natural vacuum to draw ink back into the pen.
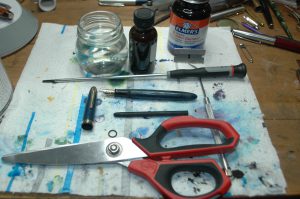
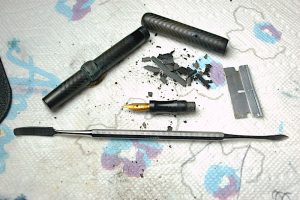
In the first photo, you will see almost all that you need to restore a Sheaffer TouchDown filler. We forgot to include a bottle of “Super Lube: O-Ring Silicon Lubricant.” In case you have trouble seeing the photo, you will need: a Sheaffer TouchDown-filling pen, a long-shaft flathead screwdriver, dental pick, scissors, razor blade, a size 15 latex rubber ink sac, an O-ring, sac shellac, rubber cement and jar of room-tempeture water. A couple of Q-tips, paper towels, corn starch and a wooden dowel might also be useful.
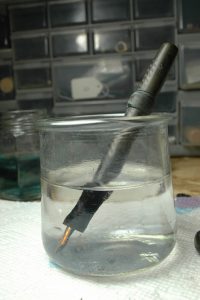
To get started, unscrew the cap from the fountain pen, and stick the pen nib first in water. You do not want to soak the entire pen in water, just up to the division between the section (finger-grip part) and the blue barrel of this pen. Let it soak for anywhere from an hour to overnight. This leaches out most of the old ink and softens any possible glue a past repairer might have used to secure the threaded section to the barrel.
Once the pen is finished soaking, dry it off with a tissue or paper towel. Frequently these pens can unscrew without any assistance from section pliers. Grip the section (finger grip) between your thumb and forefinger on one hand and the barrel with your other hand. Unscrew the section with a steady, gentle pressure counterclockwise (lefty loosey.)
When the section unscrews, you will see the “sac protector” and inner remains of the ink sac come out with the section. The sac protector is friction fit, and you can remove it simply by pulling straight back. Some times the old ink sac has petrified and stays on the section nipple. Sometimes it is in pieces inside the sac protector. Sometimes the old sac has melted to the inside of the sac protector. The first two scenarios are very easy to manage. The melted sac takes a long time to remove. Q-tips, wooden dowels or anything else you can use to safely scrape the inside of the sac protector clean will help. It is very important to remove all the debris from inside the sac protector to allow the new sac to slide in and operate properly.
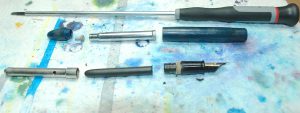
After you have finished with the sac protector, unscrew the blindcap on the tail of the pen barrel and, if possible, pull the blind cap back as far as it will go. (Don’t force it if it is frozen inside the pen.) Now take the long-shaft flathead screwdriver and ease it up the barrel until you can feel the screw at the end of the barrel and metal tube. Turn the screwdriver slowly until you feel it find the slot of the screw. Hold the blind cap tightly with one hand and gently unscrew the screw to the left. You will feel the screw come free. It seems easiest to let gravity help it fall out on to your work bench. With some gentle pressure, the plastic blind cap will pop off the metal tube. Next, you push the tube back down and out the section-end of the barrel.
Until you get used to it, the trickiest part of the restoration is replacing the latex-rubber O-ring in the blindcap-end of the barrel. You can see the black O-ring imbedded in a groove of the barrel in this photo. If you are lucky, the O-ring will still have a little pliability and it will come right out with the help of the dental pick. If you are unlucky, the O-ring will have petrified, and you’ll have to carefully dig it out little piece by little piece.
Once the old O-ring is out, you might want to use a Q-tip to clean out any dirt in that end of the barrel. The barrel on TouchDowns are often still quite clean, and cleaning it with a Q-tip might not be necessary.
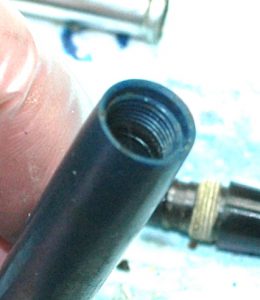
You can see the old O-ring inside this Sheaffer TouchDown barrel. Use a dental pick to carefully remove the old O-ring.
Sheaffer TouchDown fountain pens used one of two different size O-rings. Most pen-part suppliers list them as either a “small O-ring” or a “large O-ring.” Large O-rings were only used in first-year Sheaffer TouchDowns (1948), which have noticeably thicker barrels than the remaining “Thin Model” TouchDowns (1949-1952), which use small O-rings. If you ever feel like dabbling in Sheaffer Snorkels, the large O-rings are also used on PFMs and Snorkel Desk Pens.
I find it is easiest to place the new O-ring into its groove with the dental pick. I fold the O-ring a little and insert it into the blind-cap opening. Then I use the dental pick to carefully get one side of the O-ring into the groove. If all goes well, I use the dental pick to drag the opposite end of the O-ring into the groove. With two-points in the groove, I go the next high point of the sack and work it into the groove. Once that is accomplished, I try to get the last high point of the O-ring into the groove. It sounds easy, but it takes some practice to do it quickly. NEVER lube the O-ring before trying to install it. A slippery O-ring will make your life miserable.
Now it is time to start reassembling the barrel apparatus. Clean off the metal tube you had to unscrew from the blind cap with a paper towel to get any old shmutz off. Then drop the screw threads-first down the tube. Use the screwdriver to help find the tube’s hole for the screw. Leave the screwdriver in the tube slotted into the screw. Put a thin layer of silicon O-ring lube around the shoulder of the tube on the screw-end of the tube. Then insert the screw and tube, screw first, into the section hole of the barrel and gently glide it with the screwdriver all the way through the blind-cap side’s hole in the barrel until the tube won’t go any farther. Rest the barrel and tube on its side with the screwdriver still slotted into the screw.
Take the plastic blind cap and fill its cup with rubber cement. (There should be a rubber washer in there, but often it is blown and the rubber cement acts as a sealant that can replace it.) You might find a way that works better for you, but I hold the blind cap with the rubber cement in my left hand and pick up the barrel assembly by the screwdriver with my right hand. It gets a little messy, but I then screw the screw into the blindcap. You know you have found the screw hole in the blind cap when you see the tube going into the blind cap’s cup and rubber cement starts smooshing out. It is important to make sure the screw is in tightly, but you have to be very careful not to overtighten the screw because it can split the blind cap in half and make it useless for the necessary air seal to make the filler work. It is important for the tube to be extended all the way to prevent the rubber cement from getting into the O-ring. Wipe the excess rubber cement off with a paper towel. Now you can work the tube back and forth to spread the silicon lube around the O-ring and get smooth operation from the barrel assembly.
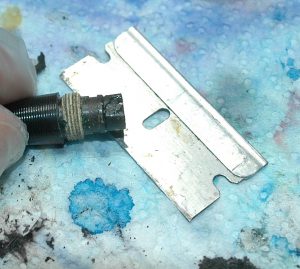
Getting back to the section assembly part of the pen, take the razor and clean the usually hardened old ink sac off the nipple of the section. Be very careful not to accidentally chip off a piece of the nipple. That will ruin your pen. Some people will insist you need to give the nib assembly a sonic cleaning at this point, but if you soaked it long enough, you likely already removed most of the old ink.
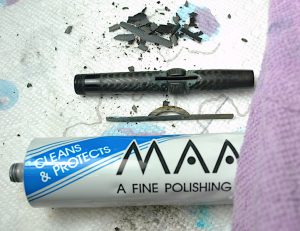
To move forward, you need to trim your ink sac to fit perfectly into the sac protector. I don’t have a definitive way to do this. I usually stick the sac (closed end first) in the sac protector, pinch it at large opening of the sac protector, pull out the sac from the protector while maintaining the pinch and then trim it with scissors. Make sure the nipple on the section is dry. Put the sac on the nipple and then put the ink sac protector over the sac to see how well it fits. If the sac is a shade too long, trim it just a bit more. If the sac is a millimeter or so short, that is perfectly fine. Remove the sac protector and then ink sac. Paint a thin layer of sac shellac on the nipple of the section and then replace the properly trimmed ink sac. Wipe off the excess shellac and let the assemble dry for a few minutes. Next rub down the ink sac with pure talcum powder (old skool and potentially cancerous, as talc is mined with naturally occurring asbestos) or corn starch. The corn starch (or death talc) helps preserve the rubber. Snap the sac protector into place over the sac.
Final assembly is easy. Screw the section back into the barrel in a clockwise (righty tighty) fashion. Some old manuals say that you should put rubber cement on the threads (you can see the remains of old rubber cement on the starting photos) to help seal the barrel, but it isn’t necessary and only gives future restorers a bigger headache. The threads seal the section and barrel nicely on their own.
At this point, you have a pen that is ready to write. I, generally, give the pen 24 hours to let the shellac set completely. Then I test it with water, flushing out any remaining old ink while making sure it fills properly.
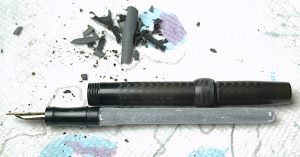
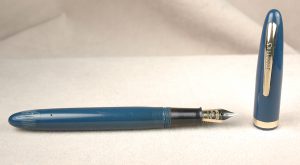 If you want it to looks its best, you can do a wet sanding that will remove a thin layer of the plastic, removing most surface scratches and stains. It also can enhance the color a bit. Unfortunately, it also makes the remaining imprint shallower or removes it entirely, which is a reason to be judicious in deciding which pens to wet sand. Yet, how to wet sand a pen is worthy of an article on to itself.


 Shopping Cart


