Tag Archives: vintage pen restoration

How Do I Restore a Conklin Crescent

We are by no means done with the Decameron 2020 Project. However, I felt like getting back to pens for a posting. If you’ve been mostly coming for the storytelling, who knows, maybe you’ll get a kick out of a deeper dive into old fountain pens.

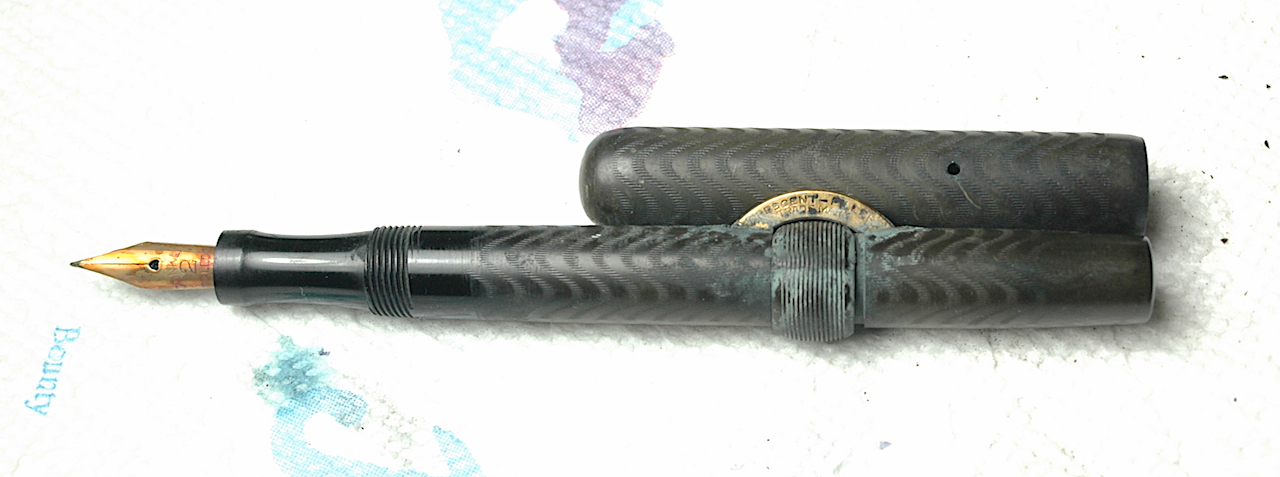
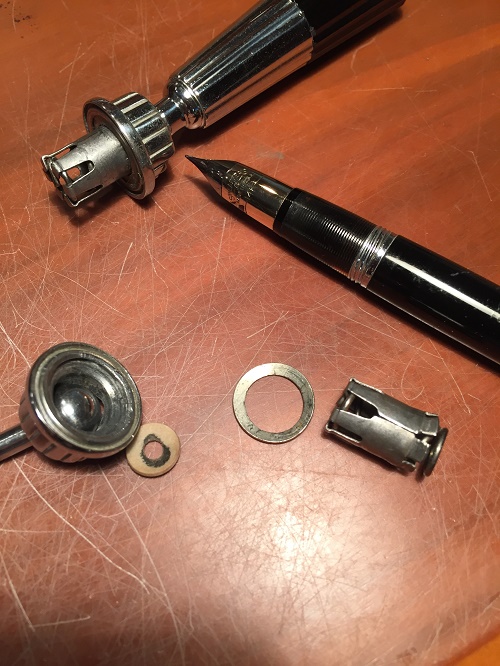
Here is a Conklin Crescent 2NL fountain pen in need of restoration.

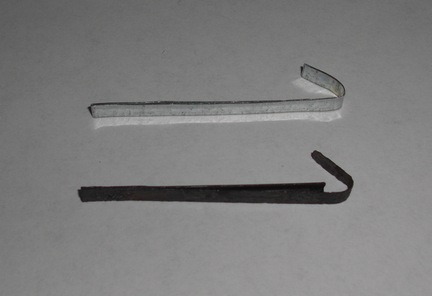
Let’s look at one of the oldest “self-filling” fountain pen filling systems. In the earliest days of fillable fountain pens, any pen with a bladder or ink sac was considered self-filling. Before that you had dips and eyedroppers. Conklin invented the crescent filler in 1898. For as cumbersome as it looks, it was an insanely simple design. The pen is hollow like an eyedropper, but there is a rubber ink sac affixed to the nipple of the section. A crescent is fitted to a flat steel bar, and when the safety ring is rotated into the proper position, the crescent can be depressed, flattening the rubber ink sac within. The rubber ink sac wants to re-inflate, which fills the sac with ink and pushes the crescent back out of the barrel. Way less messy than an eyedropper, it was an instant hit. Even the famed American author Mark Twain was hired to be an advertising spokesman for the pen.

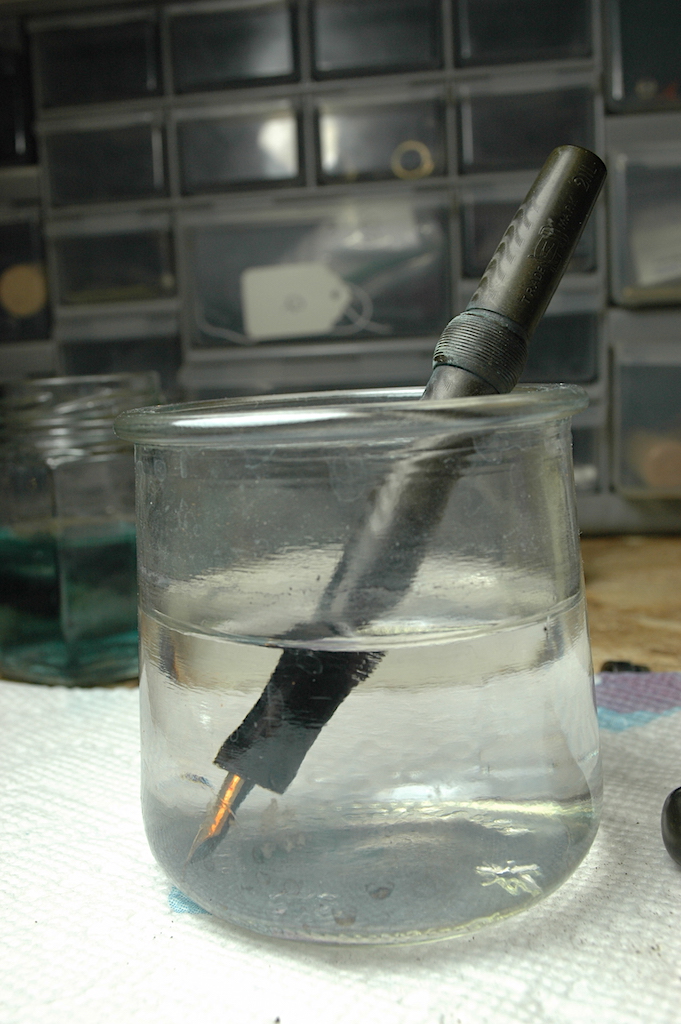
Don’t soak a Conklin hard rubber pen for very long, as it will discolor the old hard rubber. Be sure to get the water over the end of the section and on to the barrel threads.

If you already read our “How Do I Re-Sac a Vintage Pen” article, this isn’t very different. However, most of these pens are made from black hard rubber more than 100 years ago, and they are very brittle. You want to make sure you are pretty comfortable with restoring plastic/celluloid pens first. These early Conklins are getting much older and harder to find, and they break much more easily.

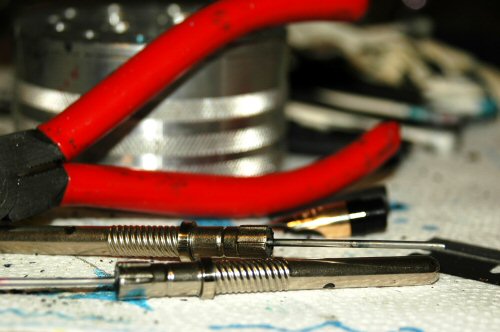
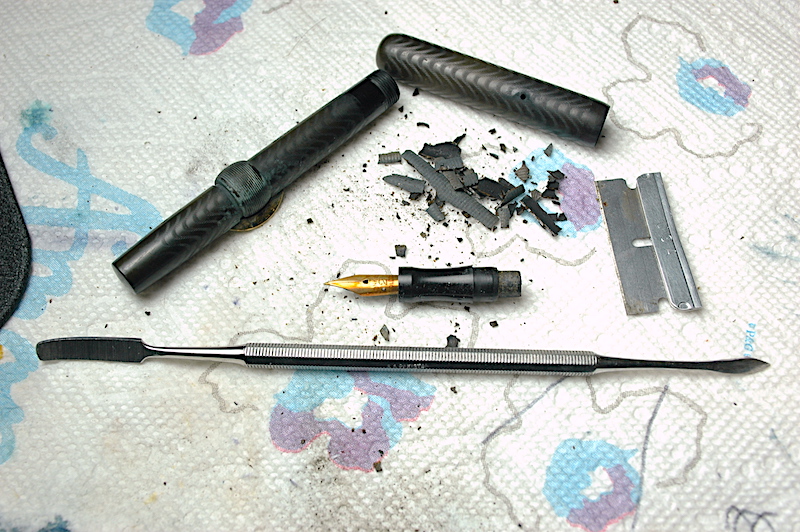
As with before, you will need some ink sacs, a pair of spark-plug/section pliers, a long dental pick, sac shellac or rubber cement, scissors that can cut through rubber ink sacs, a jar or cup, clean water, polish, a cloth rag, paper towels, a hairdryer, a razor blade and an ultra-sonic cleaner.

  1. Always start by soaking the nib in room temperature water over the threads of the barrel. Now the trick with old hard rubber is that water discolors it quickly. A shiny black will quickly turn to a chocolate brown haze. Don’t soak it for long, just enough to start to leech out old ink and maybe lubricate the friction fit of the section into the barrel. I certainly wouldn’t soak it for more than an hour. I’d probably soak it for much shorter a time.
  2. Next, remove the nib and section from the water and dry them off.
  3. Warm them up just a little with the hair dryer or heat gun. You only want them to be warm to the touch. Heat will also discolor the hard rubber. Plus, it can melt it.
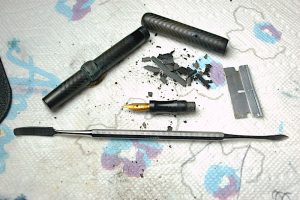
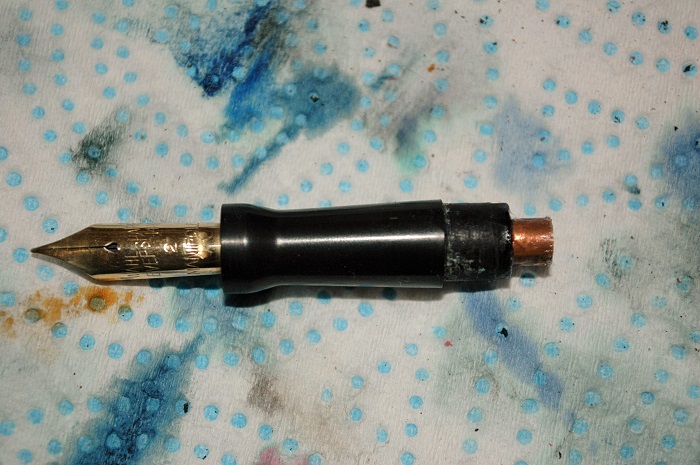
  4. Scrape the dead ink sac out of the barrel. Be sure to be especially careful shaving the ink sac remains off the section nipple.

    Using your section pliers, gently grip and twist the section counter clockwise in an unscrewing motion. Sometimes it takes nerves of steel, patience and experience to discern the difference between the old ink sac inside the pen cracking and the barrel of the pen cracking. If the barrel cracks, you’ve likely killed the pen and made it nothing more than a parts donor.

  5. Once you get the section to start coming out, gentle, small wiggles can work it out without further stressing it from twisting. Very small wiggles. You can easily break the barrel, especially when the section looks as if it is almost out of the barrel. The more the section wiggles, the more it can act as a lever to crack the barrel. Some people choose the give the nib and section a sonic cleaning and others don’t. The sonic action can destroy the part if there is a crack already starting in it. More than 30 seconds to a minute will start discoloring the rubber. However, I’ve also found that pens this old often are filled with sediment-based inks that need something special like a sonic cleaning to remove the caked-in old ink.
  6. After the section is out, the rest is fairly easy. Scrape out all of the old ink sac from inside the barrel and very gently shave off the remaining sac on the nipple. Your razor can easily cut the nipple or cave in a wall of the nipple. Go super slow and easy with only small motions.
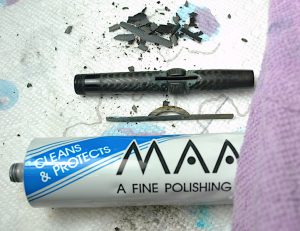
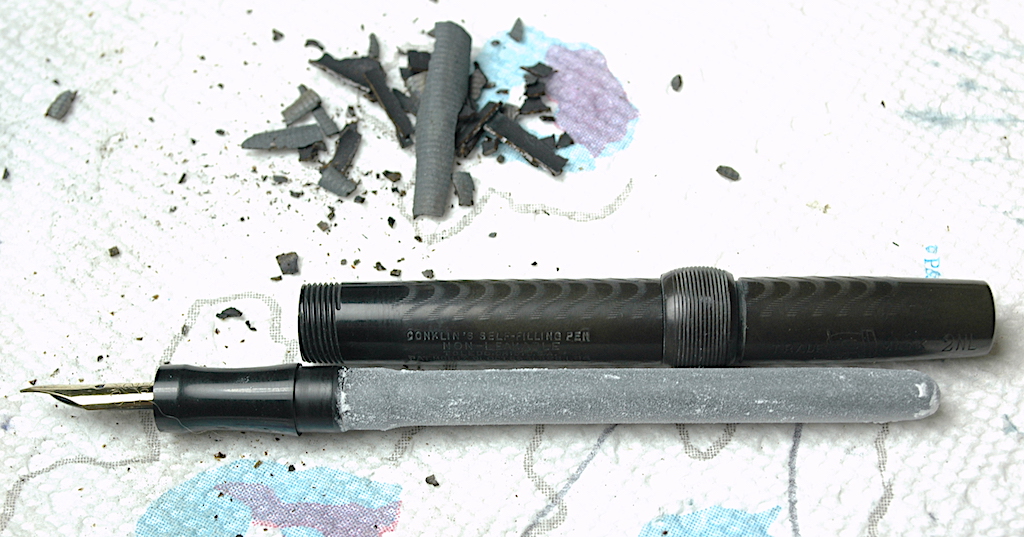
  7. Polishing old hard rubber is difficult. You can wear away a lot of rubber very quickly, ruining imprints and chasing.

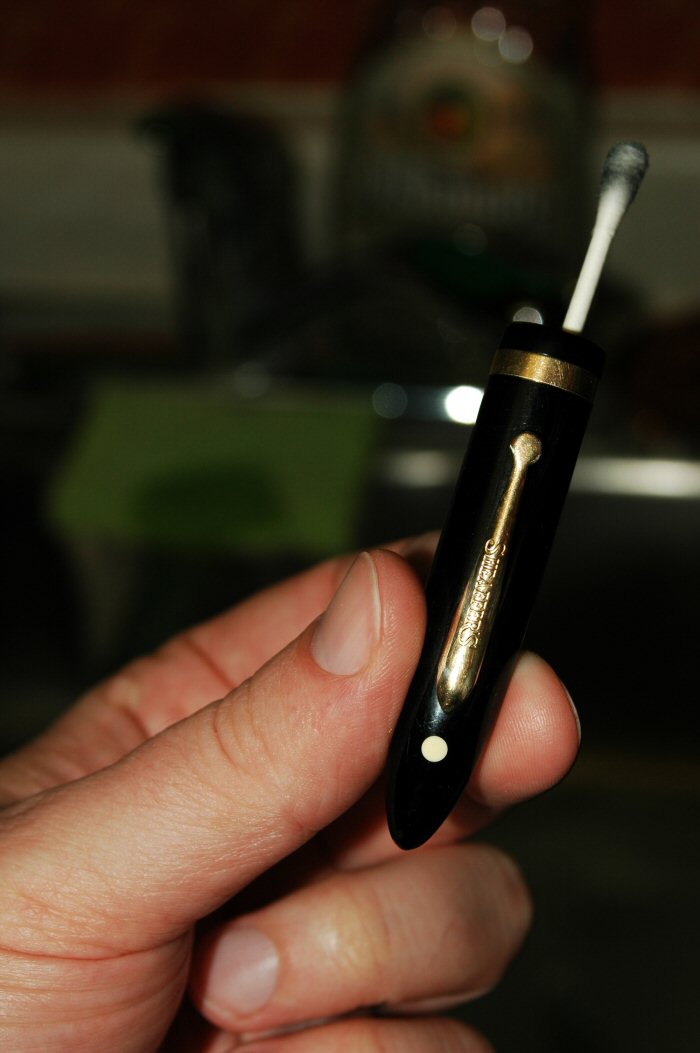
    With everything cleaned out and disassembled, that is when I like to polish the pen and parts. You cannot go as rough on century-old hard rubber as you can plastics. I like to use MAAS metal polish on a soft terry cloth rag. Mostly I just give a light going over of the pen and cap with the polish and rag because both strip away the top layers of the rubber and can remove chasing and other imprints. It also removes some of the chocolate hazing. Using a Q-tip, I also polish the nib and crescent.

  8. Reinstall the crescent filler and lock it in place with the safety ring.
  9. Dust the ink sac in talcum power to help preserve it.

    Size and trim an ink sac that isn’t too snug inside the barrel. If you don’t have the crescent filler with the bar reinstalled first, you won’t get the proper fit.

  10. Use orange shellac to attach the sac to the section nipple.
  11. Dust the sac in pure talcum powder
  12. Very gently and slowly reinstall the sac and section into the barrel. This is another high-risk move that can crack the barrel so take it easy. You might even want to warm-up the barrel a bit.

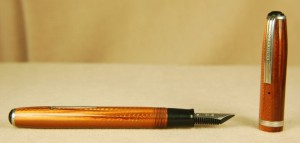
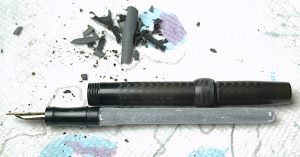
Wait 24 hours for the shellac to dry before filling the pen. Then you are ready to write.

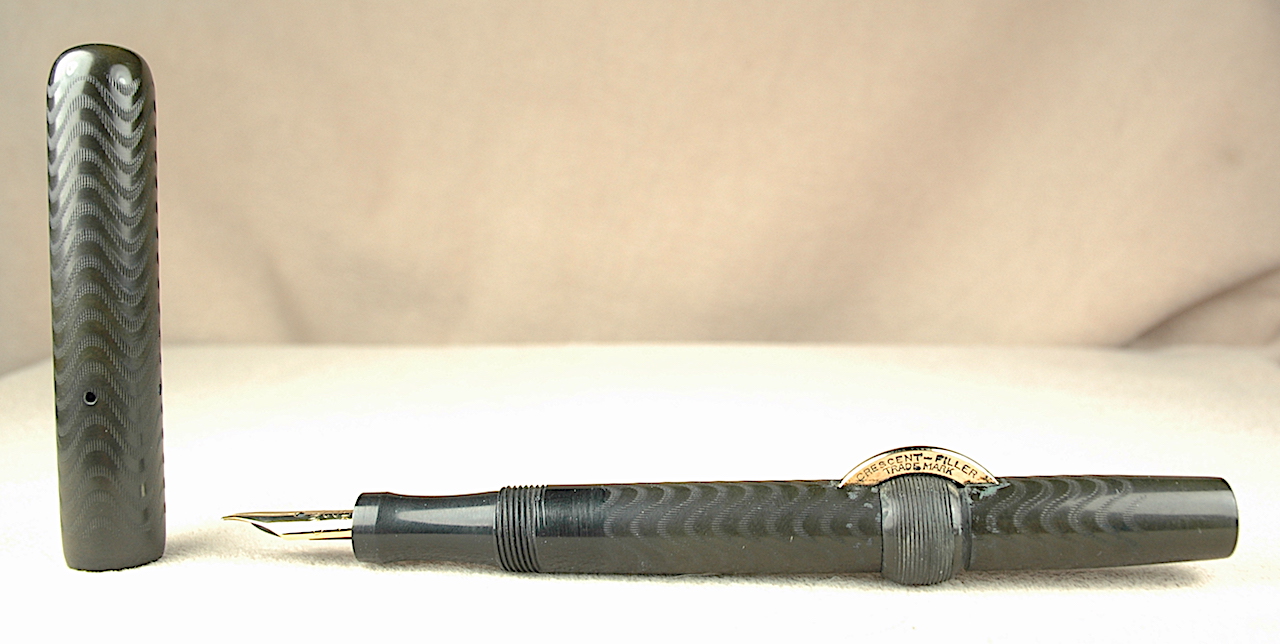
The finished pen should look much cleaner and be ready to write.

Baltimore Pen Show, Here We Come!

For the last several years, we have heard about the splendor of the Baltimore Pen Show. This is what we’ve heard: It is well organized by our buddy Bert Oser. It is a premier place to buy and sell premier luxury pens. It is well advertised to the public, and it is becoming the premier pen show in the country.

This year, we are going to experience it for ourselves to see if it is all true. We have spent the past month restoring dozens of vintage pens and prepping never-before-seen-on-our-site luxury pens.

PLUS, for showgoers, we have dropped some of our prices to clear out some of our luxury inventory.

On a personal level, this is my first trip to Baltimore. I bemoan the fact the Orioles aren’t yet playing, as I’d love to see a game at Camden Yards, but I hope to have some fun exploring the waterfront and old Fort McHenry, home of “The Star-Spangled Banner,” if there’s time.

And, of course, the very best part will be getting to hang out with old friends at a new location, while also making new friends at a show I’ve never seen before. Please be sure to come check it out and say, “Hi.”

Fun Pen Repair Help

Not too long ago we were approached by a radio restoration expert named Jaime A. for help on his special 1938 Detrola radio desk set. One of the two Parker Vacumatic trumpets had broken and he needed a replacement. We just so happened to be lucky enough to have a replacement trumpet set.

Photo shows a 1938 Parker Vacumatic desk set that features a clock, weather station and Detrola radio.

A fully restored Detrola radio makes up the centerpiece of this nearly perfect Parker 1938 desk set!

The set fits perfectly, but he wants to get one of the rarer chrome-based, ribbed trumpets to better match what originally came with the set. He also wants matching Parker Vacumatic desk pens (or a matching pen and pencil for such a desk set.). If you can help him out, please reach out to us in the comments, and we will hook you guys up.

In the meantime, feast your eyes on this set. Jaime completely refinished the wood and stain, replaced the vacuum tubes in the radio and got the clock and weather station portions working. That’s a lighter in the center of the wooden base!

If any body has a chrome-base and ribbed Parker Vacumatic trumpet they would like to sell, please let us know so we can help Jaime A. finish the final touches on his Detrol Radio and Parker Vacumatic desk set.

If any body has a chrome-base and ribbed Parker Vacumatic trumpet they would like to sell, please let us know so we can help Jaime A. finish the final touches on his Detrol Radio and Parker Vacumatic desk set.

Clearly, those Sheaffers are not the original pens for the set. They are just temporary place holders until he can find the right set of Vacs.

Still, it is one of the rarest and most handsome desk sets we’ve ever seen!

When Nipples Go Bad…Section Nipples, That Is

Once in a rare while, I find that the section of a pen has lost its nipple to attach an ink sac. Sometimes, an old nipple is just too heavily damaged to patch together or seat a bladder. On the vintage Wahl fountain pen below from the 1920s, the nipple actually was still attached to the remnants of the old ink sac but cleanly detached from the section.

A piece of copper tubing has been fit into a vintage fountain pen section to serve as a nipple, to which you can attach a fresh ink sac.

A piece of copper tubing has been fit into a vintage fountain pen section to serve as a nipple, to which you can attach a fresh ink sac.

As Wahl sections from the 1920s aren’t easy replacement parts to find, I find it is best to jury rig a solution. This means it is time for a trip to McDonald’s or the local hardware store.

I have used a variety of objects such as straws (from McDonald’s) to metal pipes over the years. All it needs to be is strong enough to hold a shellacked ink sac.

In this case, the hardware store had a small copper pipe that fit perfectly. Luckily for the pen, the section hole was deep enough to accommodate the inkfeed at proper depth while allowing enough room for the  pipe to hold tight. If the feed rested above the hole, then I would have been out of luck.

To get started, use a rotary tool or hacksaw to cut the pipe to the proper length. Use said rotary tool or some heavy sand paper to smooth the newly cut piece. This keeps it from not fitting or from leaving sharp pieces to hurt the ink sac. Remember to keep the replacement nipple fairly short to avoid it coming into contact with the inner pressure bar or spring. If it is too long, it might trap the filling mechanism and not allow you to fill the pen.

Coat the outside of the tube with some rubber cement, before setting it down in the section. This will seal the microscopic gap between the section and tube if you have a good fit. Plus, rubber cement won’t harm the plastic or hard rubber. Nor will it stick so tightly that you cannot remove the new nipple for any reason.

Make sure no rubber cement is clogging the inkfeed channel, preventing you from using the pen you have worked so hard to restore.

After everything is clear, use a little more rubber cement to affix the new ink sac. As long as you keep the pen away from heat, which you should always do anyway, the rubber cement makes for a good seal for the bladder. Until orange shellac became more available to pen collectors in recent years, rubber cement had been the go-to sealant for putting on new ink sacs. As I wasn’t sure how much I could trust the shellac between metal and rubber surfaces, I went with the old standby that I knew I could trust.

Upon completing this. let everything set and dry for 24-hours. Test it with water or ink to make sure the seals are good. If the pen goes for another 24-hours on its side without any leaks in the nipple, section or sac, you are good to go.

If the sac will fill but cannot retain any fluid, then there is an air leak you will need to find and seal. It might be a well hidden hairline crack elsewhere in the section. It also could be a hole in the ink sac, which is unlikely. Mostly it will be a gap somewhere between the section and the new nipple.

Once everything is tested and holding, put the rest of the pen together as you would any other repair job.

SPECIAL REMINDER: DO NOT force a piece of metal tubing into the remaining hole. Metal tubes are stronger than old hard rubber or plastic. It will crack your remaining part if forced into place.. If that happens, it is time to find a new pen to work on. Be careful.

J-Pressure Bar Repair Update

A friend and reader of “Drippy Musings” named Harv S. from Palatine, IL, reached out to me this past May to thank me for last November’s piece about making your own J-springs (pressure bars) at home.

Not only did he find the article helpful, he shared with me his own modification to duplicate the action of other pressure bars with an extra “leg” that helps to squeeze out a few extra drops of ink. Below are his photo and advice.


Reader Harv S. from Palatine showed us not only the J-spring pressure bar he made after reading our column, he gives his own advice for adding a second leg to the spring to make it perform like some other vintage J-springs.

Reader Harv S. from Palatine, IL,  showed us not only the J-spring pressure bar he made after reading our column, he gives his own advice for adding a second leg to the spring to make it perform like some other vintage J-springs.

“Here’s a picture of the original, weakened, corroded spring and the one I made to replace it.  I couldn’t find brass flashing material so I went with galvanized steel, which should be fairly resistant to rusting though not so much as non-ferrous metal, agreed.  Although the picture doesn’t show it well, I folded over the material so that there’s a secondary leg of the spring just like the original riveted one.  I have some diamond grit files that I de-burred the new spring with and it seems to work well.” — Harv S.

What I love about the fountain pen community is how much we help each other out with this hobby and occassional obsession.

Thank you, Harv. I look forward to seeing more of your’s and other reader’s projects. Please let me know how I can help.

My Battle with Snorkels Advances, Stymies

Two Snorkel filling units mock me from my work bench, as I try to sort out the final mysterious reasons they won't draw ink.

Two Snorkel filling units mock me from my work bench, as I try to sort out the final mysterious reasons they won’t draw ink.

For roughly 10 years, I have struggled to find a way to fix the beautiful and brilliant Sheaffer Snorkel. Years ago I saw a poll that asked pen collectors what they prefered: the Parker 51 or the Sheaffer Snorkel. I sided with the 25% that preferred the Snorkel.

Among other things, I am a clean freak. Snorkels are the most mess-free pens of the vintage era. The Parker 61 was/is mess-free, too, but it is static and just aborbs ink. There is no Rube Goldberg intricacy.

The Snorkel satisfies my need for cleanliness and order as well as my need for complicated and elaborate. When they work, they are wonderful pens.

However, in my effort to learn to restore these beautiful devils, I have littered the junkyard with the corpses of those steel filler units.

The reason there was a delay in updating this blog or the vintage pens in the past week was because I had made not one but two restoration breakthroughs with the Snorkel fountain pen. ONE: I finally found a way to remove the plug that holds the ink sac and seals the pneumatic casing without damaging anything. TWO: I found a way to insert a new ink sac and that plug back into said casing.

I already know how to restore the touchdown filler O-rings and assembly. I even know how to replace the Snorkel tube’s gasket between the nib and the section.

All done. Right! NO! Frustratingly, miserably no. I have an air leak or blockage somewhere that won’t allow the pen to fill. Whatever the problem is, I know it is a simple small easy little tweak that is likely staring right at me. I just don’t see it. That is all that is standing between me and finishing about a dozen classic Sheaffer Snorkels that are just dying for the opportunity to work again and be sold into loving homes that will use them and cherish them.

If you know the secret inner psychology of what it takes to fix a Snorkel, please let me know.

Pen Tip #2: I Flushed My Pen. So Why Am I Still Getting Ink on My Hands?

A Q-tip can be one of your best tools for helping to clean out a pen cap and keeping your fingers from getting inky. Even after rinsing this Sheaffer Lifetime cap, you can still see plenty of ink on the cotton.

A Q-tip can be one of your best tools for helping to clean out a pen cap and keeping your fingers from getting inky. Even after rinsing this Sheaffer Lifetime cap, you can still see plenty of ink on the cotton.

Periodically flushing your pen with water often helps eliminate leaks as well as helping to get your nib to start writing well, again, as we discussed in Pen Tip #1.

Nevertheless, after you’ve gotten your pen cleaned and filled, you notice that you still have a little or a lot of ink on your fingers the next morning after you’ve decided to write with it.

The trouble often comes from old ink still inside your cap. Even if you rinsed your cap when you flushed your pen, that is not usually nearly enough to get all the old ink out.

Inside the caps of nearly all vintage and modern pens is an inner cap. It usually seals the nib compartment of your cap when the section (writing grip) of your pen screws up and against it. This keeps your pen from drying out. However, as fountain pens are wont to occasionally leak, drip or see some evaporation with heat, ink gets into these inner caps. Worse, it gets between your inner cap and outer cap shell. Once enough accumulates, your fingers are bound to get inked.

Your best bet is to soak your cap overnight in room temperature water.

Are you sensing a theme? Room temperature water and soakings are our friend.

Make sure the whole cap is immersed, and make sure that there is no air trapped inside the cap.

After a good, long soak, shake the cap empty over a sink. This gets messy in a hurry, so be careful.

Your next move is to hold the cap under running room-temperature water from the tap while scrubbing its insides with a small plastic-brissle brush that is like a toothbrush but smaller. Some hardware stores, tobacco shops and gun shops sell ones that work pretty well. I often use a plastic-brissle brush I found in an air rifle cleaning kit. I don’t have an air rifle to clean, but I spent the money just to get that little brush used on the air rifle barrels. Whatever you do, do not use a metal-wire brush used on regular hand guns and rifles. It will tear apart your cap.

Once the ink stops coming out of the cap in the sink, shake out the cap again. Use a Q-tip to dry out the cap. Odds are good that there is still plenty of ink in the cap, and you will go through many Q-tips trying to clean it out. You will have to keep getting Q-tips wet to keep getting the old gunk out. Pay special attention to the cap threads and the lip of the inner cap. Keep cleaning until you are satisfied.

This process takes a while, but if you only have one or two pens you have to do this for, it is worth just doing this to them once every several years. If you are a hardcore collector, we can discuss inner cap pullers and ultrasonic cleaners on another day.

Click here to see the finished restoration of the Sheaffer Lifetime cap in the photo above.

Please write in with your pen repair questions.

Parker 21, Parker 45 & Esterbrook Fountain Pens

If you have been visiting our vintage pens pages lately, you might find yourself asking, “Self, what’s with all of the cheap Parkers and Esterbrooks?”

We sell more vintage Esterbrook pens than any other brand. These copper-colored Esterbrooks are my personal favorite of the options available, but our most popular colors are blue, grey and black.

We sell more vintage Esterbrook pens than any other brand. These copper-colored Esterbrooks are my personal favorite of the options available, but our most popular colors are blue, grey and black.

It is simple enough my friends. Esterbrooks are the most popular pens we sell at ThePenMarket.com. We generally can’t keep them in stock. As for the inexpensive Parkers, we had so many expensive pens on the vintage pens pages, we thought it would be nice to offer a high-quality entry pen to the site for people just looking to get into writing with fountain pens.

But then there is one more reason.

ThePenMarket.com recently acquired an amazing collection of rarer, harder to find vintage pens dating back to the turn of the last century. We’re talking hard rubber and silver filigree fountain pens. Think Waterman 12, Waterman 52, Waterman 54 and a beautiful sterling silver Waterman 452. We’ve got Parker Duofolds and Vacs. Sheaffer Lifetimes and Balances. Maybe some Mabie Todd. Perhaps some sterling and gold no names. You’ll quiver with delight at the senior Conklin Enduras with remarkable color clarity.

We’ve got 120 classic vintage pens to catalog, restore and post for sale.

Are you salivating yet? When they arrive online would you rather they be the first things you see or have them buried under 2 dozen steel nib beauties. That’s what we thought. In the coming weeks and months, e-fist fights might breakout over the first daily opportunity to buy these glorious fountain pen wonders of yesteryear.